Time to downsize? Check out the incredible advantages

In 1973, the median U.S. home size was 1,525 square feet. Since then, builders have gradually increased the square footage of the homes they construct.

In 2007, home sizes hit their peak (2,227 square feet) and have been dropping ever since, according to the Census Bureau.

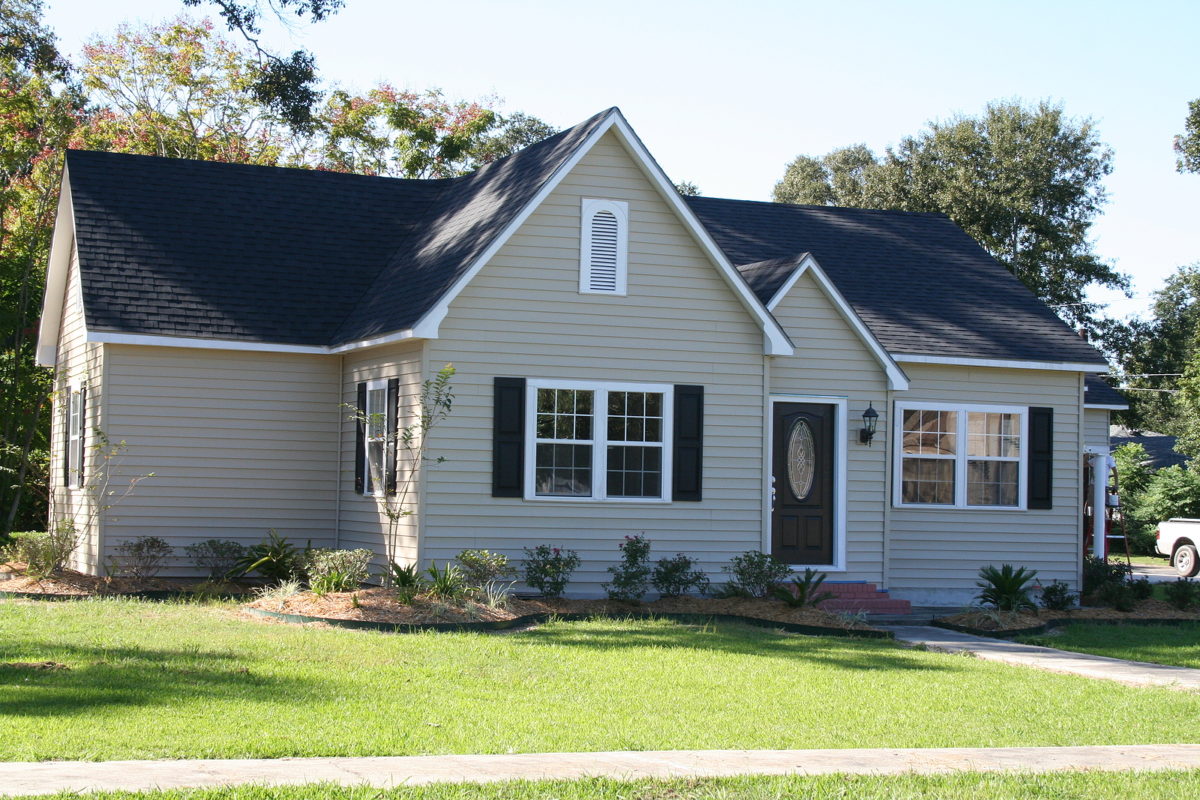
Although Americans aren’t quite ready to completely give up their McMansions, the trend appears to be toward smaller homes.

A smaller footprint has its advantages. Let’s take a look at some of them.

Money Saver

The most obvious advantage to buying a smaller home is that the monthly payment will typically be lower than it would be if you bought a large home.  Less obvious money-saving advantages include:

  • Lower utility bills – less area to heat and cool.
  • Smaller houses require less maintenance, which can cost a bundle with a large house — a smaller roof requires fewer materials to repair it, for example.
  • Small homes cost less to keep clean – you’ll spend less on cleaning supplies and whatever you estimate your time is worth.
  • Small houses cost less to furnish – the furniture that you do purchase will be smaller as well.
  • Smaller homes have smaller tax bills.

The case for downsizing to save money is even more urgent if you are nearing or in retirement. Annual property taxes and home maintenance can eat up a huge amount of your savings.

If you aren’t near retirement, think of what you can do with the money saved by downsizing – like furnishing it with high-quality furniture and appliances that will last longer; another cost-saving advantage.

No Wasted Space

Lifestyles have changed since the days when formal dining and living rooms were in vogue. Americans are awake to the fact that they have been paying for huge amounts of space that they seldom use.

Today, a country kitchen or informal dining room suffices for our smaller families and any extra space is typically devoted to a home office or larger kitchens and bathrooms.

One of the most common fears when considering a smaller home, however, is the lack of storage space. The solution? Downsize all your “stuff” too.

“We use 20 percent of what we own, 80 percent of the time,” according to Regina Brett at cleveland.com. This means that 80 percent of our “stuff” just sits, taking up valuable space.

If you feel that you absolutely can’t live without these belongings, put them in storage and pull them out on the rare occasions you need to use them.

The rest can be stored creatively in a smaller home. Utilize the vertical spaces in the home, such as placing shelves above the washer and dryer or the clothing rod in the closet. Raise the beds to create storage space beneath them.

Peace of Mind

While living large is impressive, living small brings happiness, according to Stephanie Rosenbloom of the New York Times. Smaller homes require less work thus freeing up time for leisure activities and time to make memories.

Since they also cost less, the extra money can be used to create happiness. “Current research suggests that, unlike consumption of material goods, spending on leisure and services typically strengthens social bonds, which in turn helps amplify happiness,” Rosenbloom claims.

Yes, large homes still signify status – especially if the home is of the luxury variety. If you aren’t a member of the country’s 1 percent, however, smaller may just be better.

Reach out to us for more ideas on downsizing to a smaller home.

Should I buy a home with a septic system?

When looking at homes for sale you may see in the listing description that a home isn’t on “city services.”

What this means is that the home has its own “sewer,” known as a septic system.

We frequently field questions about septic systems, so we put together this report with the basics you’ll need to know about buying and owning a home that isn’t on city services.

The anatomy of the septic system

Let’s face it: Sewage is probably the least glamorous topic to consider. But bodily fluids have to go somewhere and sewers and septic systems are our current choices.

Whatever is put down the drain, from the toilet, shower, washing machine and sink, ends up in the septic tank.

That tank is located underground and it’s watertight. This is where all the incoming “stuff” is treated. The solids are trapped on the bottom of the tank and the wastewater that’s left over is released into the leach field (sometimes called a “drain field”).

The solids, or sludge as it’s called in the septic business, are broken down by bacteria naturally found in wastewater. Not all of it is broken down and what’s not remains in the tank until the homeowner has it pumped out.

As mentioned earlier, this is a basic description. If you want to dive into the technical aspects of septic systems, you’ll find lots of information online.

Septic system maintenance

If you purchase a home with a septic system, you will be responsible for its maintenance. Defer maintenance on the system and problems will get worse.

In fact, the national average cost for septic system repair is around $2,700.

Aside from a hefty bill, if the tank isn’t maintained it may spring a leak, saturating the leach field. You may end up with sewage coming back into the home, into the bathtub or another plumbing fixture.

Allow the problem to get so bad that you need a new system and you’re looking at a cost of around $4,600 (but it can go higher).

When considering purchasing a home with a septic system you’ll want consider basic maintenance costs. This includes paying for an annual inspection and having the tank pumped every three to five years.

The cost to pump the tank varies according to the tank’s capacity. The national average, according to HomeAdvisor.com, is $381.

Your due diligence

Aside from the whole house inspection every smart homebuyer should have performed, we recommend that you also hire a professional septic contractor to inspect the septic system.

The inspection will include looking for leaks, ensuring that the sludge levels are below the outlet tee, checking to ensure the electrical and mechanical components are in good condition and more.

Typically, it’s the homebuyer’s responsibility to hire and pay for the contractor, but not always. In some regions, such as Central Virginia, for instance, the seller must have the septic system inspected “within 30 days of the closing date,” according to information posted at Realtor.com.

Septic systems aren’t as scary as many homebuyers think. Yes, they aren’t as convenient as being on city services, but as long as the system is inspected each year and you keep up the maintenance, you should have no worries.

And, it beats having to pay to get the home connected to the city’s sewer system.

Fall: Time to plant those mums!

Fall mums, also known as garden mums, used to be commonly known as chrysanthemums. They are available in many colors and sizes, are easy to grow in the garden bed as well as containers and they’re sure to add a jolt of color when everything else is dying back.

The best time to plant the fall mum is in late August to mid-September.

The fall mum is planted either in late August or early September. But you can still plant until “… six weeks before the first killing frost,” according to Leanne Potts at hgtv.com.

What you’ll need

  • Shovel
  • Compost
  • Gardening fork
  • 5-10-5 fertilizer
  • Pruning shears
  • Mulch

Prepare the planting bed

The ideal place to plant your fall mum is one that gets a full day of sunshine. The plant will produce more and better blooms the more sun it gets.

The fall mum has a very shallow root system so you won’t need to dig up the soil too much when preparing the bed. Dig down to a depth of 4 inches, turning the soil and crushing any large clods of dirt.

Remove any rocks or old roots or other debris that you find. Spread a 2-inch layer of compost over the planting bed and, with the gardening fork, mix it in well with the existing soil, and then level the bed so that there aren’t any depressions.

Plant the mums

The distance you place between plants is going to depend a lot upon the size of the mums you are planting. Generally, you will want to space them 18 inches apart.

Remove the plant from its current pot by tipping the pot over and gently coaxing it out. Squeezing the sides of plastic planting pots helps disengage roots that are stuck to the sides.

Once it’s out of the nursery pot, loosen the mum’s outer roots with your fingers.

Dig a hole twice the width and the same depth as the pot in which the mum was growing. Place the roots of the plant into the hole and backfill, patting the soil around the roots as you go. Firm the soil around the plant and then water deeply.

Care of the newly-planted mum

Regular, deep watering is vital for the success of your fall mum garden. Give them a good soak twice a week.

They won’t require any fertilizer their first season in the garden. Next season, plan on feeding monthly with a 5-10-5 fertilizer at the rate of 1 lb. per 100 square feet of garden space.

When your mum plants have reached 6-inches in height, cut an inch of new growth from every shoot. These cut shoots will produce more branches and, when those have grown 3 inches, cut them as well. Keep doing this until July. This will encourage the mum plant to be bushier and it will provide you with more flowers.

As winter approaches, keep the plants moist. There’s no need to cut them back, as you will do this in the spring. When the soil freezes, add a 4-inch layer of mulch around them.

In the spring, rake back the mulch and cut the mum plants back to the soil. As you did last season, start trimming the new growth when the plant is 6 inches tall.

Happy Fall!

The lead based paint disclosure

Among the many forms you’ll be asked to sign when you buy a home is the Lead Based Paint disclosure. I’ve seen many clients give it just a cursory glance before signing it; rarely does anyone take the time to read it.

It’s an important disclosure, as it lets you know if there is lead-based paint on the walls, window sills and doors.

Why should you care?

Lead-based paint dust and chips can cause serious health problems, especially in kids. “Lead is particularly dangerous to children because their growing bodies absorb more lead than adults do and their brains and nervous systems are more sensitive to the damaging effects of lead,” cautions the U.S. Environmental Protection Agency (EPA).

“Babies and young children can also be more highly exposed to lead because they often put their hands and other objects that can have lead from dust or soil on them into their mouths.”

A little history

Before 1978, lead-based paint was the most commonly used in new-home construction.

The EPA estimates that 87 percent of homes built before 1940, 69 percent of those built between 1940 and 1959 and 24 percent of homes built between 1960 and 1977 contain lead-based paint.

The older the home, the better the chance that it contains hazardous levels of lead. The use of lead-based paint was banned in the United States in 1978.

Homeowner disclosure requirements

Although federal law requires the home seller to disclose the presence of lead-based paint if the home was built prior to 1978, most offer the disclosure even for more recently built homes.

The seller is also required to give the buyer a pamphlet titled “Protect Your Family From Lead In Your Home.”

The buyer must be allowed a 10-day period to inspect the paint in the home, but this time period may be adjusted by mutual agreement.

Homebuyer duties

Despite seller disclosure duties, homebuyers are expected to exercise due diligence when purchasing a home. This means reading and understanding each form you sign during the transaction.

If the home was built before 1978 and the seller claims he or she has no knowledge of the presence of lead-based paint, you should hire a lead inspector to ensure that there is no lead present in the home.

You can search for Certified Inspection firms on the EPA’s website.

Will finding lead in the home kill the deal?

The presence of lead in the home doesn’t necessarily derail the purchase. The inspector should be able to provide you with an estimate on fixing the problem.

We can take this estimate to the seller and ask him or her to make the repairs before the close of escrow or request the amount required to remedy the situation as cash-back at the close of escrow and have the repairs performed after you move in.

Feel free to reach out to us if you need more information on this disclosure or other aspects of the home purchase or sale process.

Tips to close your pool

Summer 2020 and 2021 saw the sale of pools, and homes with pools, skyrocket. In July of this year, “… a basic vinyl in-ground pool — without the bells and whistles of heating, decking or any further customization — costs $85,000 on average, up from the $60,000 to $65,000 in 2019,” said Zachary Kussin at nypost.com.

As a result, a huge swath of the American public has been subjected to crash courses in subjects such as balancing the chlorine and pH levels in their pools, checking alkalinity and calcium hardness levels, keeping the pool chlorinated and more.

With winter just few months away, their next question will be “What do I do to get this thing ready for winter?”

If you’re among the curious, read on.

Open your pool early and close your pool late

It’s tempting to want to get a head start on closing your pool as summer winds down and kids head back to school. Tempting, but not wise.

“If you close your pool while the weather is still warm, the winter protection chemicals you’ve added will often not last until spring,” according to Lana Seidman with HIC of Staten Island, Inc., a non-profit trade association

She goes on to explain that “… pool chemicals are consumed much faster in hotter temperatures versus cooler temperatures.”

How hot is hot? Sixty degrees Fahrenheit appears to be the magic number. This is the temperature at which algae goes dormant, according to Seidman. Wait until the water temperature remains consistently lower than 60 degrees before closing your pool.

Give the pool a good scrub

The experts at Thatcher Pools recommend that you “… grab the pool brush and your telescoping pole and start scrubbing. Scrub everything from the walls to the floor, and get to the nooks and crannies if you can.”

Not only does this process loosen debris but also algae spores that may have settled into those nooks and crannies.

Finally, vacuum up all the loosened debris.

Get those chemicals balanced

Here’s what to aim for, according to those pros at Thatcher Pools:

  • pH: 7.2 to 7.8
  • Alkalinity: 100 to 150 parts per million (ppm)
  • Chlorine: Less than 5 parts per million.

Add an algaecide (never add this when the chloring level is high) and pool enzymes next. Consider using a Winter Pill that will work all winter long.

You’ll also want to shock the pool, regardless of how clear the water is. Find a shock product designed to be used when closing a pool that contains “… at least 65 per cent hypochlorite.”

No, the work isn’t over yet, but this gives you a good head start. You’ll find pool closing walk-through tutorials and videos online.

What questions should I ask real estate agents?

Seven in 10 real estate consumers work with the first real estate agent they interview, according to studies by the National Association of Realtors (NAR).

I don’t know about you, but I find that statistic shocking. Whether buying or selling a home, you’re dealing with one of the biggest investments you’ll make in your lifetime.

Why wouldn’t you take the time to ensure that the person that assists you in this transaction is experienced, knowledgeable and equipped with the skills required to get you where you want to be both financially and personally?

Even more surprising, according to the NAR, sellers typically ask real estate agents only two questions before hiring them — they want to know how much their home is worth and how much they will have to pay in commissions. That’s it; they ask no further questions.

So, this month, we’ll take a look at some answers to the tough questions you should ask before trusting any real estate agent to represent you in the purchase or sale of real estate.

This is a job interview

When you interview agents to assist you in the sale or purchase of a home you are, in essence, conducting a job interview and you should approach it as such.

Be aware of how the agent presents herself (or himself, as the case may be) and his or her business.

Are listing presentation materials professionally formatted and presented? Remember, if any of the agents can’t or won’t market themselves effectively, how can they possibly market your home?

Ask the right questions

Ah, the internet – what would we do without it? Homebuyers, by and large, begin their home searches online and many sellers use the internet to size up the competition. The web also happens to be the ideal place to help you narrow your choices when it comes to choosing a real estate agent.

More than 70 percent of Americans seek online product reviews before making a purchase, according to researchers at Northwestern University.

While service reviews aren’t quite as prevalent, you can find agent reviews and testimonials from clients online. So, once you have your list of agents to interview, it’s your turn to seek out reviews.

Real estate consumer success stories, in their own words, are powerful proof of an agent’s effectiveness. You can typically find testimonials on agent websites, but the best are unsolicited by the agent and you’ll find those on yelp.com and some of the large real estate platforms.

OK, here’s question number one to ask in agent interviews: “May I have the name and telephone numbers of some past clients?” Then, don’t be afraid to call them and probe for details about the agent’s skills, strong points and work ethic.

Additional questions you should ask each agent include:

  • Length of time in the industry – Even more important, or perhaps it goes hand-in-hand, is the number of “deals” the agent has participated in. The best agents have enough experience to where they can handle whatever a transaction throws their way.
  • Marketing – It’s a listing agent’s primary job and therefore an important question to ask is how he or she plans on marketing your home.

The agent should have a visible and robust online presence as well as access to the many online real estate marketing platforms.

Ask to see examples of past marketing campaigns. Home descriptions should be compelling and the photos should be clear.

If a virtual or 3D tour is important to you, ask for examples that the agent has created for past clients. Finally, it takes money to effectively market a home so ensure that the agent you hire has a marketing budget to back up the plan.

  • Ask the agents for their list-to-sales price ratio. This represents how close to list price the agent’s listings have sold.

Each agent should be able to tell you the average days a home remains on the market in our area so ask. Then, inquire as to how long the agent’s listings remain on the market.

Just as in any other industry, not all real estate agents are alike. To assume they are sets you up for wasted time and money.

Interview at least three agents and be prepared to ask the tough questions.

Thinking about home renovations? Read this first

There’s nothing wrong with wanting to perform home improvement projects before you put your home on the market. In fact, some fixes are mandatory.

When you’re considering major renovations, however, you need to be careful that you don’t over-improve the home for the neighborhood.

Getting Started

Before you hire anyone or hammer one nail, get in touch with us so we can calculate your home’s current market value. In the process, we’ll learn how much neighboring homes are worth; important information when you are considering renovation projects.

Appraisers have a lot of tools in their evaluation tool belt and two of them are the principles of progression and regression.

The latter says that a larger home surrounded by smaller homes will be devalued because of the market values of those small homes.

The principle of progression says the opposite: tiny homes surrounded by big homes benefit from the value of surrounding homes.

So, the watchword when contemplating your projects is don’t “over-improve.” Don’t create the best home on the block, thinking you’ll get a return on your renovation investment. You probably won’t.

Here are some tips on how to avoid over-improving your home:

The Next Step

The next step is to determine how much the project costs and how much value, if any, it will add to the home. This will let you know if the project is cost effective.

For instance, suppose your home is worth $390,500 (the average U.S. home price currently) and you decide to do a minor kitchen remodel.

The project’s price comes in at $26,214 (the national average for a mid-range kitchen remodel). The resale value of this project is $ $18,927, meaning you will realize a 72.2 percent return on your investment when you sell the home.

If you are remodeling your kitchen for your own benefit, then the fact that the ROI is on the low-ish side may not bother you.

If you want to perform the project for an increase in home value, however, you may want to rethink the idea.

Remember as well that if the return is higher than the local market will bear, it doesn’t make sense to make the improvement to a house you’ll be selling.

The highest ROI you’ll find when it comes to replacements and remodeling is a garage door replacement, according to according to the Remodeling 2020 Cost vs. Value Report (www.costvsvalue.com). The average cost nationwide for the project is $3,907 and the ROI is $3,663 (93.8%).

Think carefully before performing a remodel in the hopes of raising your home’s value. Consider the following:

  • Is it necessary? Can the current kitchen, bathroom or whatever be cosmetically updated?
  • If a project increases your home’s value, is the new value the highest in the neighborhood?

To avoid wasting money by over-improving your house, choose your projects carefully and learn the maximum potential sales price you’ll realize from the performing the improvement.

We’re happy to help you crunch the numbers so feel free to reach out.


Pets have accidents: Here’s how to clean them from carpet

Statistics; you gotta love them.

According to the American Veterinary Medical Association, 38.4% of American households are home to a dog, while 25.4% have cats.

That’s a grand total of more than 48 million dogs and nearly 32 million cats.

Imagine the amount bodily fluids that ends up on carpets nationwide. It’s inescapable, really. Even the most well-trained pet can have an accident indoors.

Let’s take a look at some of the more common messes our pets leave behind and how to clean them from carpet.

Pet vomit

Cats vomit more often than dogs. It’s true. Some cats vomit more often than other cats. If you live with a serial vomiter, don’t despair. Whether it’s a cat or a dog who leaves behind vomit, we have a tip to remove it, and the stain, from the carpet.

  • Lay a paper towel over the mess and gently blot the liquid from it. Don’t press to hard while blotting to avoid pushing the vomit further into the carpet.
  • Use another paper towel to gently lift the vomit pile from the carpet.
  • Clean the resulting stain a.s.a.p. with a paste composed of two parts of baking soda in one part hydrogen peroxide. Stir well and use the spoon to spread the paste over the spot until it’s covered entirely. Avoid pressing the mixture into the carpet.
  • Allow the paste to remain on the stained area of the carpet until it is dry. This may take anywhere from a few hours to overnight.
  • Use the vacuum to suck up the dried paste.

You may need to reapply a fresh layer of the paste for stubborn stains. Repeat the procedure, allowing the paste to dry completely, before using the vacuum to suck it up.

Pet urine

Owners of geriatric dogs, more than other pet owners, deal with a lot of pet accidents. As our pets age, especially dogs, they often lose bladder function and become incontinent.

Many owners deal with this by diapering their dogs or crating them at night when they can’t help the dog outside to relieve itself.

Accidents still happen, though, and although urine is a tough substance to remove from carpet, it is possible.

A new urine stains is far easier to deal with than one that is set-in. In fact, when we discover pee long after the fact, we hire a specialist to help. After all, it probably soaked into the pad beneath the carpet as well.

Here’s what you’ll need to clean a new urine stain:

  • Rags or paper towels
  • ½ cup water
  • ½ cup distilled white vinegar
  • ¼ cup baking soda
  • ¼ cup 3% hydrogen peroxide
  • Spray bottle
  • Scrub brush

After mixing the solution, check to ensure it is safe for your type of carpet. Try it on a small section of the carpet that is seldom seen. For instance, under the sofa or behind the drapes.

Use the rags or paper towels to blot out as much of the liquid as possible. When you think you’ve gotten all of it, put a clean rag over the spot and stand on it for a few seconds. You’d be surprised how much urine is left in the carpet.

Combine the water, vinegar, baking soda and peroxide in the spray bottle. Spritz the urine-stained area until it is wet.

Use the brush to lightly work the solution into the stained area, then allow the solution to sit for about 5 to 10 minutes.

Work the solution into the carpet with a brush or by rubbing it in with your fingers while wearing a rubber glove. Allow the solution to remain on the area for about 10 minutes.

Use a clean rag or bunch of paper towels to blot up the solution.

Sprinkle a bit of baking soda (enough to cover the area with urine), allow it to dry completely and then vacuum up the residue.

How to save money when you buy a home

If you’re considering buying a home, statistics say that one of the first things you’ll do is surf the Internet. From looking at homes for sale to learning about the process and choosing a real estate agent, you’ll find lots of information.

Be forewarned, however, that not everything you read is factual. For instance, some real estate agents, especially, recommend that your first step to homeownership is to hire a real estate agent.

While it’s important that you go into the current market alongside an expert, the first and most important step doesn’t include hiring that expert.

All homebuyers who will not be paying cash for a home should see a lender before hiring an agent and WAY before looking at homes for sale, either online or in person. But even that isn’t the first step.

So, what is the first step?

It’s easy to feel overwhelmed with the homebuying process when all you really want to do is skip over the boring steps to get to the fun stuff: looking at homes.

Especially considering that the beginning of the homebuying process has to do with finances.

If your dream is to buy a decent home, in a decent area, with a comfortable mortgage payment, step one must come first: raise your credit score.

Raising your score even a smidge can make a huge difference

The Fair Isaac Corporation, commonly known as FICO, is an analytics company that takes all of your credit information and scores from the credit reporting agencies and calculates a FICO® scores

These scores can range from 300 to 850, and a “good” credit score is considered to be between 670 and 739.

Yes, many borrowers obtain an FHA-backed mortgage with lower scores and a lower down payment, but they pay more for the home in the end.

Plus, what many first-time homebuyers may not realize is that the loan that the FHA guarantees comes from a lender who will charge big-time interest rates because of a low FICO score.

Those rates result in a higher monthly home payment ― which will already be elevated because of the tiny down payment and FHA’s mandatory mortgage insurance premium that accompanies it.

Boosting your score, on the other hand, can mean big savings on your monthly mortgage payment.

Here’s a scenario, using a base rate we determined randomly (current rates are far lower). A borrower with a credit score of 700 to 759 might be offered a rate of 3.73 percent on a 30-year fixed rate loan. The borrower with a 620 to 639 score, on the other hand, would be offered a rate of 5.09 percent.

If you’re the low scorer in the above scenario you’ll pay $187 more a month on your mortgage payment than the high scorer. You will also pay $67,181 more in interest over the life of the loan.

If you were to raise your score to 640 you would end up saving more than $238,700. Raise it even higher, to 660, and you’ll save $42,000. Finally, if you can get that score up to 700 you will save more than $58,000.

As you can see, patience and a bit of hard work before you purchase a home definitely pays off.

How to boost that score quickly

At the very least, pay down bills, don’t apply for new credit and pay bills on time.

In fact, the folks at FICO specifically caution borrowers to cease the use of their credit cards completely and pay down what is owed on them.

Start paying off other debt that appears on your credit reports one-by-one; hack away at them and before you know it, those balances will be gone and your credit score will reflect the new, more financially responsible you.

Now you’re ready for step 2 of the home buying process – so strut into that lender’s office and confidently ask the representative to pull your credit score.

Now is the ideal time to aerate your lawn

Just when you thought time spent working on your landscape was coming to an end as we approach the cooler season, along come the experts.

The period from late summer and early fall, they claim, is the best time of year to do one last lawn-care maintenance task: aeration.

Now, there are caveats, of course, and not all lawn-care specialists agree on when to aerate a lawn.

If your lawn is composed of cool-season grass, now is the ideal time to aerate. If, on the other hand, you grow warm-season grass, they claim, is best aerated in late spring.

What is aeration?

Many homeowners don’t understand that there is a difference between dethatching a lawn and aerating it.

While both are critical to the health of the turf, they are two different processes, requiring different tools.

“… aeration results in the breakdown of compacted soil whereas dethatching removes layers of thatch, or dead grass and other debris, from the top of the soil,” according to the pros at sodsolutions.com.

In a nutshell, aeration involves punching holes in the turf to allow air, nutrients and water to penetrate the soil.

What happens if you don’t aerate your lawn?

Think back to any spring and summer rains you experienced. Was the lawn covered in puddles of rainwater?

That’s because the soil under the grass is compacted and the water has nowhere to go.

Sure, you can leave the standing water; it will drain eventually, right?

In the meantime, however, it may provide a breeding spot for mosquitos. Standing water also prevents grass from growing “… properly, … leaving the area vulnerable to moss growth,” according to landscaping expert David Beaulieu, at thespruce.com.

“Excess water can even lead to problems with your home’s foundation,” he concludes.

The benefits of lawn aeration

We lightly touched on a few of the benefits of lawn aeration, but here’s the “official” list from the experts at trugreen.com:

  • Aeration lets the soil “breathe.”
  • Aeration encourages “… thatch-decomposing microorganisms …” to move from the soil to the top layer.
  • The process allows more air, nutrients and moisture into the soil, providing the lawn with greater access to these important elements.
  • Aeration helps develop new, healthy roots after a tough, hot summer, making it “…ready for a green spring.”

How to Aerate Your Lawn

While many homeowners hire a landscaping company to aerate the lawn, it is an easy DIY project.

You’ll need a aerator, of course, and they’re available to rent at big home improvement stores such as Lowe’s and Home Depot. Ensure that you understand exactly how to use the tool and all the safety information the store can supply.

  • Check to ensure that sprinkler heads or other lines won’t be run over or otherwise damaged during the process. Mark areas of concern so that you can keep away from them while aerating.
  • Mow the lawn and apply an inch of water the day before you’ll be aerating.
  • Go over the lawn again, removing any debris, such as twigs and large leaves.
  • One pass is all you’ll need if the soil is lightly compacted. Heavily compacted soil may need an additional pass.
  • Allow the soil plugs to remain on the lawn (they’ll add nutrients to the lawn as they decompose).
  • Water the lawn again when you’ve finished aerating it and then water again every three days for two weeks.