3 ways to make your home attractive to buyers (that have nothing to do with staging and curb appeal)

What is the number one fear of most homebuyers? That the home they have fallen in love with is a “lemon,” and that there will be future issues that will cost the buyer a fortune.

Sure, a professional home inspection can alleviate many of these nagging doubts, but there are other things a seller can do to induce confidence in homebuyers. Things that your competition is most likely not offering.

1. Check your warranties

Have you had any work done to the home? Whether it was replacing a water heater or HVAC system to installing irrigation in the backyard, you hopefully have a warranty or two for the work performed.

Read over the terms of the warranties, looking carefully for whether or not any of them are transferable. “When allowed, warranty transfers are subject to the manufacturer’s terms and conditions so be sure to review the warranty for this important information,” cautions Annie Crawford at GAF.com.

Transferable warranties, especially on pricey items, such as HVAC systems and swimming pools, are a confidence booster for homebuyers, and an excellent marketing tool.

2. Gather renovation records and receipts

Not only do homebuyers love improvements to a home, appraisers do too. Therefore, it’s always a good idea to have on hand, for both parties, receipts and records of any renovations performed on the home.

Offer to make copies so that the buyer knows which contractor to call if service or repairs are ever required.

3. How old is that …?

Savvy homebuyers will ask their real estate agent to find out the age of the pricier systems in a home. These include the HVAC system, roof, electrical system and water heater, among others.

If you’ve had routine service performed on any system in the home (especially the HVAC system), dig out the records to prove this. It’s valuable information for both your bottom line in the home sale and for the buyer’s confidence in the home.

Take these three steps to make your home more attractive to buyers and watch the offers roll in.


2 ways to quickly smarten up your home and save money

Across the country, utility bills have skyrocketed. The news is littered with horror stories, such as the couple in Ohio who are looking at a power bill of more than $850.

The rise in heating and cooling costs alone is happening so fast that it’s impossible to determine how much the average American can expect to pay for energy through 2023.

There are, thankfully, methods you can use to pare down those utility bills and they’re all offered via technology.

1. Today’s thermostats are smart, and they offer savings on heating and cooling bills

“A smart thermostat is a thermostat that can be controlled with a phone, tablet, smart speaker, or another internet-connected device, according to Erika Rawes at digitaltrends.com. Unlike traditional thermostats, the digital variety can ‘learn’ various temperature settings and when you want them to kick in.

According to a recent white paper produced by the folks who manufacture the Nest Learning Thermostat, you’ll save, on average, 10% to 12% on your heating bills and about 15% when you use your central air conditioner.

They are more stylish than the traditional thermostat as well.

2. Light up on the cheap

Lighting accounts for around 15% of an average home’s electricity use, claim the experts at the U.S. Department of Energy (DOE). To whittle that down to a more manageable level, switch your incandescent bulbs to LED smart bulbs, that are compatible with your  smart hub or voice assistant.

Once they’re set up, you’ll be able to control your lights from the comfort of your bed and even from the beach during that tropical vacay you’re dreaming of.

“Energy costs are the highest in 15 years” according to several sources and verified by Politifact.com. Using technology is an easy solution to help you save on these costs.


How to Fix a Stuck Garbage Disposal: A Step-by-Step Guide

The garbage disposal is the workhorse of the kitchen. Yet, it’s a device that we assume will always be at our ‘disposal’ at the flip of a switch.

Sadly, that isn’t always the case. I think most of us have, at one time or another, flipped that switch and heard the dreaded humming sound.

How a garbage disposal works 

Before diving into the troubleshooting and fixing process, it’s important to understand the basic functionality of a garbage disposal.

These units are installed under your kitchen sink and are designed to shred food waste into small particles that can safely pass through your plumbing. Here’s a simplified breakdown of how they work:

  • When you turn on the disposal by flipping a switch, it activates an electric motor.
  • The motor rotates a grinding chamber containing impellers or blades. These blades shred and break down food waste into smaller pieces.
  • Water from your faucet is used to wash the shredded particles down the drain, ensuring they are carried away through the plumbing.
  • The ground-up food waste is carried away to the sewage system or septic tank, depending on your home’s setup.

What causes a jammed garbage disposal?

Several factors can lead to a jammed garbage disposal:

  • Foreign Objects: The most common cause of jams is foreign objects, such as utensils, small bones, or non-food items, accidentally falling into the disposal.
  • Overloading: Putting too much food waste into the disposal at once can overwhelm it and lead to jamming.
  • Improper Use: Running the disposal without enough water or not letting it run long enough after grinding can cause clogs. Not understanding what can and cannot be put into the disposal is also a common cause of jams.
  • Dull Blades: Over time, the blades in your disposal can become dull, making it less effective at grinding food waste.

Safety considerations before working on the disposal

Before attempting to fix a stuck garbage disposal, ensure your safety.

Turn off the Power: Always disconnect the power to the disposal to prevent accidental starts. Locate the circuit breaker or power switch for the disposal and turn it off.

Cut the Power Cord: If your disposal doesn’t have a dedicated switch or breaker, you may want to unplug it. If it’s hardwired, consult an electrician.

Use Protective Gear: Wear gloves and eye protection to safeguard against any potential debris or sharp objects.

Never Reach In: Avoid putting your hand into the disposal, even when it’s disconnected. Instead, use tools for retrieval.

Tools needed to get the job done

To fix a jammed garbage disposal, you’ll need a few essential tools:

Hex Wrench (Allen Wrench): Most disposals come with a hex wrench for manually turning the disposal’s flywheel to free obstructions. If you’ve misplaced yours, use a ¼-inch Allen wrench.

Needle Nose Pliers: Long-nose pliers are useful for extracting objects that may be causing the jam. You can also use kitchen tongs.

Bucket: To catch any water or debris that may lead while working on the disposal.

Flashlight: This helps you see inside the disposal for a better view of the problem.

Let’s get to it: Fixing a a stuck garbage disposal

Follow these steps to troubleshoot and fix a jammed garbage disposal:

Turn Off the Power: Ensure the disposal is completely disconnected from the power source.

Inspect the Jam: Use a flashlight to look inside the disposal and identify the cause of the jam. If you see any foreign objects, carefully use tongs or kitchen pliers to remove them.

Use the Hex Wrench: There is an area on the bottom of the disposal where you can insert the hex wrench. Yes, you will need to lay down under the sink to see it. Manually turn the flywheel back and forth to free any obstructions. This may require some effort, so be patient.

Reset the Disposal: After clearing the jam, press the reset button, typically located on the bottom or side of the disposal. This will reset the safety mechanism.

Turn the Power Back On: Reconnect the power and test the disposal with a small amount of food waste. Ensure it’s running smoothly before using it for larger loads.

Avoiding future jams and keeping your disposal clean 

Preventing future jams and maintaining a clean garbage disposal is crucial for its longevity and efficiency. Here’s how to do it:

Always use cold water when using the disposal: “Hot water may cause fats to congeal. When congealed, fats and oils can stick to the blades of your disposal and cause the system to work harder than necessary, impacting the motor,” cautions the pros with Smith & Keene.

Snake the drain: Smith & Keene pros also suggest snaking the drain every two years. Snakes are inexpensive at the big home improvement stores.

Be mindful of what you put in the disposal: Avoid putting hard or fibrous items like bones, fruit pits, potato and apple peels, and corn husks into the disposal. Avoid pouring grease down the drain and never throw rice, pasta or bread into the unit.

Regular Cleaning: Clean your disposal every two weeks to prevent odors and buildup. Pour ice cubes into the disposal and run it with cold water for a few seconds. This helps clean the blades and dislodges debris.

Use a degreaser: Occasionally use a degreaser to help keep down the amount of fat that can build up and cause even more problems.

Getting rid of what’s jamming a garbage disposer is a super easy DIY project. Remember to follow the safety precautions and use the right tools and your disposal should run like a champ!


What’s going on in the real estate market?

To say that our neck of the woods is wildly popular would be an understatement. From national press accolades as one of the country’s best places to live to excellent schools, our communities offer an unparalleled lifestyle.

Its popularity is one reason that our market is being particularly hard hit by a low inventory of homes for sale. With far more buyers in the market than homes to sell, prices are soaring in response to the demand.

How is “inventory” determined?

Real estate professionals answer a hypothetical question when determining the absorption rate for the current inventory of homes for sale:

“How long would it take to sell every listed home if no new homes came on the market?”

Finding the answer requires using a specific calculation that results in a “months of inventory” figure.

As of this writing, U.S. Existing Home Months’ Supply is at 3.30, which is up from 3.10 the previous month. In fact, the inventory of available homes has been steadily increasing, month over month, since December of 2022, according to research from the National Association of REALTORS.

Most real estate professionals agree that an inventory of 5 or 6 months is a sign of a balanced housing market. We still have a way to go to reach either of those numbers, but the steady increase over the past 10 months is encouraging for homebuyers.

This is where we are right now – a market that still favors sellers, but is in flux. If you hope to take advantage of the sellers’ market, jump in soon.

Why are there so few homes for sale?

The reasons behind our low inventory situation are multi-pronged.

Mortgage interest rates

Not only are rates higher than they’ve been in some time, but folks who bought when they were super low are reluctant to sell. “… homeowners don’t want to give up their low mortgage rates,” according to Holden Lewis at NerdWallet.com.

Baby boomers (born between 1946 and 1964)

Our older generation is taking much of the blame. Surveys of this generation of homeowners (33 million are owner-occupants), find that the majority of them have decided to age in place. Plus, they are concerned about number 1, above, losing their current low mortgage rate if they sell and then buy another home.

Home builders

“New home sales are up almost a third compared to last year, even as sales for existing homes remain in the doldrums,” claims Diccon Hyatt at Investopedia.com.

Sounds like good news, right? Not so fast.

Those higher interest rates aren’t only hurting homebuyers. Builders need credit as well and financing their projects has become vastly more expensive.

While housing permits have increased, completions have dropped to the “… lowest level since January 2022,” according to Lucia Mutikani at Reuters.com.

Finally, investors who have been snatching up homes over the past few years are seeing rents rise at an astonishing rate. “Those investors have no incentive to sell,” Dennis Cisterna, CEO of Investability Solutions tells Lewis.

What are you waiting for?

If you’re thinking of selling your home, why are you waiting? With each increase in mortgage rates, a certain number of potential buyers leave the pool. If those numbers grow larger, the market will change and prices may begin to come down.

Right now, your home value is most likely at a record high and buyers are clamoring for homes. If ever there was a better time to sell a home, this is absolutely it.

Many would-be sellers tell us that they’re hesitating because of a fear that they won’t be able to find a suitable replacement home. Buying a home while trying to sell one can be challenging, but we offer brilliant solutions that make the process far less stressful.

Please reach out to us if you have any questions about the real estate market here in our corner of the world We love to talk about real estate!

3 Things you absolutely must do before the open house

Yes, there aren’t enough homes for sale for all of the buyers who are dreaming of buying one. The good news for homebuyers is that the inventory of available homes has increased, month over month, since April of this year (realtor.com).

Let’s hope that trend continues, for buyers’ sake.

As for home sellers? If you are putting your home on the market soon, pat yourself on the back. The inventory will, someday soon, get back to normal. When it does, there will be plenty of competition among home sellers and prices typically drop in these situations.

You will get more for the house right now than in a buyers’ market. Especially if you ready the home for the spotlight.

1. Clean anything that’s gross

Potential homebuyers look at just about everything in your home. They open drawers to see how roomy they are, they open closets for the same reason.

They open kitchen appliances if they’re included in the sale.

Many homeowners learn to live with the gunk that accumulates inside appliances, such as the oven, refrigerator and dishwasher,  without performing routine cleaning. Open house attendees will consider it disgusting.

Ensure that any appliances that will be included in the sale are impeccably clean, inside and out.

Clean the toilet until it sparkles, get rid of soap scum in the bathtub and hang up fresh towels.

2.Don’t ignore your curb appeal (or lack thereof)

We like to ask our listing clients to go outside and stand at the curb in front of the house. Ask a friend or neighbor to accompany you.

Take notes of what you see and ask your companion to do the same. Since this spot, at the curb, is most likely where potential buyers will get their first in-person glimpse of the home, look at it with a critical eye.

Are there any turnoffs? These can be anything from chipped or peeling paint on the fascia to dead plants and torn window screens.

Transform that area of the home into a magnet that draws people out of their cars and into the home.

3.Don’t leave home without them

Common home-selling practices include the fact that the homeowner should not be home during the open house. Your real estate agent will act as your representative to all that attend.

Your real estate agent, on the other hand, isn’t responsible for ensuring that the home is clean, that the landscaping is in top shape and that your pets aren’t present.

Yes, it’s a terrible inconvenience to have to find a place for your pets for several hours. But it is critical. Here’s why:

  • Many people are allergic to dogs and/or cats. Just looking at them may psychologically trigger their allergies.
  • An intense fear of dogs. Nobody knows how many people suffer from this phobia but the experts at the Cleveland Clinic claim that “… fear of animals is one of the most common types of specific phobias.”

They also say that “… about 1 in every 3 people with a phobia of animals has an overwhelming fear of dogs.”

  • With all of the people coming in and going out of the house, your pets may get out.

Many homeowners think that they can get around these issues by crating the animals and keeping them in a closed-off-to-open-house attendees room.

It’s something most listing agents discourage. Potential buyers will wonder why it isn’t available to view. Think of it this way:

Would you buy a car from a seller who refuses to allow you to look in the trunk?

There are many ways to deal with the pet conundrum:

  • Schedule their grooming for open house day
  • Ask a friend or family member to watch them
  • Take them to a pet daycare center
  • Hire a dog walker for a few hours
  • Take the dog to the park
  • Negotiate with a boarding facility for an hourly rate


Shopping for a home? Pay attention to the neighborhood

Homebuyers enter the home shopping process with one of two mindsets. There are those who know what kind of house they want – the number of bedrooms and bathrooms, the type of kitchen and maybe whether or not they want a yard.

Then there are those who know where they want to live, such as a specific school district or neighborhood, but haven’t completed a wish list of home features.

Seldom does a homebuyer tell her real estate agent that she wants a “3-bedroom, 2-bathroom home with a gourmet kitchen, a fireplace and a pool in the backyard, located on J Street in the Mountain Shadows neighborhood.”

While the features you want in a home are important information for your real estate agent, “location, location, location” is just as important, important, important.

Even if you’re among the group of homebuyers who know exactly what you want in a house and perhaps have one picked out, it’s important to scope out the neighborhood before committing fully to buying.

Don’t Believe What You Hear

Especially when you are new to an area, it’s easy to believe what residents tell you about the various neighborhoods.

“When I was getting ready to move to Las Vegas 10 years ago I went online and read about the various neighborhoods,” recalls Veronica Thomas. “The consensus seemed to be that Green Valley and Summerlin were the best places to live.”

On a weekend trip to check out the areas in person, Thomas found that neither area suited her. “Green Valley was far too congested for me,” she said.

“Summerlin was way too far from my job on the Strip. I’d heard that both had low crime rates but they weren’t that much lower than some other areas I found much more attractive,” she concludes.

There is nothing quite like first-hand information. If good schools are important to you, do the research yourself instead of relying on what others consider “good.” GreatSchools.org lists schools’ test scores and features reviews from parents.

Crime statistics can also be found online. The FBI offers a nationwide Sex Offender Registry on its website and Neighborhood Scout boasts that they “reveal the safety from crime for every neighborhood in America.” Finally, call the police or sheriff’s department in the area for more information on crime statistics.

Google Maps will allow you to map a route from the new house to your job, to a particular school or to the nearest shopping center and kick back the mileage and a rough estimate of the time it will take to get there.

A lot of your preliminary neighborhood research can be done online, but it’s not a substitute for actually checking out the neighborhood in person.

Drive It

Number three on the list of the 5 biggest mistakes homebuyers make when choosing a neighborhood is underestimating or ignoring the commute, according to MSN Real Estate. Their advice is to actually make the commute during normal commute hours to see if it fits your lifestyle.

Drive through the neighborhood at different times during the day and evening, on both weekdays and weekends, looking for anything that may be considered an annoyance.

Music blasting from a teenager’s open bedroom window when you’re trying to unwind after work may make you wonder why you bought a house in that neighborhood in the first place. Is the house under the airport’s flight path? Kids – and all that they imply – may be a blessing or a curse, depending on how you feel about them.

If you don’t drive, walk the neighborhood. Locate the nearest public transportation stop and see for yourself what the walk is like to the store and other local conveniences.

Check Municipal Records

Finally, check the neighborhood and surrounding area for anything that may impact the home’s value. Look for:

  • A high number of foreclosures nearby
  • Developments in the works
  • Upcoming zoning changes

Sure, it’s important to fulfill those dreams of the perfect house for you. But the bigger picture – a suitable neighborhood in an area that fits your lifestyle is what will, according to MSN Real Estate’s Melinda Fulmer, “determine whether you’re living the American dream or just living.”

The 3 Most Important Real Estate Documents You’ll Sign

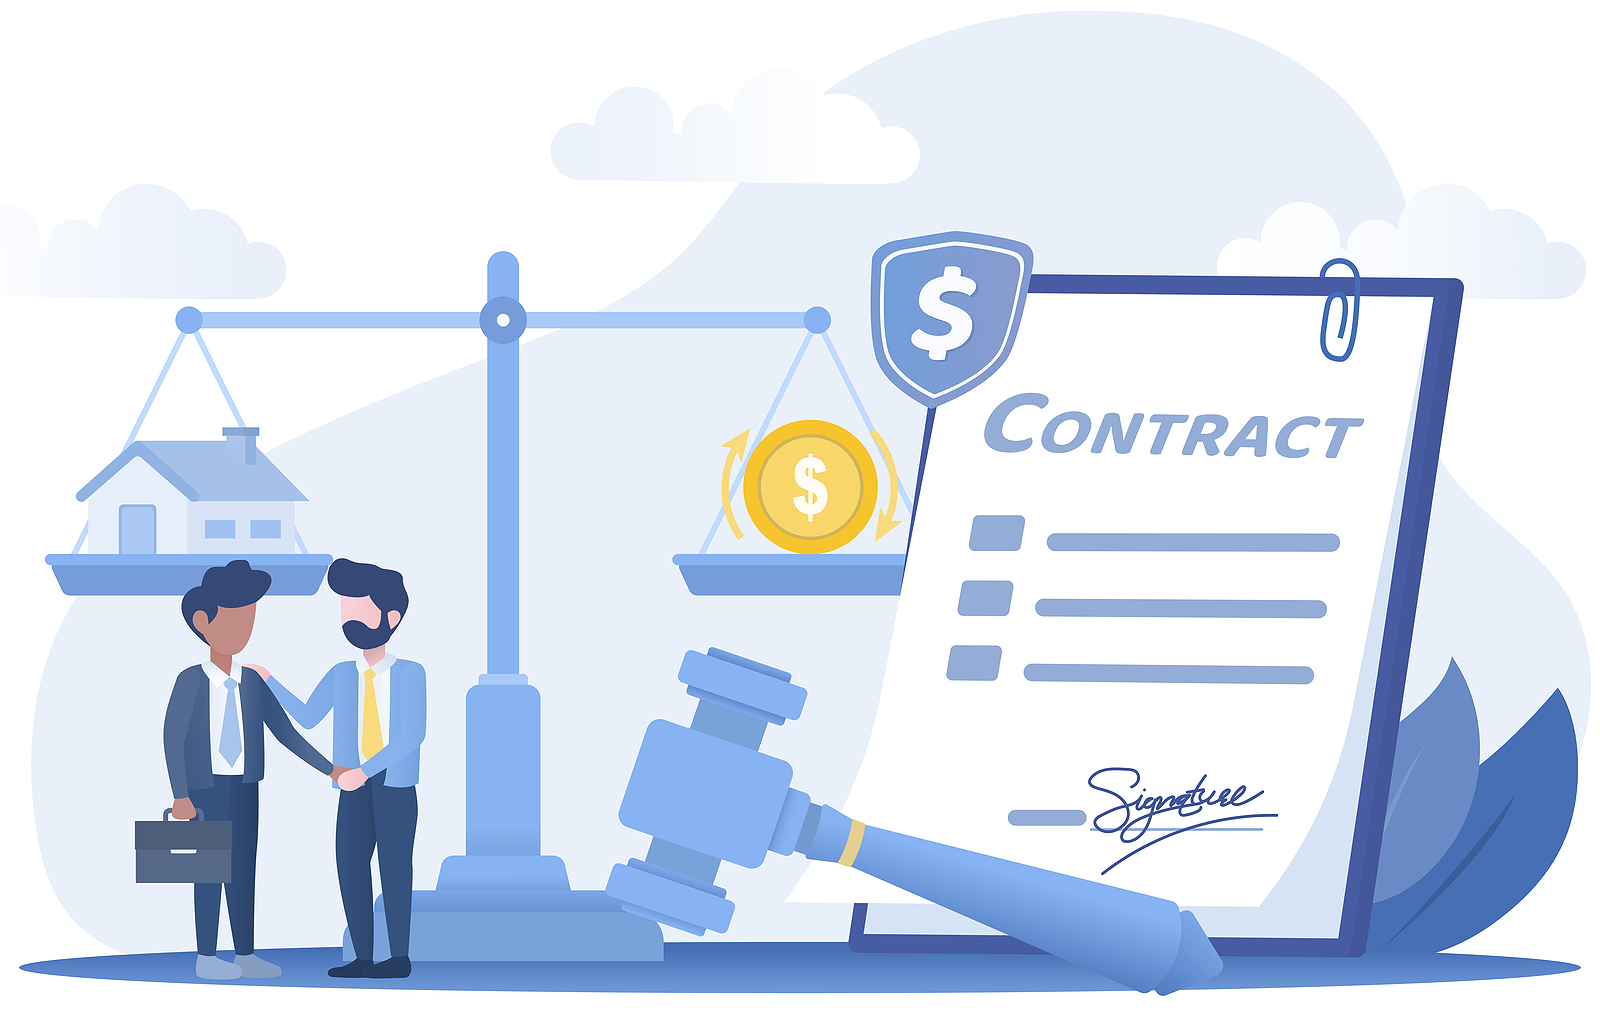
The process of purchasing a home can be summed up in five words: a huge pile of paperwork. Despite promises of becoming a paperless society, it seems the real estate industry hasn’t yet caught up and both buyers and sellers spend a lot of time with pen in hand.

It’s easy to allow your mind to wander and your eyes to glaze over when your real estate agent sticks yet another form full of legalese in front of you. It’s also dangerous – especially when confronted by one of the three most important real estate documents in the home purchase process.

Let’s take a look at these nasty’s and why you should pay close attention to them.

The Purchase Agreement

Invariably, the first question a homeowner has when handed a purchase agreement is: “How much?” Sure, the offering price is important, but there’s a lot more lurking in the purchase agreement – and some of it is just as important as the money.

A few of the clauses you should scrutinize:

Earnest money deposit: As a seller, you’ll want this amount to be high and as a buyer, you will want to pay as little as possible. The amount of the deposit, however, not only proves that the buyer is serious about completing the transaction but also his or her financial solvency.

As Trev E. Petersen of the Knudsen Law Firm in Lincoln, Neb. says, as a seller, would you “even consider selling to a person who does not have $1,000 to put down on the house?” On the flip side, as a buyer “If you cannot afford a $1,000 earnest money deposit, should you even be considering the purchase?”

Financing contingency: The financing contingency allows the buyer to exit the transaction with no penalty if he or she can’t obtain financing at the stated rate and terms. The contingency, like all of them, is time-sensitive, meaning that the buyer has a limited amount of time to secure a promise from a lender.

The promise is typically based on underwriting, so it is different from the pre-approval process the buyer may have gone through prior to submitting the offer.

Sellers want to scrutinize the time element in this part of the contract. Since you’ll be taking the home off the market during this period, ensure that it isn’t protracted.

Dates: Every contingency in the purchase agreement has a corresponding time limit. There is also a stated date for closing and for possession of the home. Both parties should pay close attention to all of these time limits bearing in mind that “time is of the essence” in a real estate transaction.

Seller’s Property Disclosure

Arguably one of the most commonly litigated real estate processes is the seller’s property disclosure. Rules vary by state and even by region, but generally, a seller has a duty to fully disclose “the condition and information concerning the property known by the Seller which materially affects the value of the property.”

For the buyer, this form is a road map to future repairs. For the seller, if done honestly and thoroughly, it’s a “CYR,” (cover your rear-end).

Buyers also have a duty during the process and it’s known as “due diligence.” Part of this diligence involves becoming as informed as possible about the investment you are about to purchase.

This means you simply must read the seller’s disclosure forms. If you don’t, and a pre-existing condition later rears its ugly and costly head, you have no legal recourse after the sale closes.

Remember, that fresh coat of paint may just be a seller’s way of increasing the home’s curb appeal – or the paint could be acting as a bandage to cover water damage. Check the disclosures carefully.

Homeowners Association Documents

Purchasing a home that is governed by a homeowner’s association brings a whole new pile of paperwork to the process. The governing documents, known as the Covenants, Conditions and Restrictions, or CCRs for short, are extremely important reading material.

These documents will tell you if you can paint your house and, if so, what color. They contain pet restrictions, landscaping restrictions, parking rules and even whether or not you can fly a flag on your property. In essence, although you own your home, the CC&Rs dictate how you can use it.

Other documents in the package that bear scrutiny are the HOA meeting minutes, the budget, insurance information and the financial statements.

These documents don’t exactly make for light, enjoyable reading, but it is vital that you read them thoroughly. Keep in mind that if the HOA isn’t run properly, they may not have enough money in the reserve fund to pay for large repairs or maintenance projects.

In these cases, they will levy an assessment on all homeowners. This assessment is mandatory and failure to pay may result in fines, property liens and even foreclosure.

Consult with an attorney if there is anything in the paperwork you don’t understand.

While every piece of paper put in front of you for your signature is important in a real estate transaction, these three deserve special scrutiny. A home is a lot more than four walls and a roof, it’s an investment that requires due diligence on your part before agreeing to the purchase.

DIY: Clean out that dryer vent

If you’ve ever seen those photos of the nastiness that comes out of a dryer vent, and you love DIY projects, you’ll love knowing that it’s not that difficult of a job.

You don’t have to hire a vent cleaning company because it’s a simple (and satisfying) DIY project.

You’ll need some tools, but other than that, the job is a snap.

Why clean it?

All that stuff in the vent is a safety hazard. Between “… 2014-2018, U.S. fire departments responded to an estimated average …” of 13,820 home fires involving clothes dryers, according to Marty Ahrens with the National Fire Protection Association (NFPA).

“One-third (32 percent) of dryer fires were caused by a failure to clean. This appears to be mainly lint build-up,” Ahrens concludes.

Aside from the safety issue, all that rubbish in the vent causes the dryer to work harder and, thus, less effectively, wasting energy.

Gather your tools and get to work

You will need a dryer vent cleaning brush and a vacuum cleaner with a crevice attachment.

  • Disconnect the dryer from the power supply or, for a gas dryer, turn off the gas supply.
  • Drag the dryer away from the wall to give yourself enough room to get behind it.
  • Disconnect the duct connected to the back of the dryer.
  • Insert a vent cleaning brush (available at Amazon.com, HomeDepot.com and Lowes.com) into the opening at the back of the dryer and “… gently twist it around, pulling out any lint,” suggests Jenny McFarlane and Sarah Warwick at RealHomes.com.
  • By this point, you should have a nasty pile of lint on the floor which you can then vacuum up.

Next, move on to the vent duct (the part that connects to the wall).

  • Disconnect the duct from the wall.
  • Use your hands to remove the lint.
  • Use the vacuum with the crevice attachment to carefully clean inside the vent.

There may be some lint stuck in the dryer vent tubing. Insert the brush into the tubing and push it forward and pull backward. Repeat this several times, at both ends of the tubing,

Don’t neglect the exterior vent

Do you know where your dryer’s exterior vent is? “For most dryer models, you can’t run the exhaust duct more than 25 feet from the dryer to the exhaust port,” according to the experts at MrAppliance.com.

They go on to suggest that if you can’t find it nearby, “… check the basement wall or the attic/roof.”

  • Remove the vent cover
  • Use the brush to loosen the lint inside the duct, and the vacuum to remove it.
  • Replace the cover and you’re finished!

Before you call it a day and a job well-done, check behind the dryer to ensure you’ve cleaned up all the lint off the floor. Otherwise, a fire hazard still exists.

Test your handiwork

  • Reconnect the dryer to the power outlet or turn the gas back on.
  • Push the dryer back into place.
  • Run the dryer for about 15 minutes on the air cycle (often called the “fluff” cycle) to ensure everything is working as it should.


Have you considered a newly-built home? Maybe you should

Homebuilders are paying attention. “Homebuilders are downsizing the American Dream to lure in entry-level buyers frustrated by the resale housing market,” according to Dani Romero at Yahoo Finance.

They’ve already increased housing starts, which reflects their aim to meet the wants and needs of homebuyers who are frustrated by the paltry number of existing homes for sale.

This is huge news for you if you’re among that group. Would you ever imagine that you could buy a brand-new home? No greasy smells from someone else’s cooking, no nasty carpet. Everything, down to the last detail, is brand new.

But wait … there’s more

Have you ever met a homeowner who threw in a pricey country club membership as an enticement to purchase his home? We haven’t either, yet we have met home builders who do just that.

It’s called an incentive and in slow-moving real estate markets, it takes more than offering a choice of countertops and sexy landscaping to sell a home. In some luxury home communities, in fact, huge incentives are the norm.

Incentives from builders run the gamut from appliances to gift cards to mortgage rate buydowns. The latter should be particularly attractive to first-time homebuyers.

If you aren’t familiar with rate buydowns, learn more at CNBC.com.

Incentives aren’t the only reason, however, that many Americans are touring new home communities.

Shop smart and you’ll save money in the long run

Most new homes are energy efficient. If you go a step further and buy a house that bears the ENERGY STAR label, you’ll use 20 to 30 percent less energy every year than you would had you purchased an existing home without ENERGY STAR labeling.

Considering that the average American spends $2,368 on utility bills every year (NerdWallet.com), this reflects substantial savings. What would you do with an extra $473 to $710 a year?

Add that to any incentives you’re offered and you may save a significant chunk of money, not only on the purchase, but down the road with less expensive power bills.

While all of this is good news for homebuyers there are aspects of the new-home purchase that should be considered.

Don’t shop without representation

The builder is represented by a real estate agent. As such, he or she owes a fiduciary duty to the builder, not the buyer.

To protect your interests, use a real estate agent while shopping for and purchasing a newly constructed home. It will cost you nothing, as the builder pays all real estate brokerage fees.

Try to ignore the bling

Model homes are alluring – it’s easy to fall head over heels in love with them. The builder knows this and loads the models with her top-of-the-line options and upgrades.

So, while you dream of having a replica of the model home, the builder dreams of giving it to you – at tens of thousands of dollars over the original price of the home.

New home specialists suggest that you choose options and upgrades that appeal to you and will make living in the home more pleasant, rather than trying to copy the model home’s features.

Ask the builder’s representative if you will be held financially responsible for installed upgrades should you need to cancel the sale.

Finally, if you absolutely must have an expensive upgrade, find out how much it would cost to have an outside contractor purchase and install it after the close of escrow. You may be surprised how much money you can save by going this route.

Inspect to protect

“Buy a new one [home], and you’re essentially the guinea pig testing how well the HVAC system works and whether the basement floods during a storm,” cautions Lisa Kaplan Gordon at Realtor.com.

There are several other reasons you should have the new home professionally inspected by an independent third party prior to closing escrow.

Experts with the California Real Estate Inspection Association take the inspection process one step further, suggesting that the home should be inspected during construction. This helps “… ensure that the work completed is in compliance with plans, specifications, and the construction schedule.”

Finally, real estate legal experts suggest that you purchase a new home warranty that takes up any slack in the builder’s warranty.

So, what are you waiting for? Grab your real estate agent (that would be us, by the way!) and head out to tour the new homes under construction. You may be surprised by what you find.


It’s storm season: Protect yourself and your home from lightning strikes

Here we are, smack dab in the middle of storm season and the time when electrical storms are most likely to occur. “About 25 million cloud-to-ground lightning strikes occur in the United States each year,” according to the National Weather Service.

These lightning strikes resulted in 51 fatalities, on average. This is why they call lightning “The Underrated Killer.”

It’s time to take it seriously and learn what to do, from the experts, during a thunderstorm.

Protect electronics

With the advances in technology, we’ve come a long way from the days of looking at the sky to determine if a storm is coming. Today, we often learn days ahead of a coming hurricane or tropical storm.

As it looms closer, however, we have work to do. First, if you lack a whole-home surge protector, buy one now.

Otherwise, unplug your electronics, such as televisions, computers, routers, etc. Why?

“… an average [lightning] stroke carries about 30 million volts,” according to the experts at StrikeCheck. Our electronics are accustomed to receiving 120 or 240 volts.

This excess voltage, when it hits a tree, power line or other structure, then travels to nearby homes (plural, if they are connected).

Back to that surge protector we mentioned earlier. There are two types, according to the editors at Dell.com. The most common device contains a metal oxide varistor (MOV) which absorbs all that overflow of voltage and redirects it to the ground.

The second type of surge protector contains a gas discharge arrestor (GDR), which is a bit harder to describe. Check out the description at Dell.com. Both, by the way, work just as effectively.

And, no, that power strip is not a surge protector. You’ll need one surge protector for each device you are going to protect.

When shopping for surge protectors, “… check the joule rating, which tells you how much energy the surge protector can absorb before it fails … The higher the rating, the better,” according to the editors at Progressive.com.

They go on to caution that we should “Avoid joule ratings under 1,000.”

OK, so there was no strike, but you lost power

This is another situation you should get out in front of. Do you know anything about your home’s circuit breakers? Do you know where they are located, for instance? What it looks like when a breaker is tripped?

The first step is to locate the box, which is typically on an exterior wall, near the garage, but not always.

Open the box. Are the breakers labeled as to which breaker controls which circuit? You may see a numbered list on the interior of the box’s door. The number typically refers to the circuit breaker (they are numbered, if you look closely) and which circuit it controls is typically written next to the number.

If the power goes out during an electric storm, you will need this information to determine if a circuit breaker was tripped or if the problem is more extensive, such as at the substation, with the transformers or because of downed power lines.

You’ll find a walkthrough of how to reset the circuit breakers in this YouTube video.

Do you need backup power?

Backup generators have been all the rage in the past few years and, if there is someone who uses medical equipment in the home, a generator may be a lifesaver during an outage.

At the very least, a generator will run essential appliances, such as the refrigerator. “A generator with 2000 watts of power will be sufficient to operate the freezer and refrigerator without any difficulties,” according to Erik Watson at PowerAll.

When lightning strikes your house

“It may start a fire. In some cases, the fire may start in areas that aren’t immediately obvious, such as in your attic insulation,” according to the pros at PennyElectric.com.

They go on to say that, to avoid being electrocuted, you should not use a landline phone during an electrical storm. Other ways to protect yourself include:

  • Avoid using a desktop computer (you unplugged it, right?). Use a tablet or laptop instead.
  • Avoid bathing (shower or bath) or swimming in a pool during an electrical storm.
  • Stay away from any windows that have metal frames.

It may be tempting to leave the home, but it’s not wise unless you are in danger, such as a fire or even if you smell smoke. “You are safer in your house in the center of a room than outdoors,” say the folks at Penny Electric.

Do call the fire department as soon as possible if lightning strikes your home. They will come out and look for fire in areas of the home not visible to you.

While severe electrical storms can occur any month of the year “September is the month during which most storms strike the U.S.,” according to research from NOAA’s Atlantic Oceanographic and Meteorological Laboratory.

Stay safe this storm season!