The 4 basics of spring cleaning

The Washington Post calls spring cleaning “the annual guilt trip.” The tradition traces its history to the days when homes were lit and heated with kerosene, wood, coal and oil. When the weather warmed and the sun shone, women would transfer the home’s entire contents to the outdoors and then attack the grime indoors.

Old habits die hard and the spring cleaning ritual is still very much alive. As with any process with multiple “moving parts,” this one is easiest when you break it down into its most basic components.

1. Dust

All those cozy, warm fires you enjoyed over the winter can leave fine dust and ash on most surfaces in the home, including the walls. Get out the duster and get to work, starting with the ceiling, and working your way down.

Don’t neglect the ceiling light and fan. Hardware stores typically carry either long-handled or extendable dusters which will keep you off the ladder and out from under the falling “gunk.”

You can find them online at Lowe’s, Home Depot and Amazon.com.

2. Windows

The wintry mix really takes its toll on our windows but a quick clean will allow all that glorious springtime sunshine to stream through.

Remove fabric window coverings and wash or dry-clean them. If you have blinds, give them a good dusting, then raise them to get at those windows and then remove the screens.

Use a solution of mild dishwashing soap and a strip applicator to wash the windows. Then, swipe a squeegee across them to remove the dirty water. The pros at This Old House offer a handy walkthrough of their easy and effective window-washing process online at thisoldhouse.com.

Once the windows are sparkling, all that’s left to do is to wipe down the sills, clean the tracks (give each a squirt of lubricant after cleaning) and attack those dirty screens. Use the same type of soap-and-water solution you did for the windows and a soft scrub brush on the latter.

3. Baseboards 

Even though they aren’t within our direct line of sight when we enter a room, clean baseboards can make the entire room feel fresh.

If there is still dust leftover from your dusting session, get rid of that first. A whiskbroom or even a paintbrush works well for this.

Home maintenance expert Bob Vila recommends using a solution of dishwashing soap and water on painted baseboards, but vinegar and water works as well. If your baseboards don’t require scrubbing, use a magic eraser product instead.
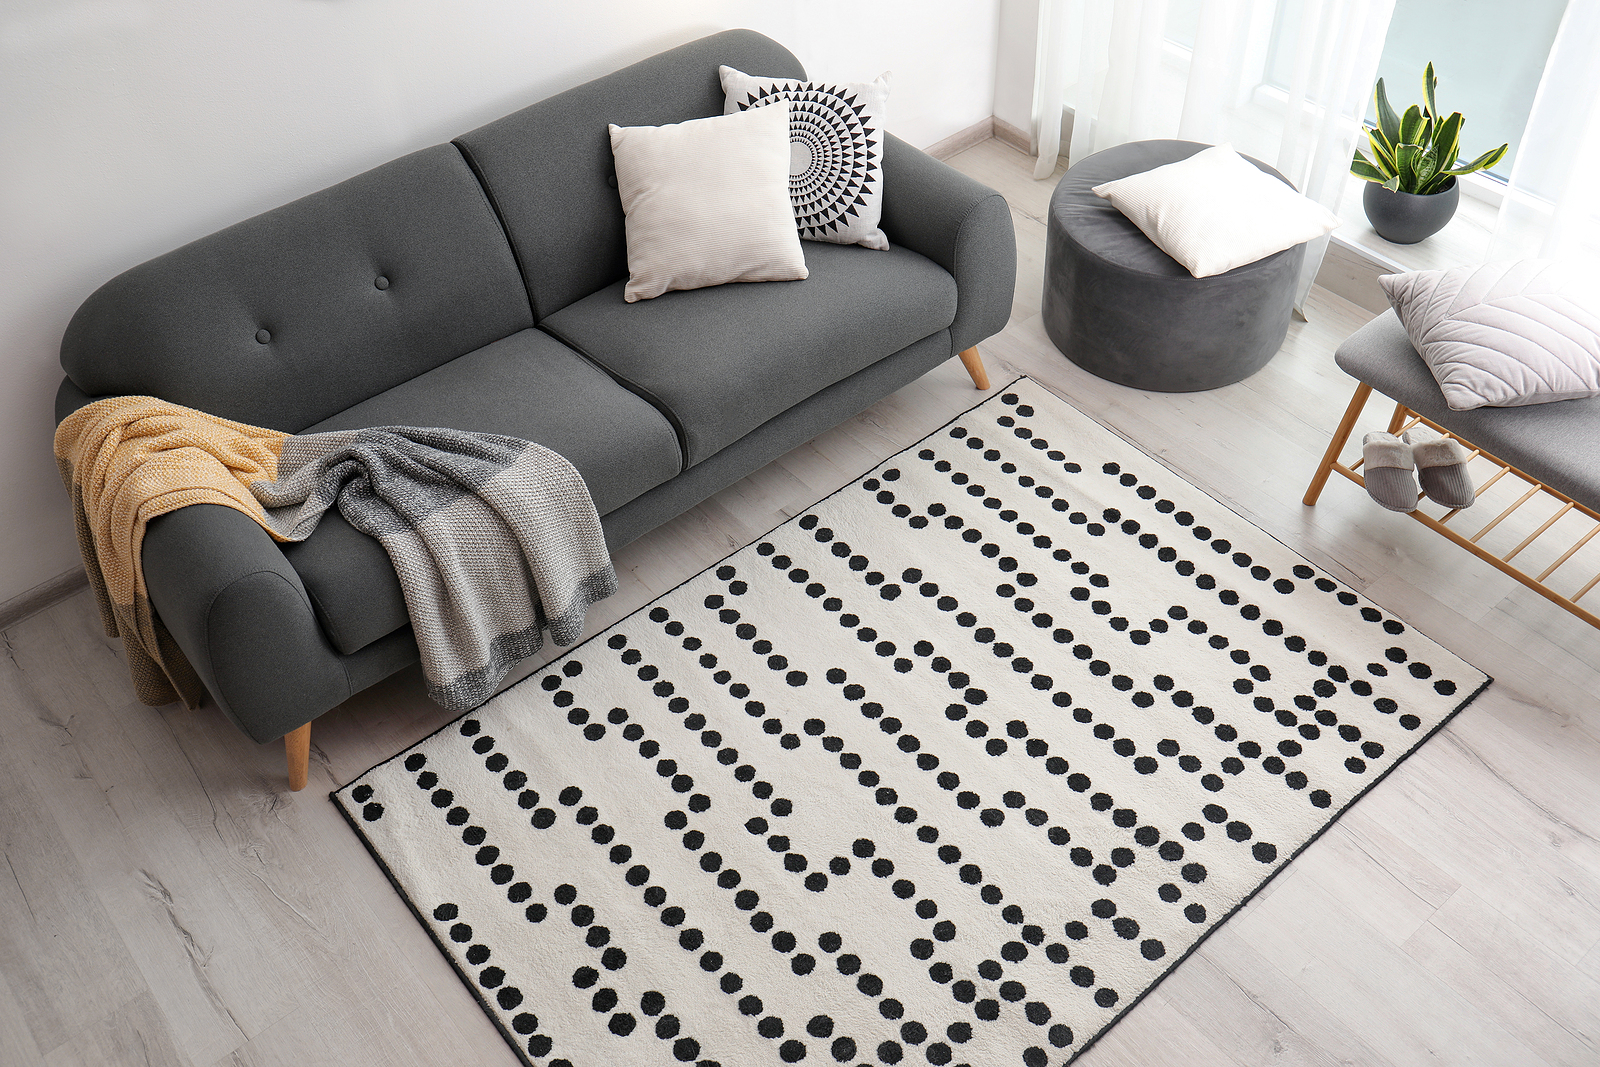
4. Floors 

Carpets

The flooring experts at Empire Today recommend a thorough and professional cleaning of the carpets in the home to set the stage for a healthy, happy spring.

Naturally you can DIY this project or, hire pros to do it for you.

Hardwood Floors

Avoid scratching your hardwood floor by getting rid of every last speck of dirt, dust and debris before cleaning it.

Then, use a cleaning solution recommended for the type of finish on your floor. If your hardwood flooring is relatively new, it’s most likely surface-sealed with polycrylic, polyurethane or urethane. Older floors are either not sealed, or finished with oil, lacquer, shellac or varnish.

Surface-sealed hardwood floors are the easiest to clean; just sweep or vacuum and then run a damp mop over them. Floors with other finishes take a bit more work to bring them up to epic spring-cleaning standards.

Depending on the beating the floor took over the winter, this may include stripping the old wax and applying fresh wax and then buffing it. Rent floor buffers at Lowe’s, Home Depot and other home improvement outlets.

Laminate Floors

Popular for their easy-care requirements, laminate floors typically respond well to a damp cleaning with a commercial laminate-floor cleaning product. The experts at Mohawk FloorCare recommend using a microfiber, terrycloth or cotton mop and to avoid wet-mopping (keep it damp) your laminate floor.

Use an acetone-based fingernail polish remover to carefully remove any stubborn stains. Wax or chewing gum will come up by rubbing them with an ice cube and then using (gently) a plastic-edged scraper.

Sure, there are a seemingly-endless number of things that will require a deep cleaning this spring, but focus on the basics first and the rest won’t seem so daunting.

Tips to find amazing used furniture deals online

The real estate industry likes to call homes for sale, if they’re not new-builds, “existing homes.”

In reality, they’re used homes, sometimes gently used and, sadly, other times they’re used and abused.

The same goes for cars and anything else that is on the resale market. Yes, there’s a lot of junk out there, but there are often amazing deals on items in as-new condition.

If you’re thinking of refurnishing a room or two this summer, don’t overlook used furniture and start your shopping online.

We’ve rounded up some tips to get you started and to keep you safe while making your purchases.

You’re not alone

Nearly half of Americans shopped for resale items during the pandemic last year, according to OfferUp.com’s Recommerce Report. The category producing the most growth was home goods.

“The average American saved $400 in 2020 by shopping for furniture and home goods on resale marketplaces, and just shy of one in ten saved over $1,000,” according to the report.

Although many Americans have reverted back to in-store shopping, others have stuck to their pandemic routine of shopping online and opting for curbside pickup or having items delivered.

Whether your goal is to save money or you’re looking for something that you can’t find in local furniture stores, online resale shopping is fun, convenient and thrifty.

Where to point your browser

To get the most bang for your buck, visit local platforms and apps that offer in-person transaction service. Even with the price of gas what it currently is, you’ll still pay less to pick up a piece of furniture from the seller’s home than to have it shipped from across the country.

Some of the resale platforms that offer local search include:

  • OfferUp.com (easiest way to shop is to download the app. Set search parameters to “Local pickup only”)
  • Facebook Marketplace
  • NextDoor.com
  • Craigslist.org
  • Ebay.com (click on the word “Advanced” next to the blue search button on the right side of the page. Scroll down the page to the “Location” box and set your parameters)

Other sites offer resale furnishings and accessories and, depending on the seller, you may get free shipping.

Tips for buying home furnishings online

Unfortunately, cybercrime is real. Fortunately, online shopping scams aren’t high on the list of crimes. Investment and romance scams take the top two spots.

It’s still important to protect yourself while shopping online. Look closely at the photos of any item you’re interested in. If you’d like additional photos, contact the seller. If you have questions, get them answered to your satisfaction before committing to the purchase.

When working with local sellers, be mindful of online buying etiquette and safety. Plan to meet in a busy, public spot.

Show up on time for your appointment. If you can’t make it, give the seller as much advanced notice as possible.

Shopping online for furniture and home décor accessories can save you a lot of money. Be smart, stay safe and happy decorating!

Meet 2022’s Plants of the Year

It’s that time of year when the National Garden Bureau (NGB) releases their “Year of the” plant list.

On this list you’ll find “… one annual, one perennial, one bulb crop, one edible, and one shrub,” according to the editors at the NGB.

How did the plants make this prestigious list? By being “… popular, easy-to-grow, widely adaptable, genetically diverse, and versatile.”

Today, we’ll take a look at 2022’s indoor plant, outdoor plant and edible plant of the year.

Year of the Peperomia

(Peperomia spp.)

The genus Peperomia offers a wide variety of choices for both indoor growing and outdoor (depending on climate). From the succulent, trailing string of turtles (Peperomia prostrata) to the spicy scent of the cilantro peperomia (Peperomia maculosa), choosing just one is challenging.

Their popularity extends far beyond scent and novelty, however. Native to tropical forest understories, peperomia doesn’t require a lot of light, so they make ideal office companions or to add a spot of life to a shady corner of the home.

In addition to the two previously mentioned, popular species include (Peperomia elongata), watermelon peperomia (Peperomia argyreia) and the baby rubber plant (Peperomia obtusifolia).

Species considered “rare” can be pricey but you’ll find less expensive peperomia online and at nurseries and gardening centers.

Although most commonly grown indoors in the U.S., some species are fine outdoors and hardy to United States Department of Agriculture (USDA) zones 10 through 12.

Year of the Gladiolus

Plant the corms in spring and have gorgeous spikes of blooms by summer. What could be easier?

Along with their grandeur and beauty, however, glads have a lot to offer the landscape. The grandifloras (Gladiolus grandiflora), the most popular hybrid, can grow to 4-feet in height, “… 12 to 20 blossoms per stem,” according to the editors at the National Garden Bureau, online.

If you crave fresh flower bouquets, this is the plant for you.

These beauties are hardy to USDA zone 7.

Year of the Salad Greens

Ever feel particularly amorous after eating a salad? There’s a reason for that. Salads, at one time in history (the 1500s), were considered aphrodisiacs, according to the editors at the National Garden Bureau.

The editors’ choice of salad greens as their edible plant of the year, by the way, isn’t restricted to lettuce. The group also includes:

  • Arugula (Eruca vesicaria): Fast-grower. Plant in early fall or early spring.
  • Dandelion greens (Taraxacum officinale): Get to those leaves early because they develop bitterness once the plant flowers.
  • Endive (Cichorium endivia): This plant’s favorite temperature range is 60 to 65 degrees Fahrenheit.
  • Kale is formally known as Brassica oleracea. This is one plant you won’t have to worry about in winter as the leaves actually become tastier after a cold snap.
  • Mustard greens (Brassica juncea; B. rapa): These plants grow quickly, so you’ll be populating your salads with them within four weeks of planting.
  • Radicchio (Cichorium intybus var. foliosum), also known as Italian chicory, offers a pop of deep, rich red to the vegetable garden. It thrives in the fall and spring garden.
  • Spinach (Spinacia oleracea) is a cool-season crop. From planting to harvest is typically within 45 days of planting.
  • Lettuce (Lactuca sativa) is considered a cool-season crop but it’s easy to grow and you’ll have fresh salads all winter long.

To read the rest of the list, visit ngb.org.

Be a rebel and break those area rug “rules!”

Bob Vila claims that there are “9 rules of area rugs that everyone should know.” House renovator Jenell Beals at Houzz.com claims that there are 11 rug rules. We say “rules shmules,” and remind you that some rules were made to be broken.

Some of them just don’t fit when we’re attempting to put a personal stamp on decorating or updating the appearance of our homes. And, area rugs can add that personal stamp, even if you have to break the “rules” in choice, size and placement of them.

Let’s break some area rug rules

Rule #1: Scale Matters

Absolutely; this is true in almost all cases. Rugs often convey the overall size of a room.

But that doesn’t mean you can only choose carpet that covers the entire room. You can still look at smaller rugs that help to discern between the different activity spaces within a room or open plan space.

Rule #2: Furniture Legs Must Be on the Rug

It’s true that this often looks the best in a smaller room with carpet. But, it’s not a hard-and-fast requirement.

Consider just the front feet, or, just the front feet of the couch while the armchair legs are all on the area rug. Think of this as more of a guideline that helps you to choose the right size rug for a room.

Rule #3: Runners Are for Hallways

Yes, runners are perfect for hallways, but they can add depth to bedrooms when placed at the foot of the bed and in long, rectangular living spaces. In general, you will want to use larger runner rugs to get the right effect, but you can use runners in any room.

There are a few more rug rules you might want to break. Those include the use of patterns that contrast slightly with your furniture and window treatments, layering area rugs and adding rugs to rooms with wall-to-wall carpeting.

But there is one area rug rule you should never break: take measurements of your room before shopping for your area rugs. And don’t forget to take color swatches with you when you head out to the stores.

Get additional tips from area rug rulebreakers online at WilliamsonSource.com, ApartmentTherapy.com and PaulaBergDesign.com.


Grow avocado like a boss

If you’re a fan of avocado toast, guacamole or chunks of avocado stuffed into your fish tacos, have we got a treat for you!

When you decide to quit the store-bought varieties and grow your own avocado, you’ll wonder what took you so long.

If you live within the avocado’s USDA hardiness zones (8 through 11), the tree is a snap to grow. So, get to the nursery and pick out the healthiest avocado tree you can find and let’s get it planted and growing.

Scroll to the end of the post to learn more about avocadoes and how to choose the variety best for your growing zone (which you can find by entering your ZIP Code here).

How to plant an avocado tree

Choose a sheltered area to grow the avocado tree. Protect it from high winds and any area of your microclimate where temperatures dip to below 32 degrees Fahrenheit. It requires a warm location that receives sun all day.

Ensure that there’s plenty of room for the tree to grow – about 20 feet if you want it to be able to spread out.

As for timing, right now is ideal, but any time before about mid-June is fine.

If you don’t have a soil pH tester, now is the time to buy one. First, however, check with your local extension service. Many provide free soil testing. You’ll find a cooperative extension directory here.

  • Aerate the soil in the planting area by digging into it to a depth of 12 inches with a gardening fork and crushing large clumps of soil.
  • The avocado tree requires a soil pH of 6 to 6.5. To adjust your soil’s pH, you’ll need to add soil amendments. You’ll find an easy-to-follow explanation of these at the University of California Cooperative Extension’s website.
  • The charts, however, aren’t useable for the home gardener. The UC Vegetable Research and Information Center breaks down the quantities required. For instance, to raise the soil’s pH, you’ll want to apply finely ground limestone.
  • Naturally, the amount to apply depends on soil structure, but as a general rule of thumb, use 4 tablespoons of lime per square foot of garden space to raise the pH two points. Check out the charts on the UC website. They’re quite handy.
  • Add those amendments to your soil and mix them to a depth of 8 inches.
  • Dig a planting hole the same depth and twice the width of the pot in which the avocado is currently growing in the pot. Use the gardening fork to lightly scrape the sides of the hole to make it easier for the roots to penetrate.
  • Remove the avocado tree from its pot and place the roots in the planting hole. Cover the roots with soil and use your fingers to gently work it around and between the tree’s roots.
  • Fill the hole halfway with soil and then fill it with water. When the water drains, finish filling the planting hole with soil and lightly press it down around the base of the tree.
  • Water the newly planted avocado tree until the water puddles.
  • Pour a 3-inch layer of mulch on the soil and, keeping it 6 inches from the trunk, spread it in a 3-foot radius around the avocado tree.

 How to water your avocado tree

There are several ways to figure out when to water and how much water to give. Dig a hole, 10 inches deep, 5 inches from the tree’s trunk. Feel the soil at the bottom of the hole, if it is dry, water the tree, slowly, until the bottom of the hole is moist. Time how long it takes to deliver the water so you know how long to water in the future.

  • If you don’t have a drip irrigation system, purchase a soaker hose that is long enough to wind around the tree, set out as far as the tree’s dripline.
  • Run the soaker hose for 3 hours and then dig into the soil to see how far the water has penetrated. If it isn’t wet to a depth of 6 inches, run the hose for an hour longer. After a bit of trial and error you will know how long to run the soaker hose when watering.
  • Allow the soil to dry before watering again and then use the timing you figured out in the above step.
  • Depending upon the weather in your region, you may need to water once a week.
  • Stop watering the avocado tree one month before the first frost.

How to fertilize your avocado tree

Don’t fertilize the first-year avocado. During its second year, fertilize it monthly, from February until September. Use 8-3-9 fertilizer according to the amount specified on the label.

Growers in frost-prone areas may not have success with avocados and will need to offer the tree protection in the winter.

Last year, one avocado cost, on average, 78 cents. This year you will pay around $1.24 and expect that price to rise dramatically.

Grow your own and save money!

Your 6-step early spring lawn schedule

Serious gardeners have a lawn-care schedule, adhered to like clockwork each year. You can identify these folks by their lush, green landscapes.

Others use a hit and miss approach and, while the grass lives, it may not thrive. Prepping the lawn for the coming growing season is one way to have a healthy, green lawn.

Take advantage of the cooler weather in late winter or early spring to get outside and prep the lawn.

Here’s what you’ll need to get your lawn ready for spring

  • Leaf rake
  • Metal rake or dethatcher
  • Pre-emergent crabgrass herbicide
  • Rotary spreader
  • Fertilizer
  • Fertilizer spreader
  • Grass seed
  • Lawnmower
  1. Get the lawn ready for the spring season by raking up winter debris, such as branches, pine needles and leaves. Raking may also remove some of the thatch layer, allowing your lawn to ‘breath’ better and to more readily absorb water.
  2. Check for the lawn for how much thatch is left. This is leaf and stem debris that builds up between the grass blades and the soil. A small amount of thatch — 1/2 inch or less — is fine. Remove excess thatch with a thatch rake, allowing 1/2 inch to remain. View this quick walkthrough of the process at YouTube.com.
  3. Apply a pre-emergent crabgrass control product. Crabgrass seeds germinate in the spring as the soil begins to warm. The best way to apply the pre-emergent herbicide granules is with a rotary spreader, scattering it as you walk across the lawn. Water the lawn to a depth of 6 inches after application.
  4. Early spring lawn fertilizer is important so apply it to warm season grasses, such as Bermuda, zoysia and St. Augustine, immediately after green-up. Use the amount of fertilizer listed on the package and broadcast it evenly over a dry lawn. Cool season lawns, such as tall fescue and Kentucky bluegrass, should have been fertilized in February.
  5. While fall is the best time to over-seed a lawn, spring is the second best. The experts at Scott’s walk you through the process in this video. Wait a month after fertilizing to do it.

If you’ve applied a pre-emergent weed killer, you’ll need to wait the amount of time recommended on the weed killer’s label before over-seeding.

  1. Finally, mow the lawn to a height of 4 inches.

Now your lawn is ready for whatever spring and summer throws at it.


2022 Baby nursery trends

If you’re adding to your family this year, congratulations! It’s an exciting time with lots to look forward to.

As in other areas of the home, baby nursery décor preferences change and each year, it’s out with old and in with the new.

We’ve scoured the internet to learn from design experts what you can expect to see when you shop to outfit your baby’s room.

Going with a theme?

Look to the night sky for inspiration for a theme in the nursery. According to Rated People’s Nursery Trends Report, stars are all the rage in the 2022 nursery.

You’ll find star-themed nursery ideas on Pinterest.com.

Woodland-themed nurseries are popular this year as well, with “… rainbows, sunshine and forests” following close behind, according to the folks at ratedpeople.com.

Check out baby nursery color trends

Wall color sets the stage for the rest of your design choices when decorating any room. This year’s hottest trend is “bold monochromatic,” claim the pros at thebump.com.

“This trend allows you to play with multiple tones of a specific base hue to create depth and dimensions throughout the nursery,” Elizabeth Rees, founder of Chasing Paper, tells The Bump’s Nehal Aggarwal.

When considering which base hue to choose, how about blue? “This year’s scene stealer will be our girl, blue,” suggests Pam at Project Nursery.

“From dusty blue to midnight to just a little bit french [sic] country, we think the right blue can make a statement while also lending itself as a versatile neutral,” she concludes.

If your notion is that blue-is-for-boys and you’re expecting a little girl, consider Pantone’s color of the year for 2022, “Very Peri.” It’s a lovely “… periwinkle blue that tows the line between blue and violet perfectly,” according to the editors at babyaspen.com.

Furniture trends for the 2022 nursery

Parents will love shopping for the nursery’s furniture this year. Pinterest predicts that curvy furniture (in all parts of the home) will dominate in 2022. If this style appeals to you consider cane nursery furniture.

“Whether it’s cane nursery furnishings or small nursery accessories, they’ll have a modern edgier look . . .” than the 70s throw-backs and “. . . will fit right in to most nursery design styles with its rich texture and neutral color,” according to the designers at nurserydesignstudio.com.

Nursery safety

Whether you spend way too much time at Instagram or don’t even know what it is, the social media platform has it’s good points and those that are so wrong that they’re being called out for them.

Last summer, Today’s Parent wrote an article claiming that many Instagram influencers are posting images of nurseries that are “…actually dangerous for babies.”

Alana McGinn, goodnightsleepsite.com’s sleep consultant, agrees.

“We are forgoing safe sleep spaces and including obvious sleep hazards all for a pretty Instagram picture,” McGinn tells Melissa Greer at Today’s Parent.

In reality, infants require a flat surface free of everything other than a swaddle blanket wrapped securely around them.

Do yourself a favor and read the article at todaysparent.com.

Next on the list of safety concerns are all those toxic compounds emitted by paint, rugs, carpeting and new furniture.

Choose low VOC (volatile organic compound) paint. When it comes to deciding on flooring, many experts recommend anything but carpet.

New carpets go through a process known as “off-gassing,” with the largest release of gasses happening in the first 72 hours of installation.

Dr. Joseph Mercola, however, claims that the carpet will continue off-gassing, at lower levels, for up to five years of installation. The gasses released cause eye and respiratory tract problems and may also impact your baby’s central nervous system.

“The adhesive used to affix the carpet to the floor typically contains benzene and toluene, some of the most harmful VOCs,” Mercola cautions.

While other flooring choices aren’t as warm and cozy as carpet, with carefully-selected throw rugs you can get awfully close to that feeling.

Learn more about volatile organic compounds in the home from the U.S. Environmental Protection Agency.

Clogged drains? Check out these DIY fixes!

It’s probably happened to all of us. While washing your hands in the bathroom the sink begins filling and filling and not draining. It’s annoying.

Thankfully, your chances are good that you won’t need to call a plumber. Try these handy tips we’ve rounded up from the pros.

How to unclog a drain

Unless you’ve been putting things down the drain that aren’t meant to be disposed of via plumbing, (kids love to do that) the typical kitchen sink clog is a gooey mess of grease and food. In the tub and bathroom sinks, add hair to the mix.

The best first step when approaching a drain clog is to use hot water. Boil two to three quarts of water and pour it down the drain, slowly.

If that doesn’t work, and the clog is in the bathroom, take a trip to the hardware store to purchase a Zip-It. Donna Boyle Schwartz, at BobVilla.com swears by this inexpensive tool.

“Zip-It is a long, slender piece of plastic with small barbs on the sides; you stick it down the drain as far as it will go and pull gently to remove the clogs,” she claims.

You can purchase the tool online at HomeDepot.com, Lowes.com and Amazon.com.

Still plugged up?

Time to bring out the big gun: the plunger. Ensure that you’re using a sink plunger for the sink and a toilet plunger for the toilet.

What’s the difference? A toilet plunger has a flange at the bottom and the sink plunger has a shallow, bell-shaped bottom. See a comparison photo at HouseGrail.com.

Fill the sink with several inches of water and push down on the plunger, gently and repeatedly until the water begins to drain.

If that doesn’t clear things up, you may have a clogged trap, which is the curved piece of pipe under the sink. Don’t worry, it’s not as difficult as it sounds.

First, put a bowl or bucket under the pipe to catch any water that may be in it. Unscrew the pipe with a wrench or pliers. Often, on newer-model pipes, they can be unscrewed by hand.

Place the trap under the faucet and run hot water through it and then clean the inside with a drain cleaning brush.

If all else fails, try using a toilet snake.  Push it gently into the clogged pipe until you hit the clog. Then, turn the snake’s handle which will cause it to sort of “drill” through the clog.

By the way, don’t use a snake meant for cleaning sink drains. These are made of metal that can scratch the inside of the toilet bowl. Ensure that the auger you use is meant for use on toilets.

Finally, if you just can’t seem to clear a clog, call a professional plumber. You may have a clog at the sewer, which can only be handled by the pros.


3 home upgrades that are good for the environment

The American consumer was slow to catch on, but today we have a growing awareness of the environment and how it’s impacted by humans.

“A new study across 24 countries reveals 58% of adults are more mindful of their impact on the environment, and 85% said they’re willing to take personal action to combat environmental and sustainability challenges.” according to MasterCard newsroom editors.

We also expect large corporations and brands to follow suit and to “… behave in a more sustainable and eco-friendly way.”

Change begins at home, don’t you agree? Today we share some tips with you about three home upgrades you can perform that will actually help the environment.

1. Increase the home’s insulation

If you live in a newly-built home you may think that it has sufficient insulation. You may be mistaken. “To keep initial selling prices competitive, many home builders offer standard (not optimal) levels of insulation,” say the pros at doityourself.com.

Folks with older homes probably already suspect that the home doesn’t have enough. To find out if you need additional insulation, try this test: Touch the walls and, if you have a ladder tall enough, the ceilings.

They should feel dry and somewhat warm. If not, there is not enough insulation.

Then, ask yourself the following questions:

  • Does the temperature fluctuate from room-to-room?
  • Have you experienced higher heating and cooling bills (pre-current inflation)?
  • Does the attic experience water leaks? “Water has a much easier time finding its way into a poorly-insulated home than a well-insulated one,” according to Mike O’Hara with insulatekansascity.com. If you experience water leaks in the attic, “… your insulation may be part of the problem,” O’Hara claims.

Consider obtaining an energy audit to pinpoint where the home needs additional insulation.

2. You’ll need a healthy budget for this one, but it’s worth it

Upgrade your heating and cooling system. Yes, it’s pricey, but if you can afford it, it’s one of the best home improvement projects for the money.

The experts at the U.S. Environmental Protection Agency (EPA) recommend purchasing Energy Star certified HVAC products to make a huge difference when it comes to how your home impacts the environment.

Visit energystar.gov to learn the warning signs that it’s time to replace your HVAC system. They also offer tips on how to hire an HVAC contractor.

3. Consider going solar

Humans have been harnessing the energy from the sun since the 7th Century B.C. It took numerous inventions between then and the 1950’s when inventors Calvin Fuller, Daryl Chapin and Gerald Pearson of Bell Laboratories invented the first solar cell.

“While it was considered the first practical device for converting solar energy to electricity, it was still cost prohibitive for most people,” according to Elizabeth Chu and D. Lawrence Tarazano with the U.S. Patent and Trademark Office (smithsonianmag.com).

They are still pricey for many Americans, and the pros and cons still hotly debated.

One aspect of installing solar panels on your home’s roof that isn’t debated is the benefit they provide to the environment.

“Traditional electricity is sourced from fossil fuels such as coal and natural gas,” according to Taryn Holowka, senior vice president, marketing, communications & advocacy with the U.S Green Building Council (USGBC).

“Installing solar panels on your home helps combat greenhouse gas emissions and reduces our collective dependence on fossil fuel,” she concludes.

The cost of the panels varies, depending on how much sun your roof receives each day, your household’s energy consumption and your local rates.

An advantage for homeowners is that a home with solar panels may sell for up to 4.1% more than a home lacking solar panels, according to research performed by a nationwide real estate portal.

That’s an additional $15,370 for the median-valued home in the U.S.

Learn more about going solar on the U.S. Department of Energy’s website.

The gardening season starts now!

No, we’re not loopy – a variety of seeds can and should be started indoors and January and February are the ideal months to plant many of them.

So, thaw out that green thumb, dig into those seed catalogs you’ve been using to keep cabin fever at bay and get a head start on this season’s garden.

Some flower seeds to start now

Save some money in spring by starting your own flowers from seeds now. Some to consider include:

Sweet pea – Sweet peas are best planted in fall if you want them to bloom in early spring. It’s not too late to plant them, however. They will bloom, but just a bit later than they would have had you planted them in fall.

Start them now in seed planters filled with seed starting mix and transplant them in the garden in spring, as soon as the soil can be worked.

Need more tips? Check out reneesgarden.com.

Dianthus – Dianthus is typically quick to germinate (10 to 21 days) but slow to flower (60 to 90 days), so January is the ideal time to start the seeds indoors. You’ll need lights to set the seed tray under. Even an inexpensive fluorescent shop light will do the trick.

“Be aware that only selected cultivars of Diathus plumarius, such as ‘Sweetness’ (Dianthus plumarius ‘Sweetness’) will bloom the first year from seed,” cautions Bridget Kelly. She provides more helpful tips at gardenologist.org.

Snapdragon – Gorgeous and colorful, snapdragons are a must for a spring flower garden.

Seeds need to be sown 8 to 10 weeks before the last frost date (which you can find at davesgarden.com)

Vegetable seeds to plant in January and February

Tomatoes, peppers and any other warm-season vegetables you plan on growing require a long season, so starting the seeds indoors, early, is a must.

Other vegetables to start now include:

  • Broccoli
  • Brussels sprouts
  • Cabbage
  • Cauliflower
  • Eggplant

Get your fruit crop going

Like tomatoes, melons require a long growing season so get these seeds started indoors, now:

  • Cantaloupe
  • Honeydew
  • Watermelon

How to

Don’t look to the seed packet to give you much more information than how many weeks before your last frost date to start your seeds indoors.

The key to successful seed starting indoors is threefold:

  • Soil – always use a mix labeled especially for seed starting. These are typically soilless mixtures which will help prevent “damping off,” a common fungal disease of seeds and seedlings started in cold, wet soil.
  • Heat
  • Light

Then, you’ll need some additional equipment:

  • Containers – these can be as simple as small (3- to 4-ounce) paper cups with holes punched in the bottom for water drainage.
  • Trays to hold the containers – ensure that you line the trays with a waterproof material.
  • Seedling heat mat. These are available online at amazon.com, homedepot.com and walmart.com.
  • Fluorescent lights or LED grow lights. For the budget minded, an inexpensive fluorescent shop light will suffice. LED grow lights are a bit more expensive and you’ll find them at walmart.com and homedepot.com.
  • Plastic domes, bags or wrap – used to cover the containers to help retain moisture in the planting mix until the seedlings breach the soil.

Fill the container with the seed starting mix and use your fingers to lightly press down the soil to remove air pockets. Add more of the mix so that the container is filled to within one-quarter inch of the rim.

Plant the seeds – about two to three per container – cover the container with the dome or plastic, place them in the tray and then place that on the heat pad, under the light source.

Once the seeds germinate, remove the plastic and move the light as close as possible to them (without touching) and allow it to remain on for at least 12 hours every day.

As the seedlings grow, adjust the light so that it sits just above them – almost touching them.

Finally, about three weeks after germination, give the seedlings a weak solution of a 3-1-2 liquid fertilizer. Always apply fertilizer to wet soil and water after fertilizing.

Happy gardening!