3 Home maintenance resolutions for 2019

As most homeowners understand, owning a home isn’t a set-it-and-forget-it kind of possession. It requires what sometimes seems like almost constant maintenance. While some of these tasks can be deferred, and often are, there are others that shouldn’t wait.

Not performing these maintenance tasks can cost you dearly. We have a fresh, new year upon us, so why not resolve, right now, to undertake these three common but often deferred ways to keep your home maintained and save money in the long run?

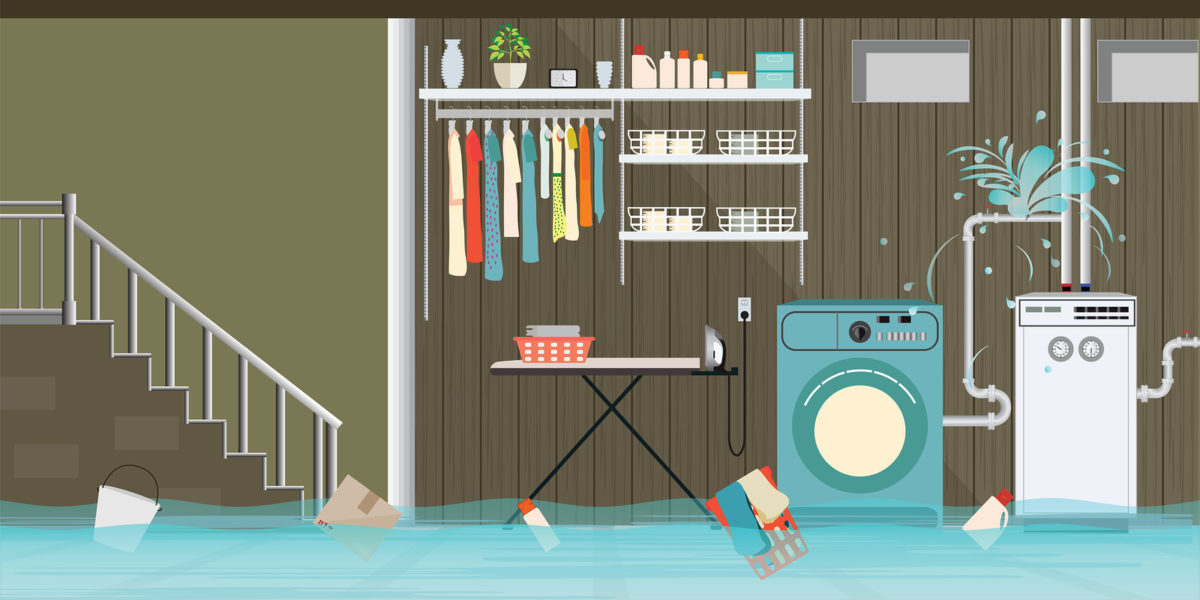
1. There’s a reason your HVAC system has filters

Perhaps the easiest and quickest piece of home maintenance you could ever perform is changing out the filter to your heating and air conditioning unit. However, I still hear about homeowners who don’t know about this.

The filter may not look like much, but it performs a very important function – keeping debris out of your HVAC unit.

“The primary purpose of a filter is to protect HVAC equipment, not to improve indoor air quality,” according to Joe Provey at BobVila.com.

“If your air filter is dirty and you’re experiencing AC problems, the majority of the time it always comes back to that clogged filter,” claims the experts at Cool Today in Sarasota, Florida.

They go on to explain that when the filter is dirty, the HVAC unit needs to work harder. The strain does a number on the system’s motors and, eventually, the unit may break down.

At a nationwide average cost of $5,413 to replace the system, not routinely changing its filters seems borderline nuts.

How frequently you’ll need to change the filters depends on several variables:

  • Number of pets in the home
  • Number of people in the home
  • The type of filter
  • Current indoor air quality

“For basic 1″-3″ air filters, manufacturers usually direct you to change them every 30-60 days,” according to the pros at Service Experts Heating, Air-Conditioning & Plumbing.

They go on to recommend that if anyone in the home experiences allergies or if you have a dog or cat, change the filters every 20 to 45 days.

If you’ve grown tired of the frequent trips to Home Depot to pick up new filters, consider installing a washable filter. Also known as a “permanent electrostatic filter,” it can last up to 10 years, but should be washed monthly.

You’ll find a brilliant explanation of these filters and why you should considering switching to them at Gardenologist.org.

2. Get at those ‘fridge coils

Did you know that refrigerator condenser coil problems account for more than 70 service calls per year? It’s true, according to familyhandyman.com.

Cleaning the coils is a 5-minute job so there’s really no excuse for a homeowner to have to place a condenser coil-related service call.

The experts suggest that we perform the task twice a year, especially if we have pets.

You’ll need to pull the refrigerator away from the wall because the coils are attached to the back of the appliance (sometimes along the bottom). Unplug it before doing any work on it.

Use the vacuum to remove the loose fuzz and a coil cleaning brush (familyhandyman.com recommends this one at Amazon.com) to get at the caked-on material.

They also suggest that you check the gasket around the edges of the door to ensure that stray food particles aren’t impeding the door, allowing the cold air to escape or hot air to get in.

Use warm water and a sponge to avoid damage to the gasket.

3. A quick and easy inspection of this part of your windows pays off

Those small holes on the bottom of your exterior windows have a very important purpose. Known as “weep holes,” their job is to drain water that catches in the sill, so it doesn’t build up and end up inside the home.

Like most things on your home’s exterior, they get clogged with dust, leaves and bugs. Let this “junk” accumulate for too long, and you’ll end up with the water entering the home and dripping down the walls.

Make it a point to inspect weep holes each year, preferably just before the rainy season. Spray the outside of the window with a hose and watch for it to drain from the weep hole. If it doesn’t, the water is getting stuck somewhere along the line.

Experts at TheFamilyHandyman.com recommend that you use a wire hanger to poke into the hole, then use the hose on the window again.

“If the little flapper (designed to keep out driving wind) is stuck shut, it can be removed with a putty knife and replaced.”

Newer windows may have a weep hole on the inside of the window as well. Find a handy walkthrough video of how to clean these at YouTube.com.

2 Ways to Avoid Overpaying for a Mortgage

The process of buying your first home involves a steep learning curve. From how to get started to understanding the roles of the various players in the process, it can be confusing.

Probably the most misunderstood aspect of the home buying process is the mortgage. Sadly, it’s also the most important. We see far too many real estate consumers who, in their haste to get it over with and get on with house hunting, don’t pay attention to exactly how much the loan will cost.

We don’t want this to happen to you, so let’s take a look at how to avoid overpaying for your home loan.

1: Dig deeper than the loan’s interest rate

When comparing home loans, most inexperienced homebuyers use the interest rate as a benchmark. Why not? It’s what the media focuses on and what lenders advertise.

But which interest rate are they talking about? There are two that you need to consider when shopping for a loan.

The advertised rate is typically what you’ll see first, with the APR, or annual percentage rate, located in the fine print. Because it represents the total cost of the loan, including points, fees and other loan costs, it’s the APR that you want to compare across loan offers.

Learn more about this by visiting the Consumer Financial Protection Bureau’s website.

What are points?

As you learn more about the mortgage process you’ll hear a lot about “points.” There are two types that you need to pay attention to: origination and discount points.

Origination points are often referred to as “origination fees” and it’s what the lender charges for its services. These are negotiable and represent yet another way to save money on your home loan.

Discount points, on the other hand, offer a way to “buy down” your interest rate. Each point is worth 1 percent of the loan amount. For example, for a $200,000 mortgage, one discount point equals $2,000.

And, each point that you purchase will lower your rate “from one-eighth to one-quarter of a percentage point,” according to Dona DeZube at interest.com.

When comparing loans, ensure that you are comparing “offers that include points to those that don’t and determine how much you’re really saving by paying thousands of extra dollars up front,” cautions DeZube.

To simplify the process, request that each lender put the loan’s points in dollars instead of percentages, according to the Federal Trade Commission. Not only does this help you compare loans, but it helps you understand the total cost.

2: Lock your Rate

Just as a loan pre-approval isn’t binding on the lender, neither is the interest rate offered. If you like the rate, lock it in. Rate locks typically last for 30 days but the costs depend on the number of days.

When comparing loans, ensure that you compare quotes with the same rate lock period.

Should you decide to lock your rate, ensure that it clearly states not only the length of the lock period, but the interest rate and number of points as well.

Your mortgage payment will likely become the largest check you write each month, so take all the time you need to ensure that you’re saving the most money possible.

Do these 7 things before moving into your new home

If there’s one thing we can guarantee during the home sale process it’s that you’ll walk away from the closing table with a sore wrist and a bad case of brain fog.

The sheer volume of papers you’ll sign is mind-boggling. The time you’ll spend sitting in the chair will numb more than your rear end.

But there is still work to be done. This is the fun part of the process though. As soon as you have the keys to your new home, get busy getting it in move-in condition.

In fact, there are some things that should be done before closing.

1. Transfer the utilities to the new address

Naturally, this is something you’ll want to do in advance of closing. We typically remind our clients to transfer utilities at least two weeks prior to closing on the new home.

And, by utilities, we mean electricity, water, gas and/or propane, sewer, trash collection, telephone land lines, security service (if the home has one), cable and internet.

Find out what day of the week the trash collectors come to the new neighborhood.

If you’ll be transferring other services to the new address, such as landscaping and pool cleaning, do those at the same time.


2. File a change of address with the post office

The post office needs to know where to deliver your mail and you have two ways of letting them know. You can either go to the post office and fill out a change-of-address card or use the U.S.P.S. online service.

Go online and navigate to moversguide.usps.com. Click on the blue “Get Started” button. Answer all the questions on the new page and use the “Next” buttons to navigate the rest of the process.

There is a $1 charge to change your address online, so you’ll need a credit or debit card.


3. Determine the quickest route to school and the best commute route to work

In all the excitement of moving into the new home, Monday will roll around before you know it.

Do you know what time to leave the home to get to school and work on time? Use the weeks before closing to familiarize yourself with the various routes you can take to each.

Make the trips during the morning commute time (not on a weekend), so that you can time your trips to the minute. This way, you can relax and know that nobody in the family will be late for school or work.

4. Change the locks on all doors leading to the exterior of the home

This task will need to wait until the home is actually yours, and you have the keys in your hand. Call a locksmith or, if you’re the DIY type, change the locks yourself.

Consider one of the new smart locks. They’re especially handy for large families and for those who have a tendency for losing keys.

Check out PC Magazine’s list of the best smart locks of 2019 at pcmag.com.

5. Need paint?

It’s a rare home that couldn’t use fresh paint on the walls and now is the best time to slap some on. If you wait, you’ll need to cover or move furniture out of each room and remove art work from the walls.

If you’ll also be replacing the flooring, you can be as messy as you want without a care as to where the paint is landing.

Speaking of new flooring, get that laid after painting and before moving in.

6. Give the home a deep clean

The previous owners of your new home were most likely told by their real estate agent that they were expected to leave the home in “broom swept” condition.

There is really no one definition of this term, but at the least, the floors should be swept and vacuumed and all personal belongings removed from the home.

No, it doesn’t always happen. But one thing you can most likely depend on is that the home won’t be deeply clean.

You’ll be so happy you took the time to do this, or hired someone to do it for you, when you move in and don’t have to lift a finger to be able to enjoy your new digs.

7. If you have pets

Parole the perimeter of the home to ensure the fencing doesn’t include gaps wide enough to allow your pet to get out. If your dog or cat will spend time in the garage, store chemicals (especially automobile anti-freeze) up high, out of their reach.

Finally, notify the microchip company of your new contact information so that if Fluffy does get loose and someone finds her, you can be notified quickly.

Your veterinarian can help you find the company contact information for the particular chip implanted in your pet.

Welcome home!

Real Estate Lingo Deciphered: What’s a “Comp?”

From Ikea product hacks to painting kitchen cabinets and refinishing countertops, Americans are absolutely hooked on the DIY craze.

There are some things, however, that only a pro should tackle and that includes determining a home’s current market value.

In fact, a National Association of Realtors’ survey of for-sale-by-owners found that determining an accurate price for their home was the homeowner’s most challenging task.

Pricing your home too high or too low are both disastrous to your pocketbook.

Real estate agents and professional appraisers pretty much use the same process to determine a home’s market value. The purpose behind the two, however, is what differs, albeit slightly.

Agents are determining market value whereas the appraiser’s sole purpose is to ensure that the lender isn’t loaning more than the home is worth.

Both will compare your home to others. These other homes are known as “comps,” short for “comparable.” Let’s take a deeper dive into how a particular home qualifies as a comp for your home.

What is “market value?”

Businessdictionary.com defines market value as “The highest estimated price that a buyer would pay and a seller would accept for an item in an open and competitive market.”

Well, that’s just swell. But how do we know what a buyer will pay?

By investigating what recent buyers have paid for similar homes

Sold homes, then, are the comps agents use when preparing a comparative market analysis. Appraisers, too, use sold homes when working on figuring out how much a home is worth.

Typically, we’ll look back no more than six months for sold homes, similar in age, style and size, within a one-mile radius of yours. Yes, there are times we need to look further back in history or extend the radius, but not often.

Now you get to find out why we say it three times

Proximity is an important factor when searching for comps. So important, in fact, that some lenders require that their appraisers search no further than one-mile in all directions if the subject home is in the suburbs and five miles in rural locations.

We, as real estate agents, have a bit more flexibility. We typically start our search for comps close to the subject property and work our way out until we have at least three comps that have sold in the past six months or so.

Then, there are additional “location, location, location” aspects to compare.

A home’s location can positively or negatively impact it’s value. Positive nearby amenities include:

  • Parks
  • Schools
  • Shopping
  • Cemeteries (A national real estate company found that homes within 100 to 200 yards of a cemetery sell for an average of $17 more per square foot than those located more than 500 yards away).
  • Access to freeways and highways

There are additional proximity amenities, some of which are specific to certain regions, such as proximity to the beach or golf course.

Negative influences include:

  • Neighborhood condition (if the neighborhood is rundown)
  • Neighbors (hoarders, sexual predators and homeowners in foreclosure)
  • Traffic, train, airport or other noise
  • Schools (homes in poor-performing school districts are worth less than those in high-performing districts)
  • Oversupply of homes for sale
  • Crime

These are just a few of the ways the location of your home impacts its value.

Comparing the condition of the home

With both the real estate agent and the appraiser, the condition of your home will carry a lot of weight when viewing the comps.

First, we’ll determine if there are any deferred maintenance issues, such as leaky plumbing, overgrown or neglected landscaping, damaged flooring, cracked tiles or window glass, among others.

Then, we’ll deduct value if comparable homes are in better condition or add value if they aren’t.

Determining how much a home will sell for in the current real estate market depends on how much buyers are willing to pay for similar homes. Those homes, as you now know, are called “comps.”

Tips for a Brilliant Bookshelf Makeover

Sure, books aren’t exactly selling like the Instapot (2018’s hottest selling product on Amazon’s Prime Day in the U.S.), but if you’re of the opinion that something isn’t worth reading unless you can hold it in your hand, read on.

Even if you consume your literature on Kindle, shelves holding books are an asset to your décor – especially if the shelves are aesthetically pleasing.

Fortunately, if they have seen better days, bookshelf makeovers are easy and inexpensive DIY projects that don’t require a lot of carpentry experience.

The first step

Any decorating project is best undertaken with a clean slate, so remove everything from the shelves. Then, dust and clean the entire unit.

If your shelves are of the particle board/plastic variety, such as those sold at Ikea, a damp cloth and some mild cleaner is all you need to clean them.

Wood units, on the other hand, require the use of a wood-safe cleaning product, such as Murphy’s Oil Soap or Bona Cabinet Cleaner (both available from Amazon.com).

Now, stand back and imagine the possibilities.

Does it need paint?

Older bookshelves that seem to have seen as many years as some of the books they hold will look youthful again with refinishing or a fresh coat of paint to the frame and shelves. Especially if the bookshelf is a castoff or bargain purchase, paint or varnish can make it look high-end.

We found a YouTube video walk-through of how to paint wood veneer and laminate surfaces, here.

Painting wood surfaces also has its challenges, but, step-by-step, this how-to video makes the process a lot easier.

What’s behind the books?

Bookshelves with closed backs offer far more creative opportunities than those that are open to the wall in the back.

Aside from painting the backboard, DIYers use everything from wallpaper to wrapping paper, fabric and even shower curtains to decorate it.

Consider lighting it up

Lighted bookshelves offer a warm glow to the entire room and there are several ways to provide the light.

Consider LED strip lighting, attached to the bottom of each shelf to illuminate the shelf below. Here’s a video walk-through to help you get this very easy project underway.

For a more casual look, try twinkle lights. Even if you decide against this idea, we recommend watching this charming YouTube walk-through purely for its entertaining nature. We’ve fallen in love with TheFilmingFangirlBOOKS.

If you’re really handy, consider adding hardwired feature lights to your bookshelf.

Time to put the books back

If you’re using the unit to store books and only books, your décor options are limited. Suggestions for arranging them include:

  • Arrange alphabetically
  • Arrange books by theme
  • Separate them by color.
  • Stack some and use the stack as a bookend.
  • Arrange hardbacks separately from soft-bound books.
  • Arrange books by size

Bookshelves can hold more than books and offer a subtle way of decorating the room. The sky is the limit when it comes to which accessories to add to your bookshelves. You’ll find ideas online at HGTV, Elle Décor and House Beautiful.

5 Tips for moving when the weather outside is frightful

Moving is bad enough, but moving in wet, muddy, sloppy weather should be illegal.

Alas, it’s not, and if you have no choice but to move during winter, do yourself a favor and hire professional movers.

If that’s not possible, pay heed to 5 of the most important tips from the pros.

1. What will you do with pets and kids?

You’ll need to work quickly during a winter-weather move and, since children and pets tend to get in the way during periods of excitement, find a place to “stash” them during the process.

Consider asking a family member to watch the kids or hire a sitter. Pets can be placed in boarding where they’ll be safe.

2. What does the weather service say?

The best way to remain updated on weather conditions is with an app on your phone.

AccuWeather offers a free weather app and also a brilliant Road Trip Planner (you’ll need your laptop for this).

Many local TV station news departments offer apps that provide local weather alerts. In Minnesota, for instance, movers can download the CBS Minnesota app, or get road condition information from the Department of Transportation.

Check their websites or search iTunes or Google Play for a region-specific app.

3. Pack the necessities first

The last thing you’ll want to do after slogging through messy weather is to have to go through all those boxes to find the essential items you’ll need right away.

Before packing anything else, fill a box with the following:

  • Old towels and rags to wipe wet floors.
  • Snow/ice removal items, such as a shovel, ice scraper and a walkway de-icer
  • A change of clothing for all family members (including dry shoes or boots)
  • Snacks
  • Food for the pets (don’t forget the bowls)
  • Several large bottles of drinking water
  • Any medications you take daily
  • Bathroom items such as a shower curtain, shampoo, soap, toilet paper
  • Valuables
  • Coffee maker and everything to go with it
  • Things to keep the kids occupied

Place the box in the trunk of your car.

4. Protect your electronics

“Electronic components can develop condensation as the temperature decreases,” according to the experts at Bekins. “This condensation can cause water damage or even short circuiting,” they caution.

Think “insulation” when considering how to protect your electronics. First, wrap each item in bubble wrap, then in a blanket. Place each item in a bubble-wrapped box and seal it tightly. Then, wrap the box in either bubble wrap or a moving blanket.

5. Use extra care when moving appliances

As soon as you move in, you’ll be tempted to get the washing machine and dryer set up, but don’t give in to the temptation.

Appliance manufacturers say that washers need to sit for at least 12 hours. This is to ensure that any traces of water that remained in them while moving hasn’t turned to ice, which could damage the appliance.

And, yes, the dryer needs to come to room temperature as well. Otherwise, the igniter and heating element may become brittle.

Sudden changes in temperature can also be lethal to your electronics, so unwrap them and allow them to sit for a while.

Is your home smarter than you? It could be

Have you ever stocked up on groceries for a week’s worth of recipes and then forgot which of them you’d intended to follow?

If you owned an LG InstaView ThinQ Refrigerator, it would’ve reminded you. This smart ‘fridge was but one of the many home tech creations on view at this year’s Consumer Electronics Show in Las Vegas.

Some of the others we found intriguing include: 

Tetra Dishwasher

Described as “a compact, connected dishwasher with 10-minute, half-gallon cycles,” Tetra is also downright gorgeous.

While we predict it will be popular with those with tiny kitchens, the fact that it requires no plumbing (water is poured in manually) “and can be placed and used anywhere with a standard electrical outlet,” may put it in-demand for even the owner of a full-size kitchen with a small family.

See Tetra at work at myheatworks.com.


Smart plumbing fixtures

We’ve used smart plumbing fixtures for years in public restrooms – toilets that flush automatically and faucets that stream water as soon as a hand is placed beneath it.

Now that same tech idea is available in our homes, only better. How many times has the cooking goo you want to get off your hands ended up on the faucet’s handle? With voice-sensing fixtures, it’s now hands-free and oh, so clean.

Check out Delta’s Wi-Fi-connected and Alexa-powered Touch2O smart faucet.


Brilliant home security

Deep Sentinel is revolutionizing home security by pairing “Artificial Intelligence with human intervention.” It starts by establishing a security perimeter around your home and then the smart cameras, motion sensors, extra loud siren, two-way speakers and “AI processing hub” all work together to defend it.

Rolling out this winter, Deep Sentinel’s equipment package is selling now for $299 (the early bird special, otherwise plan on spending $399) and the Monthly Surveillance Subscription is priced at $49.99. Learn more about how to purchase the system here.


Check the weather while you shave

The stuff of sci-fi movies just a few years ago, Alexa and Google Assistant are added to mirrors, smoke alarms, and more.

Bathroom and kitchen product giant Kohler Co., introduced the Verdera Voice-Lighted Mirror, with Alexa built in. Use your voice to control the lighting, check the traffic while you shave or apply your makeup in the morning without putting up with the clutter of a TV or radio on the bathroom counter.

The next Consumer Electronics Show happens in January so we’ll keep you posted on what’s new and exciting in smart home technology.

4 types of neighborhoods

After the boring stuff is out of the way – the loan application process, choosing a lender and then hiring a real estate agent, it’s time to go shopping, the truly fun part of buying a home.

Have you started your wish list yet? The first section should be all about location – where you want to live, right down to several neighborhoods that you find appealing.

We believe in the “Google Earth” method of finding anything – start wide and then narrow down the search radius.

At the wide end of the spectrum, you’ll need to decide whether you want to live downtown, in the suburbs or a more rural area. Let’s walk through some of the terminology you may see while shopping for a neighborhood and the pros and cons of each.

1. Urban Core

The most common name for living in the heart of a city is “downtown,” but the media have introduced another term, “urban core.”

In some areas of the country, such as Austin, Texas, the word “central” might be placed before the name of the city. So, if you live in an apartment in downtown Austin you would most likely tell folks you live in “central Austin.”

Housing choices in the urban core also depend on region. They can range from luxury penthouse condos to warehouse conversion lofts and apartments that sit atop businesses.

Your neighbors will be diverse as well, including a mix of low-to-middle income folks, the affluent and seniors.

Urban core residents like their neighborhoods because the housing is affordable (again, depending on region), it’s typically easy to get where you need to go on foot, they’re close to nightlife attractions and these neighborhoods generally lack the shopping malls so prevalent in suburbia.

Drawbacks to downtown living include trying to find parking, more crime and lots of transients.

Popular urban core neighborhoods include downtown Los Angeles, Battery Park City in Manhattan and downtown Seattle.

2. Suburbs

There are as many different descriptions of the suburbs as there are neighborhoods within them. One thing most can agree on is that the suburbs are located outside of the urban core.

Sometimes called “bedroom communities,” the suburbs offer a quieter, slower pace yet lack the uber-close proximity to many conveniences and entertainment venues.

Zillow.com finds that more than half of millennial homebuyers are choosing the suburbs, so if you plan on selling your suburban home, you may want to target this group of buyers.

Money magazine studied suburbs and, in February 2018 came up with a list of “the best” in the U.S. They include:

  • Peters, Missouri (a suburb of St. Louis)
  • Vinings, Georgia (outside Atlanta)
  • Schaumburg, Illinois (a suburb of Chicago)
  • North Arlington, New Jersey (a New York suburb)
  • New Berlin, Wisconsin (outside Milwaukee)

You can find the rest of the list at cnbc.com.

If you count yourself among those who dream of buying a home in the suburbs, plan on having a wide choice of home styles from which to choose: apartments, condos, townhomes and single-family homes.

Tip: Consider your commute before settling on the suburbs.

3. Subdivisions

Whether you long for the small-lot subdivisions that became popular in the Los Angeles area a few years ago or are seeking a large lot with manicured lawns and mature landscaping, subdivisions are still in great demand – especially among families.

They may be located in the suburbs or near the urban core.

Subdivisions typically offer residents amenities and what is offered depends on region, developer and the price of the homes.

Larger subdivisions may have a park or three for residents, a clubhouse, community pool, and bicycle or pedestrian trails. But the sky is the limit – literally – in some subdivisions.

Just outside of Charlotte, North Carolina you will find Aero Plantation, home to 90 families. It’s what is known as a fly-in subdivision and light aircraft have the right-of-way on all the roads. Lots are huge – 2 acres minimum – and there’s also a forest and lake in the community.

Trying to describe the typical subdivision home is futile as the variety is huge. Those with cul-de-sacs, however, typically house lots of families with children.

4. Rural areas

If you’re seeking a sense of community and want to put down “roots,” choose a rural area in which to buy a home. According to Pew Research, 40 percent of rural residents know their neighbors.

Only 28 percent of suburban dwellers can say the same while 24 percent of urban core residents know their neighbors.

This is a surprising finding, considering the sparse population of most rural communities.

Choose a rural setting for your new home and you’ll find that your neighbors exhibit a sharp divide in values and politics from the urban core dweller, according to Pew Research.

The populations of rural communities have been on the decline, so many are using incentives to attract new residents, according to a Zillow study. For instance, Tribune, Kansas, in its desire to attract new college graduates, offers the Rural Opportunity Zone program.

“They’ll help you pay off your student loans — up to $15,000 over the course of five years,” according to Brittan Jenkins at Business Insider.

Once you’ve decided on the type of “developed human settlement” (as Wikipedia calls them) that best appeals to you, narrow your home search to the neighborhoods that include the type of home you want and the price range.

Contact us, we’re happy to help.

The cure for wet basements

Pretend, for a moment, that it’s spring (yes, it will come). Although snow is still deep, temperatures are rising.

What happens?

The snow will melt, sometimes rapidly, creating lots and lots of flowing water. Add a spring rainstorm to the scenario and you may be facing a serious problem.

Where will all this water go? Since the earth is still frozen, it won’t go down. It will follow the path of least resistance, according to Waters Basement Services in Buffalo, NY.

That path typically leads to the home’s foundation and, eventually, to the basement.

Rainwater isn’t the only type of moisture that seeps into basements, however, something as simple as condensation can build into puddles.

Just as condensation forms when cold outside temperatures meets warm window glass, so can that same warm air hitting a cold pipes or a concrete foundation create condensation.

Think you’re safe because your home is relatively new?

Think again. The American Society of Home Inspectors (ASHI) claims that most new homes experience basement leaks within 10 to 15 years of being built.

Worse, excess moisture leads to the development of mold. ASHI experts claim that 60 percent of homes in the U.S. have moisture in the basement and nearly 40 percent of these basements will develop mold.

More than 60 percent of basements in existing homes have basement moisture.

The key to fixing the problem is to figure out where the moisture is coming from.

Searching for the source

First, you’ll need to determine if the moisture is seeping into the basement from the outside or if it’s a result of condensation.

Thankfully, this is easy. When you find moisture on a wall, tape a piece of foil to the location. Leave it on the wall for 24 hours and then check the foil for signs of dampness.

If it’s wet on the outside, then the source of moisture is coming from inside the basement (condensation, most likely). If the underside is wet, suspect moisture intrusion from outside the home, according to John D. Wagner at ThisOldHouse.com.

Now you’ll need to pinpoint exactly where the moisture is coming from. Wagner suggests that the most likely areas are where the floor joins the walls. Then, check the ceiling for signs of water intrusion (flaking paint, discoloration, etc.).

Other areas to check for leaks include:

  • Beneath buckled floor boards or lifted tiles
  • Rotten wood
  • Near rusty metal surfaces, such as nails and screws
  • Powdery-looking deposits on concrete, stone and stucco surfaces

 Fixing the Problem

The fix for your wet basement depends on the cause. If it’s condensation, airing out the basement may be the cure.

If the source of the moisture is coming from outside the home, the solution may range from filling foundation and wall cracks with epoxy to more expensive tasks, such as:

  • Re-grading the yard to direct water away from the home
  • Installing drains
  • Installing a sump pump
  • Replacing downspouts and gutters

Kevin Brasler of Washington Consumer’s Checkbook and HouseLogic.com offer DIY solutions to try before calling in a professional.

If that doesn’t work, don’t give up. Moisture can damage the home’s structure and cause mold. If the DIY suggestions don’t cure the problem, call in a pro.

Are you brave enough to buy a home while engaged?

Whoever coined the phrase “Bridezilla” must’ve been referring to the bride (or groom) who was juggling wedding planning with homebuying.

Believe it or not, many couples avoid the chicken and egg scenario (what comes first, the wedding or the house?) and decide to do both processes simultaneously.

It sounds crazy, but if you have a system and some professional guidance,  you can be successful.

Read on for our tips to get you from chaos to homeowning spouses.

It all comes down to money matters

Since the first step in a home purchase is getting a loan, you’ll need to decide if you should both apply or just one of you.

If you go for the joint mortgage, the lender will combine both applicants’ income, assets and debts. If one of you has a lot of debt, it will weigh down the application.

If, on the other hand, you’re like the average couple, where one of you looks better on paper than the other, perhaps that one should apply for the loan.

In many cases, one half of the couple has good credit but a lower income than the other. The lower income limits the amount of loan you’ll qualify for, while the high credit score may help you get a better mortgage rate.

You may want to sit down with your financial professional for the best advice on how to approach the mortgage application process.

You must consider the unthinkable

Although it may be unthinkable right now, there is a chance that you may not make it down the aisle. If you don’t, you will be among the nation’s 25 percent of failed engagements (according to Time magazine).

So, even though it’s unthinkable, you should be prepared for it, just in case. The best way to do this is to meet with an attorney about how you should divide the property, should a breakup occur. This is especially important if only one of you is on the home’s title.

To be extra safe, have your lawyer prepare a written agreement that both of you can sign.

While it’s not nearly as romantic as planning a honeymoon, planning for the successful purchase of a home before you tie the knot is important.

Feel free to reach out to us with any questions you may have. We love to talk about real estate!