Impress at your next barbecue. Learn grilling tips and tricks from the pros  

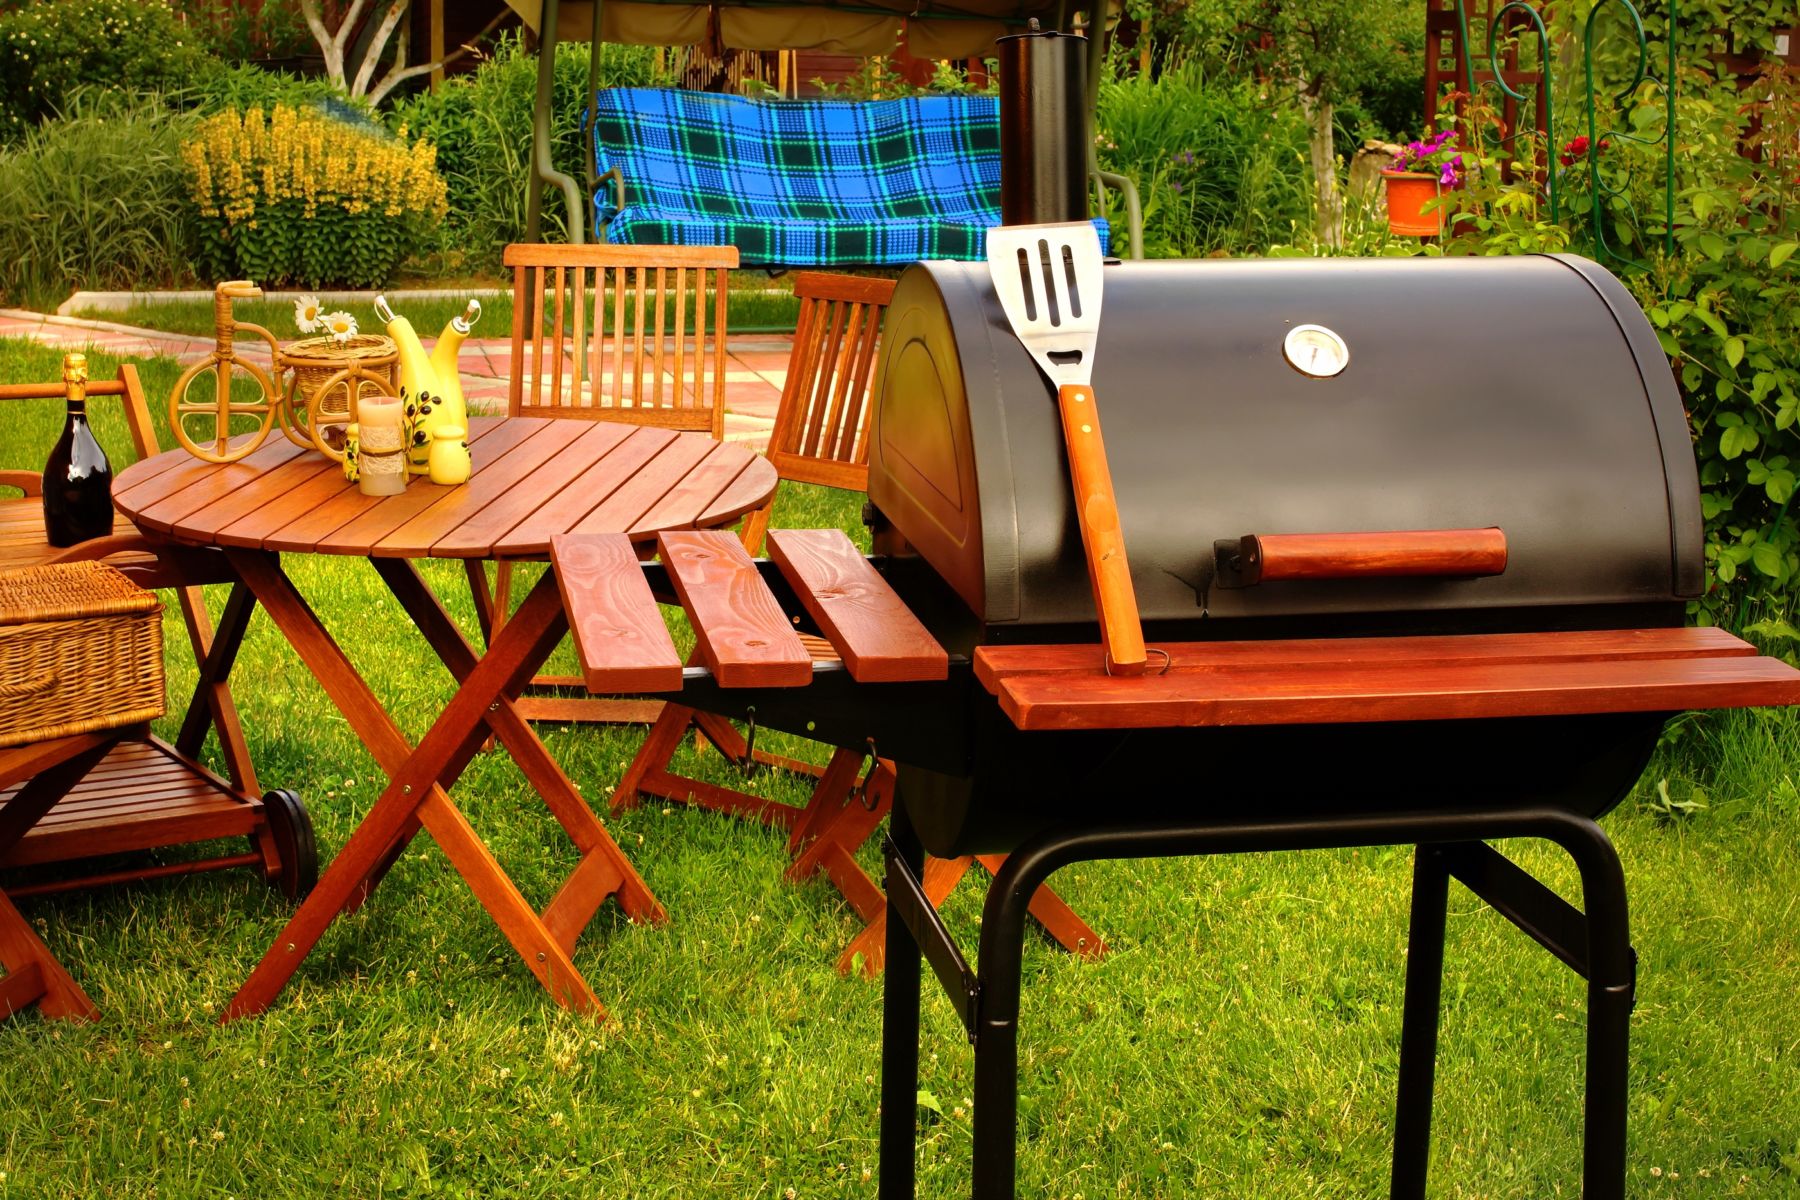
Did you wonder if grilling season would ever get here? Finally – a chance to get outdoors and polish that pit master image you’ve worked so hard to cultivate.

Even the pros seek out tips and tricks, however, so we’ve brought you some of their most brilliant.

Grill a better burger

Shopping for the right meat is half the battle when grilling burgers. “Ground beef that’s too lean will be tough and dry, so you’ll want to look for meat with a fat content of at 20-30%,” recommends the pros at Miami Beef.

“Hamburger patties about 5 inches across and ½-inch thick maximize surface area (and grill flavor) and ensure that the burgers cook through quickly and evenly,” according to Tony Rosenfeld, b.good burger restaurants co-owner and chef.

Then, before plopping them on the grill, use your thumb to make a slight indentation in the top of each burger. This avoids the “puff-up in the middle as they cook,” suggests Jamie Purviance, author of “Weber’s Way to Grill: The Step-by-Step Guide to Expert Grilling.”

You want the burgers to sear on the outside so don’t be tempted to flip them too early. Then, plan on flipping them only once. And, never press down on the patties as they cook.

“Pushing down on the burger presses out all the natural juices. Then people ask why their burgers were so dried out,” Eric LeVine, owner of New Jersey’s Paragon Tap & Table and Morris Tap & Grill.

LeVine also offered up a yummy-sounding recipe for the vegetarian in the group. “Make a patty using black and white beans, steel-cut oats, caramelized mushrooms and onions, roasted red peppers, and potato.

Top that with pickled scallions, red onions, egg-free roasted garlic aioli, and toasted chia seeds, all served on multigrain roll.”
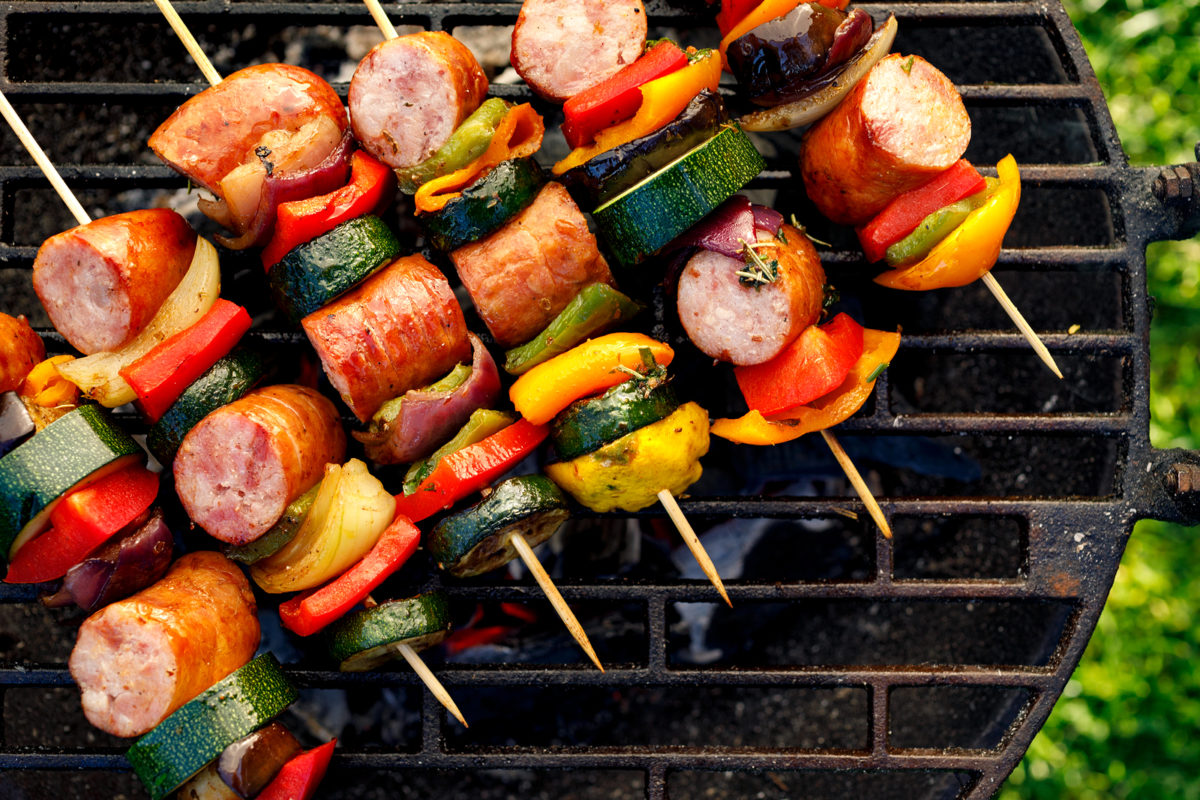
Kabobbing?

While most any meat can be skewered and grilled, chicken seems to be the most popular. And, you may want to take a “cheat day” from your diet because the pros at seriouseats.com suggest that you choose thighs over breasts.

“Chicken breasts seem like a good choice because their thickness make them ideal for cubing, but their lack of flavor and tendency towards dryness totally undermines that one advantage,” they explain. Skinless, boneless chicken thighs, on the other hand, remain moist, making them ideal for grilling.

Position the chicken pieces on the skewer so that they slightly touch one another. This allows them to retain their juices better, according to Purviance. Don’t cram them together, he warns; a slight touching is all that’s needed.

Grill a killer steak

Don’t take your steaks directly from the refrigerator to the grill, cautions Jan Birnbaum partner and former chef at San Franscisco’s Epic Roasthouse. “Always allow meats to rest at room temperature for up to two hours; depending on the size of the meat,” he explains to nydailynews.com.

He suggests putting steaks “on the grill at an internal temperature of 50 to 55 degrees.”

Before that, however, consider adding your salt, pepper or even rub to the steaks as they come to room temperature.

“My secret is coating the meat with a liberal amount of rub an hour before cooking and [leaving] it out so it comes to room temperature,” John Bracamonte, Pitmaster and co-owner of Brazen BBQ in San Diego suggests.”

Use a digital, instant-read thermometer to check the temperature of steaks both before grilling and while they’re still on the grill. Steaks are rare at 125 degrees Fahrenheit, medium at 135 degrees and well-done at 145 degrees, according to World BBQ champion Chris Lilly.

“Remember that steaks will continue to cook after they’re removed from the grill,” he cautions.

Once off the grill, give the steaks time to rest. “I prefer to let my meat rest uncovered, because the covering causes the food to steam and can make the golden brown crust or skin soggy,” said Elizabeth Karmel, author of Taming the Flame.

How long should they rest? About 10 to 20 minutes, suggests John Rivers, owner of 4 Rivers Smokehouse in Florida.

Mmm … RIBS

The tenderest ribs come from long (several hours), slow cooking. “Spikes and valleys of heat will tighten and dry out the meat, but consistently low temps will produce soft and succulent meat,” promises Purviance.

He goes on to caution grillers to wait until the last 30 minutes of grilling to sauce the ribs.

For added flavor, Bracamonte suggests sprinkling on “brown sugar during the last hour of cooking … and let that caramelize over the top.”

Gettin’ saucy

The biggest no-no when it comes to saucing your meat is to do so before you put it on the grill.

“Brush on barbecue sauce during the last part of cooking. Because most contain a lot of sugar, the sauce will burn if added too early,” said Lee Ann Whippen, chef/partner, Chicago q.

If you don’t make your own sauce, check out the results of thedailymeal.com’s taste test of store-bought barbecue sauces before you go shopping.


5 DIY landscaping projects you can do over the weekend

Summer is almost here! Grilling, swimming, or just lazing away the day in a hammock with a good book or a snooze — some of the best ways to spend a summer day. Read on if your backyard could use a bit of summer sprucing to make it more conducive to relaxing.

Install edging for a tidier look

If that spot where your garden beds end and the lawn begins is beginning to look a bit blurred, it’s time to install a barrier between the two. That barrier is called “edging,” and it’s easier to install than you may assume.

While faced with the mountain of choices at your local garden center, the simplest to install and most subtle are “4-in.deep strips of steel, aluminum or plastic,” according to the DIY experts of The Family Handyman Magazine.

Want something a bit sleeker and sexier? Consider painted aluminum or steel. Although they cost about the same, those experts at Family Handyman recommend aluminum for the DIYer because it’s lighter and easier to work with. If you insist on plastic, buy the most rigid edging you can find.

Edging, according to the pros, should be installed so that the top of it ends up 1/2-inch above the soil.

Home Depot offers an easy-to-follow walkthrough on the installation process. 

Install drip irrigation

There’s no more efficient method of delivering water to your landscape than with a drip irrigation system. The best part? It’s surprisingly easy to install and maintain. You’ll find instructions all over the internet. We like the video produced by sprinklerwarehouse.com.

Large gardening centers and home improvement stores sell kits to get you started and all the supplies you’ll need to maintain add on to your system.

Mulch your garden beds

Garden mulch is undoubtably the workhorse of the landscape. Not only does it help discourage weeds, but it helps the soil retain moisture, adds nutrients to the soil and acts as a temperature regulator for tender roots.

Mulch is manufactured from a variety of materials and comes in different textures and colors. Here are just a few of the types of mulch you’ll find in gardening centers:

  • Rock
  • Gravel
  • Bark
  • Rubber
  • Straw
  • Cocoa bean shells (toxic to pets)

Whichever material you choose, you’ll need about 2 to 3 inches of mulch, spread over the soil, but kept at least 6 inches from the base of the plants.

For additional information on mulch, how to apply it and why, watch the landdesigns.com video.

Light it up

You don’t need to hack your electrical system to add lights to the landscape. Spotlights, pathway lights and even strings of lights to hang over your patio or across the top of a fence all come in solar varieties. Stick them in the ground and let the sun replace electricity.

The pros at Pegasus Lighting offer a few tips on what to look for when you shop for solar landscaping lights:

  • Choose lights that use LEDs for the light source. Not only do they tolerate harsh weather conditions better than other light sources, but “LEDs require less energy to produce light, so they are much more dependable,” according to the experts at Pegasus.
  • Shop from among the most recent models to ensure that the photovoltaic cells (the part of the light that captures the sun’s energy to charge the batteries) are durable. Speaking of batteries, newer models contain “next generation batteries,” according to Lynn Coulter at HGTV.com. These batteries “can hold up to 2 ½ times the charge as older types,” she claims.

Create an outdoor dining oasis

Whether you’re grilling or dining on take-out or kitchen-prepped cuisine, dinner on your own patio or balcony can be heavenly after a long day of work. If you already own a patio dining set, give it a fresh coat of paint.

If you need to shop for a set, and you’re on a tight budget, consider buying a used set and refurbishing it. Shop garage sales, craigslist.org or offerup.com.


How to lower your monthly house payment

Your monthly mortgage payment, which includes the loan’s principal, interest, property taxes and homeowners insurance, no doubt takes a large chunk of your take-home pay. Most homeowners just live with the pain, despite some concrete steps they can take to lower the payment.

It’s not easy, and it does require effort on your part. But, you can lower your monthly house payment.

Dump the high interest rate

Although mortgage interest rates have been at historic lows, many homeowners bought their homes during periods of high interest rates. And, yes, rates are rising, so you’ll need to take advantage of this tip soon.

By refinancing the home with a mortgage that carries a lower interest rate, your monthly payments will naturally go down. For instance, if you bought your home in 2003, you are most likely paying 5.83 percent in interest.

Lock in today’s rates, 4.625 percent as of this writing, and your house payment will be reduced significantly.

There are aspects of refinancing that need to be considered before jumping into it so run the idea by your accountant or financial planner first.

Lower your property taxes

Depending on where you live, paying your “fair share” to help fund our schools and local government can add a hefty amount to your monthly house payment. In fact, according to the Census Bureau, the average American homeowner pays $2,197 in property taxes every year.

This adds more than $183 to your house payment each month. If you live in a high-tax state, such as Illinois or New Jersey, you may pay close to twice that amount.

Your first step to lower property taxes is to dig out your current assessment and check to ensure that everything in it is accurate, from the home’s square footage to the number of bedrooms and bathrooms. If you do find errors, or if you know of homes in your area that are more expensive yet the homeowners pay less in taxes, you may be able to dispute your tax bill.

Most county assessor’s offices have procedures to file disputes.

Are you paying too much for homeowners insurance?

The average American homeowner pays about $1,083 each year (a bit less than $100 per month) for homeowners insurance, according to ValuePenguin.com.

And, many may be paying too much, according to a Consumer Reports study. Among respondents to the survey, “About 9 percent switched insurers in the previous three years, and more than half reported finding a better price,” according to Jeff Blyskal at consumerreports.org.

He goes on to claim that homeowners “can save hundreds to more than $1,000 per year in premiums by shopping around.”

Insurance companies use your credit score when determining your premium, so work on raising your score to get better rates.

Blyskal explains that “an insurance premium for a 45-year-old homeowner with a fair credit score would be 36 percent higher than if she had an excellent score, on average nationally. If the homeowner had a poor score instead of an excellent one, her premium would be 114 percent higher.”

Get rid of PMI

Private mortgage insurance (PMI) or the Mortgage Insurance Premium (MIP) if you have an FHA loan, is both a blessing and a curse. It’s a blessing because it helps Americans who might not otherwise be given a mortgage to finally become homeowners.

The flipside, however, is that the premiums are tacked onto the house payment every month. With a conventional loan, PMI is removed when the homeowner obtains 20 percent equity in the home.

FHA’s MIP, however, remains for the life of the loan. But, if you’ve hit that magical 20 percent equity mark (and 80 percent loan-to-value), refinance into a conventional mortgage and do away with the MIP payment every month.

How to shop for a new grill for your summer cookouts

There’s a reason grilling takes center stage in summer. The weather demands it ― who wants to be cooped up indoors with all that glorious sunshine outside?

Aside from that, I doubt there’s a barbecuing man or woman in town who doesn’t feel that his or her barbecue prowess kicks hiney over even our best barbecue eateries.

To do it right, though, you need the right equipment and, if you’re in the market for a new grill (or even your first), read on for some shopping tips.

Gas or charcoal?

Or, maybe both? It’s not unheard of for the serious griller to own one of each. If, on the other hand, you don’t have a preference, maybe it’s time to learn about the differences.

Gas grills are faster and easier. You won’t need to deal with the charcoal, the fluid and then waiting for the coals to heat up. You will, however, need to ensure you have a full gas canister before the cookout begins.

Charcoal-cooked food, on the other hand, tastes better. The charcoal smokes, adding the barbecue flavor we all crave.

Consumer Reports claims that most of the gas grills we buy cost less than $300 and we use them for an average of three years. When it comes to replacing parts, expect to replace the burners. They wear out the quickest.

While charcoal grills are typically less expensive than gas grills, you can end up spending a couple hundred dollars for a large one with all the bells and whistles.

Now, charcoal and gas aren’t your only choices. George Foreman makes a lean, mean electric grill (as do other manufacturers) and there are even wood-burning grills on the market.

For the casual griller, gas or charcoal are the typical choices. If you want ease-of-use and have a need for speed, choose gas.

Which features do you need?

Of course, your budget will dictate the features you’ll find on your new grill, but there are some that are must-haves, at least for some chefs.

These might include a rotisserie (for cooking whole turkeys, chickens or roasts), lighted knobs for nighttime grilling and even alarms that let you know you’re on the verge of burning your meal.

Some are a bit extravagant but there are many features you might find quite useful. Shelving is indispensable for the serious griller. They’ll hold all of your ingredients so they are within easy reach as you cook.

A built-in thermometer is nice as well. If you really want to go all out, look for a gas grill with an infra-red burner. It’s ideal for searing meat to give it that crusty exterior and for locking in the juices.

If you’re just interested in turning out a juicy steak or burger, you don’t need all the fancy and expensive features. A basic charcoal grill will do the trick. The classic Weber kettle-style grill costs about $80 at the big home improvement stores and you can often find them on sale for even less.

Other things to think about

Don’t buy a grill without a decent manufacturer’s warranty. “This should keep you from having to spend money on parts that shouldn’t have broken in the first place,” cautions Chef Tony Matassa at BBQGuys.com.

He suggests looking for a gas grill with a 10-year burner warranty. And, speaking of the burner, Matassa reminds us to ensure that the burner size is proportional to the overall size of the grill.

“A lot of grill manufacturers make a large, impressive looking casting with a little burner – that means lots of hot and cold spots.”

Finally, he suggests that if you grill a lot of steaks, and insist on using gas, look for a gas grill that heats to at least 600 degrees Fahrenheit.

Barbecue season gets underway soon, so get out there and fill that empty spot in the backyard with a new grill.

A Kid-Friendly, No Cook Breakfast-in-Bed for Dad

June 17 is Father’s Day, the day set aside each year to show love and appreciation for dear old dad. So, just what is it that men want, truly, for Father’s Day?

Naturally, we aren’t the only curious types so retailers and others have surveyed Dads and find what, in their heart of hearts, they crave for Father’s Day:

A majority (60%) say they want to spend their day with the family

At least according to ebates.com.

Sadly, a survey by the National Retail Federation last year finds that “Many kids don’t even go as far as buying a gift for their father. Greeting cards are still the most common present …”

Let’s change it up this year, with a little help from Mom. Sure, buy or make the card, but buy the ingredients for the kids to make Dad an awesome, no-cook breakfast in bed on Father’s Day.

This recipe was actually created by kids, so it’s kid-tested for munchkins age 7 to 12 years old. Younger kids can still prepare it, but with Mom’s or another bigger person’s help.

DAD’S SPECIAL BERRY PARFAIT

INGREDIENTS

 ¼ cup breakfast Muesli (about 4 big spoonfuls)

½ cup Vanilla yogurt (about 8 big spoonfuls)

1 tablespoon Honey

¼ cup Fresh berries (about 3 kid-sized handfuls) – try to figure out Dad’s favorite berries or just use strawberries or blueberries or a mixture of both

WHAT ELSE YOU’LL NEED

A tray to carry Dad’s breakfast to his bed

Decorations for the tray, like a hand-drawn placemat

A Father’s Day card

A pretty container for the parfait (ask Mom if she has a nice champagne glass or something similar)

A spoon

A small cup of juice

A couple of napkins

The morning paper or a crossword book and pencil

If you’re allowed to make coffee or tea using the coffee maker – or if Mom can help you – serve coffee or tea just the way Dad likes it.

INSTRUCTIONS

A few days before Father’s Day, you’ll need to do a little work. Find the tray that you want to serve breakfast on and everything you want to put on it. You also should make the decorations now.

Let Mom or another adult know what to pick up at the store (see the Ingredients list). If there isn’t anyone besides Dad who can help you to get the ingredients, write him a shopping list and tell him that you need it before June 17.

He might guess that it’s for Father’s Day, but he won’t know what you’re making.

On Father’s Day morning, get your tray and put everything on it except the bowl to make the parfait. Then wash your hands so you can make Dad’s Special Berry Parfait.

Scoop the yogurt into a bowl. You can use any bowl, like the one you use for cereal or ice cream because you will need another bowl for serving.

Squeeze the honey, slowly, into a tablespoon (ask Mom if you need help finding it) and mix it together with the yogurt.

Sprinkle 1 big spoonful of muesli on the bottom of the serving dish. Top this with some of the honey- yogurt mix and add a handful of berries. Repeat this in layers until you’ve used all the ingredients.

Place the parfait dish on the tray and take it to Dad.

Then, go back to the kitchen and clean up the mess you made. (You’ll get credit for that, don’t worry!)

How safe is your deck?

If your spring cleaning routine paid special attention to getting the deck ready for summer entertaining, we have a question for you:

Did you check the deck’s safety while getting it all clean and gussied up? If not, you’re not alone.

The estimated life span for a wood deck is between 10 and 15 years, according to the U.S. Consumer Product and Safety Commission. They further estimate that half of the country’s 40 million wooden decks are older than 15 years.

Want to hear something even scarier?

Deck and porch problems cause 224,000 injuries each year in the United States – 33,000 were the result of either a collapse or structural failure.

Don’t let your summer guests be among these sad statistics. Inspect your home’s deck or porch before the seasonal fun begins and make the repairs necessary to ensure that it’s safe.

How’s that wood looking?

Your home’s deck is exposed to the elements, day in, day out, year-after-year. Naturally, it’s going to eventually show the toll the weather has been taking on it.

Check the deck for wood that is split or appears to be decaying. The experts at the National Deck and Railing Association (NADRA) suggest you check the area where the deck attaches to the house (known as the “ledger board”), which, they say, is “a common source of deck failure.”

Then, check the posts that support the deck as well as the joists under it, the support beam (runs parallel to the floor joists) and the boards that you walk across. Use a screwdriver or ice pick to lightly poke the wood, checking to ensure it’s not spongy, which is an indication of decay or damage caused by insects.

Use the same tool to probe cracks in the wood. “If you can insert it more than ¼ inch into any cracks … or if the wood breaks off without splintering, this could indicate rot,” warns Natalie Rodriguez of This Old House magazine.

Use a hammer to lightly tap each bolt or other connector. If it sounds hollow, it may be loose. Also check them for signs of corrosion. “As the fastener corrodes, it causes the wood around it to deteriorate,” according to Nick Gromicko, founder of the International Association of Certified Home Inspectors (InterNACHI).

Check the railings and balusters

Shake the deck’s railings and if they wiggle, call in a professional to help you secure them.

Use a measuring tape to ensure that they’re up to snuff, safety-wise. Rodriguez claims that the railing should be a minimum of 3-feet in height (3.5 feet is best, according to the pros at NADRA) and the balusters spaced a maximum of 4 inches apart (measured from the inside of each baluster).

Check the area around the deck

A sprinkler that hits the deck every time you water will eventually cause the wood to decay. Redirect errant sprinklers and downspouts that drain near deck posts.

Clear away plant detritus from the deck and the area beneath it. The experts at NADRA say wet plant material can be slippery and it promotes mildew.

Finally, give the deck a new, waterproof coating.

May is National Deck Safety Month – a reminder that now is a great time to do a deck inspection and perform maintenance to ensure family and friends are safe during summer.

3 Over-the-Top Luxurious Travel Destinations for your Bucket List

In case you missed it, summer recently arrived. If you’re still making your summer getaway plans, and you have the means, you may want to consider the ultimate luxury vacation.

A couple of years ago Spectrem Group conducted a study of the spending habits of people with a net worth of at least $25 million. What they found is that these people spend more on home renovations and vacations than any other purchases, including cars and jewelry.

If you are among those that would rather spend your money on seeing the world than something to wear on your wrist, check out the following destinations. Even if you don’t have the means to visit this summer, we think that they all deserve a spot on your bucket list.

1.Relax on a Private Caribbean Island

The self-described “undiscovered gem of the Caribbean,” Calivigny Island is an island for rent.

This 80 acres of unsurpassed, world-class luxury and privacy ― can be yours for a night ($30,000 per night for a two-bedroom cottage), week ($868,000) or month ($3,472,000). Located off the southern coast of Grenada, the island boasts six white-sand beaches while the resort offers a tennis court, swimming pool with a swim-up bar, a tree house, fitness center and more.

During your Robinson Crusoe experience you’ll meet no cannibals and no mutineers, but you just might enjoy windsurfing, waterskiing, jet skiing, wake boarding or any number of other water sports.

The island retreat accommodates up to 50 people so it’s ideal for weddings, family reunions and very private, romantic getaways. Find out more here.

2. Pampering in the Maldives 

The Maldives have long been a beloved destination for the wealthy, but the Soneva Jani Resort offers everything a bucket-list destination demands. The crystal-clear, turquoise waters of the Indian Ocean, the amazingly soft, white sand beach and the balmy breezes are just the beginning.

Pampering? It begins before you check in, when you’ll be handed an iPad with a questionnaire about everything from which pillows you prefer and the type of fragrance you want sprayed on them to your favorite alcoholic beverage, foods and music.

Privacy? Soneva Jani is located on Mehufaru, an uninhabited island in a lagoon in the Noonu Atoll. With only 24 villas (all over-the-water) and one beach villa, you’ll have plenty of solitude.

As a guest of the resort you’ll be enticed to hit the water in a complimentary paddleboard, kayak or catamaran, go snorkeling or diving or visit the on-site observatory to view the celestial glory. There’s also a cinema (set over the water, naturally) for movie buffs.

So, how much will all this casual opulence set you back? The least expensive villa rents at $3,000 to $5,000 a night, according to CNN. But, you can also stay in the largest villas for around $20,000 per night.

Learn more about Soneva Jani at soneva.com.

2.Reach a Transcendent State in a Floating Mansion 

All vacations should invoke Nirvana and, should you charter the super yacht that carries the name, you’ll find yourself in a blissful paradise from which it will be hard to return to the real world.

“Nirvana” is a 290-foot long floating mansion with six decks (with access provided by an elevator), a pool, a helicopter landing pad, a 3-D cinema, full gym, and a crew of 26 to cater to your every whim.

She sleeps 12 guests in 6 staterooms. These include a VIP stateroom, master suite and four double cabins.

When you aren’t sunbathing on deck, you’ll be invited to enjoy the gym, Jacuzzi, pool or get a message.

You just can’t get more privacy than being in the middle of the ocean, so if solitude is your aim, contact a yacht charter broker. Learn more here.

It’s spring! Let’s debunk 3 common gardening myths

You see them all over the internet but nowhere online do gardening fallacies proliferate more than on Pinterest.

For instance, we recently read a pin that described several ways to improve our garden soil, “naturally.” Among them was throwing a banana peel on the soil, or burying it, to supply potassium to your plants.

For the record, “As soil microorganisms work to break down the peels, they extract significant amounts of nitrogen from the soil, which results in less nitrogen for greening up plants,” according to Jeff Gillman of This Old House magazine. He suggests offering your plants a well-balanced fertilizer instead.

Read on for more common gardening myths.

Put small pebbles in the bottom of your planting pots

How many times have you read that container gardeners should add pebbles or place pot shards in the bottom of their pots to aid in drainage? Yet, this myth was busted more than 100 years ago, according to renowned horticulturist and professor, Dr. Linda Chalker Scott.

And, similar, more current studies prove that this is a myth, because “water does not move easily from layers of finer textured materials to layers of more-coarse textured,” the professor claims.

“Additionally,” she continues, “one study found that more moisture was retained in the soil underlain by gravel than that underlain by sand.

Therefore, the coarser the underlying material, the more difficult it is for water to move across the interface. Imagine what happens in a container lined with pot shards!”

So, stop with the pebbles on the bottom of your pots. Chalker-Scott suggest that you use only pots with drainage holes and high-quality topsoil to ensure adequate drainage.

Compost tea improves soil structure

Compost tea is a combination of compost and water that has been allowed to culture for a specified amount of time.

One online promoter of the use of compost tea has a list of its uses. Included on the list is that compost tea improves “nutrient retention in the soil,” reducing fertilizer use. The author also claims that the use of compost tea improves soil structure.

Compost tea does add nutrients to the soil. But, the only way it helps the soil RETAIN these nutrients is if it is applied frequently.

“The effects of compost tea are short-lived, and frequent and repeat applications are required” to replenish the soil’s nutrients and microbes, according to a 2015 study published in Advances in Bioresearch.

Horticulturists recommend ditching the water mixture and using dry compost as mulch. Each time you water, the nutrients will drip into the soil and provide those nutrients your plants are so hungry for. The bonus? Unlike tea, compost will improve the soil’s structure.

Always stake a tree when planting it

Chalker-Scott calls the process of staking a tree “tree bondage.” She does admit that there are some circumstances that call for using a stake to support a tree, such as when planting in “poor, shallow soils that hinder root development.”

But most of the time, staking a newly-planted tree is unnecessary and may end up harming the tree.

The stake takes on the support role of the trunk and root system. “This artificial support causes the tree to put its resources into growing taller but not growing wider,” Chalker-Scott explains.

Although a stake is supposed to be temporary, too often homeowners neglect to remove it. Those who do often end up with a tree that blows over or breaks during the first big wind. Chalker-Scott explains that this is due to the roots and trunk not fully developing because of the stake.

Bareroot trees are generally the only ones that require staking when planting. Chalker-Scott recommends that stakes be placed no higher than two-thirds the height of the tree. Use a flexible tie, such as a strip of nylon hosiery or other fabric that will stretch and not girdle the trunk.

Finally, remove the stake when the roots are established. Bartlett Tree Experts say that most trees’ roots are established within one to two years.

Take the shower of your dreams

You must admit, there’s nothing like a nice, hot shower at the end of a very long day. Standing under steamy water, you can almost feel the stress melt away.

It doesn’t take much to kill the shower vibe. Weak water flow, a backing-up drain or moldy tiles can all make that end-of-day routine less pleasurable. We’ve gathered some tips to ensure that when you step behind that curtain (or behind the tempered glass) all will be well in shower-land.

Wimpy water flow?

It’s easy to chalk up a wimpy water flow to low water pressure, but before you do, check your showerhead. Especially if you have hard water, mineral deposits may be the culprit. These can build up, clogging the water-flow holes.

How you clean the showerhead depends on the type you have. Newer models typically screw on to the shower arm so they’re easy to remove. Once it’s off the shower, soak it in vinegar or, for truly tough deposits, use a commercial product, such as CLR.

After soaking for about 60 minutes, used gloved hands and an old toothbrush or small scrub brush to remove the deposits. After replacing the showerhead, run water through it to remove all cleaning solution residue.

If you can’t remove the shower head, or choose not to, grab a rubber band, a plastic bag and your cleaning solution.

Place the rubber band over the showerhead arm. Fill the plastic bag with your solution and slip it over the showerhead. Use the rubber band to secure the top of the bag to the showerhead arm and allow the contraption to remain for at least 60 minutes.

Remove the bag and run the shower to flush out the solution and the loosened mineral deposits.

Backed up drains

Just like our four-legged friends, we humans shed and a lot of the hair we lose ends up in the shower, when we wash our hair.

From there, it travels down the drain where, eventually, it’ll  meet up with a big, ugly wad of hair and join it. So, not only does hair back up the water into the tub while you’re showering, it will eventually cause a more expensive backup if you don’t take care of it.

The easiest and least expensive “gadget” you can purchase to avoid hair clogs in the shower is a strainer that fits over the drain opening.

If you already have a clog, avoid using those chemical solutions you can buy at the supermarket or hardware store. Sure, they’re handy when you’re certain that the clog is a wad of hair, but, what if it’s a toy the kid threw down the drain?

In that case, the solution won’t clear the clog and, worse, it’ll back up onto your feet during your next shower.

“To protect yourself and your pipes, always try to dislodge a clog using common household methods before reaching for the drain cleaner,” say the experts at HIS Plumber in Newnan, GA.

Better yet, call a plumber if you are unsure of what’s causing the water to back up into the tub.

A clean shower is a dreamy shower

Mold on tile, soap scum and a ring around the shower – talk about a buzz kill! To make your shower truly Zen, get rid of the grime and keep it away.

Let’s take a look at some proven home remedies to get rid of the grime.

Mold

Combine household bleach and water (50/50) in a spray bottle. Open the bathroom window, don a breathing mask and gloves and spray the solution directly onto the mold. Allow it to sit for a few minutes and then use an old toothbrush to scrub it off the grout.

Use a clean, wet sponge to wipe away the residue.

Prevent mold buildup by using the fan in the bathroom while showering and allow it to run for about half an hour afterward.

Soap scum

We once met a cleaning lady who swore by the use of Tide laundry detergent (powdered) to clean soap scum from tubs and shower surrounds. It’s less abrasive than cleanser and, at least from what we witnessed, did a far better job.

Ensure that you rinse it completely, however, because it can make the surface quite slippery.

Sure, the aforementioned steps are time-consuming, but just imagine how amazingly soothing the after-shower will be.

Four easy-on-the-pocketbook ways to update your home’s interior design

You don’t need to be a professional interior decorator to update your your home’s interior.

With a little creativity, and items already present in your home, you can transform it into a showplace.

Here are 4 inexpensive ways to update your home’s interior design.

1. Paint

The quickest and most inexpensive change you can make to your home’s interior design is new paint. Whether you decide to paint entire rooms or just create an accent wall, new color on the walls will create instant glamour.

If you hire a pro to do the job, plan on spending between $380 and $790 for a 10X12 room, according to homeadvisor.com. This is labor only, by the way, and doesn’t include ceilings, trim or cost of the paint.”

Do it yourself and you’ll save big.

2. Rearrange what you have

Are you taking advantage of the focal point in each room? Whether it’s the fireplace or a view outside a window, arrange furniture so that it faces the focal point.

Not sure what qualifies as a room’s focal point? Check out the guide at pellabranch.com.

Try switching up furniture from one room and putting it in another. Sometimes a stylish nightstand makes a great end-table in the living room; or try putting a dresser in the dining room to act as a buffet.

If you need new furniture but the price just isn’t in your budget, think about slipcovering what you already have. Or, buy inexpensive used furniture and put your DIY skills to work.

While shopping for used furniture, don’t overlook Craigslist online. You can find almost anything there and sellers are likely to negotiate on prices.

3. Add Color

New throw pillows, window coverings and rugs are not only great ways to freshen a room but add color as well. The color-of-the-year, by the way is purple, so go on trend by adding pops of it in your accessories. See the shade (Ultra Violet) on pantone’s website.

Flowers and plants add a splash of color to any room, be it a huge bouquet in the entry or small nosegays in the bathrooms. If you lack a green thumb, silk flowers and plants are inexpensive alternatives.

4. Accessories

You don’t need to break the bank when shopping for accessory pieces and accents for your interior design project. If you find you need a few more accessories why not try flea markets and garage sales? Here’s what to keep an eye out for:

  • Mirrors will make any room look larger and lighter. Groupings of mirrors can be an even more dramatic way to open up a room.
  • Art work is another way to add color and interest as well as texture to your interior design.
  • Decorative pillows can be used in bedrooms and living rooms.
  • Look for items such as decorative plates to hang on the kitchen walls, vases, baskets, candle holders and sconces. Other fun things you might want to look for are drawer pulls and handles for your kitchen and bathroom cabinetry.

If you have the budget, by all means, hire a professional to give you some interior decorating ideas. If not, with a little effort you can do it yourself and save some money. Visit pinterest.com to find fellow DIYers and get tips.