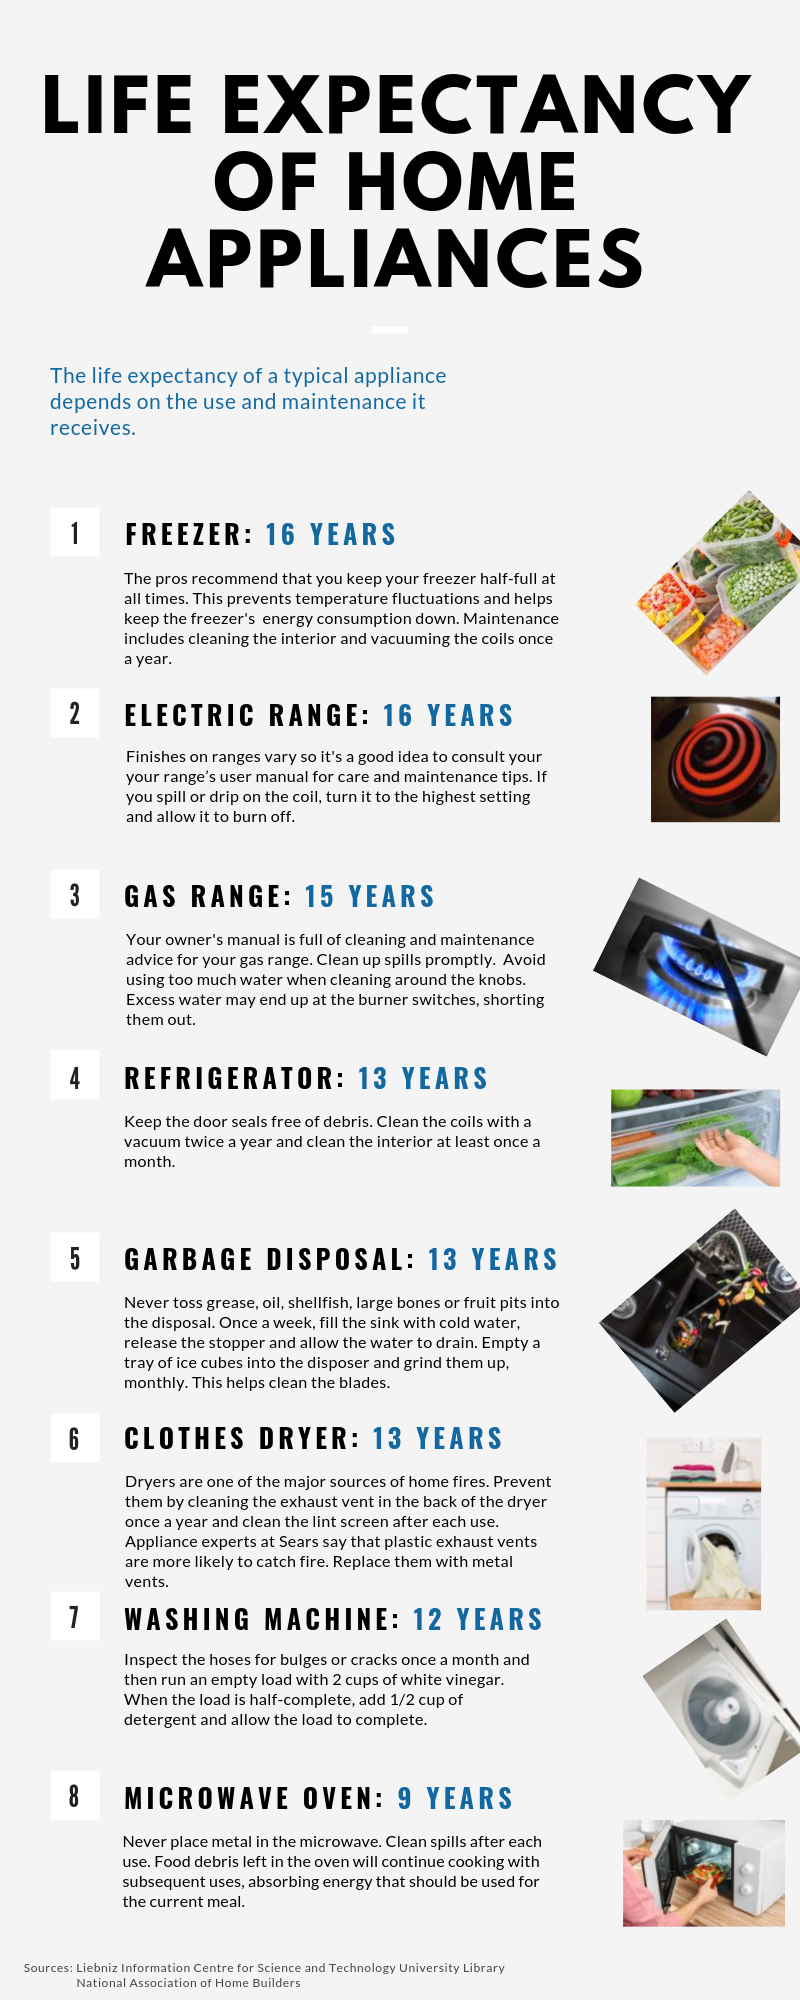

I don’t know about you, but my brain shuts down when the word “tax” is mentioned. I think many of us would rather have a root canal than talk taxes. So, let’s try to keep this light-hearted and hit just the basics.
Property taxes vary by the local government that imposes them and are based on the assessed value of your property.
According to WalletHub.com’s John S. Kiernan, folks in New Jersey pay the highest property taxes – 2.44 percent, while Hawaii’s homeowners pay the least, at 0.27 percent of assessed value.
Your property taxes, along with those of your neighbors, are used to fund schools, libraries, and other county and city services.
How Is Property Tax Determined?
Property taxes are usually, but not always, based on two factors:
- The value of the land you own.
- The value of any structures that sit on the land (often referred to as “improvements” to the land).
These two values are then fed into a pre-determined formula and out pops your property tax bill. Most municipalities reassess a property’s value every few years, some do it annually. This means that the amount of property tax you owe may change over time.
In some regions, property taxes are based on the market value of the land plus the replacement cost of the home, less “statutory depreciation.”
And many municipalities offer a tax exemption for all or part of the property taxes for certain groups of people, such as older homeowners or disabled veterans.
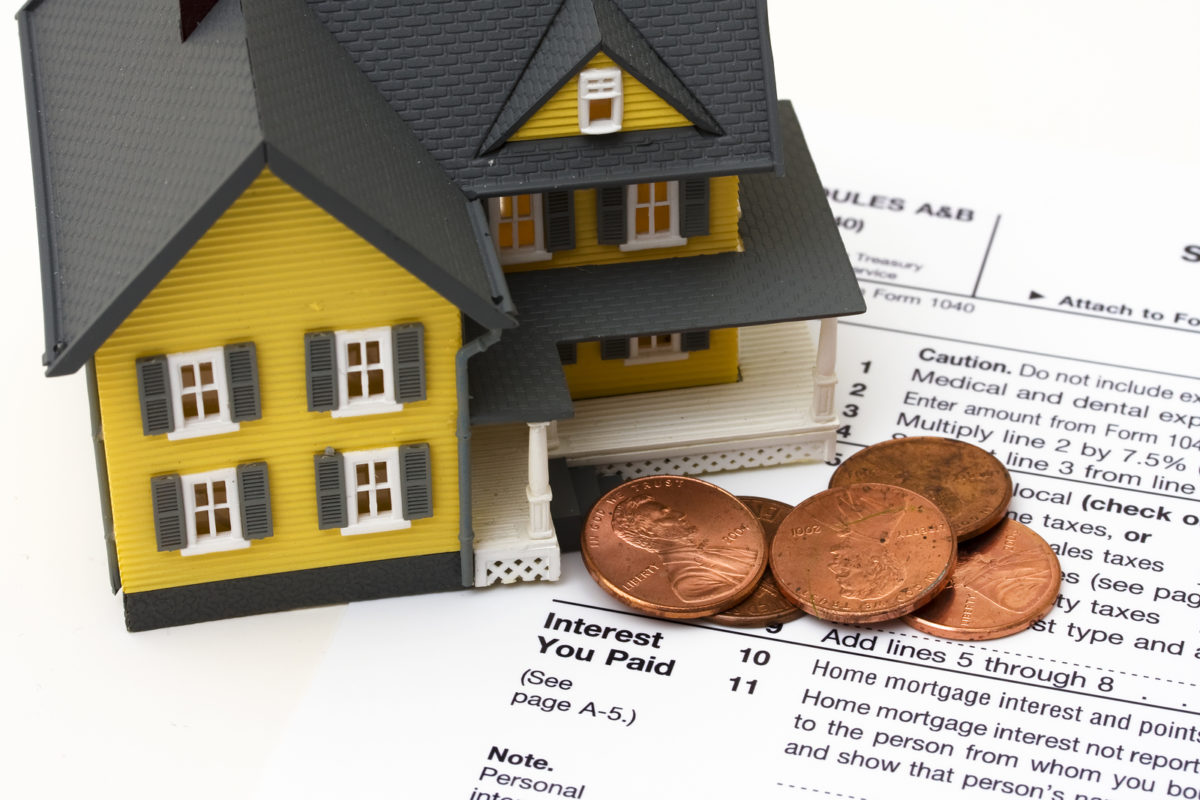
Deducting Property Taxes on your Tax Return
Tax laws change more often than the politicians who push for them, so it’s best to speak with your tax professional about where the deduction of your property taxes falls within the current tax code.
As of 2019, tax filers can deduct up to $10,000, or $5,000 if they’re married but filing separately.
This total is the maximum amount allowed for a combination of “your total state and local taxes, including taxes (or general sales taxes, if elected instead of income taxes), real estate taxes, and personal property taxes,” according to IRS Publication 530.
Again, speak with your tax specialist for the details.
How to Appeal your Property Tax Assessment
The housing market is a bit like a roller coaster, changing frequently, going up and down.
Therefore, it’s quite possible that your assessment is based on a market value that’s no longer valid.
If home values are rising quickly, such as they did over the past few years, you’ll want to keep quiet. Although your home’s market value is higher, your taxes may be based on a lower value, keeping them low.
When values are falling, however, you’ll want to ensure that your taxes are as well.
While the statistics vary according to region, an estimated 30 to 60 percent of homeowners in this country are over-taxed, according to the National Taxpayer’s Union.
Furthermore, homeowners who disagree with the assessor’s valuation of the house have a right to appeal a property tax assessment. Despite this, fewer than 5 percent actually appeal, even though most of those who do so eventually win.
The National Taxpayer’s Union offers a handy Homeowner’s Checklist, outlining the steps to take when filing a property tax assessment appeal.
Be aware that you are still required to pay the taxes when due, despite an open appeal. Penalties for nonpayment may include penalty and interest charges on the unpaid balance.
The assessor may also place a lien against the property and typically has the ability to seize and sell the property for unpaid taxes.
Always consult with your accountant or tax specialist if you have any questions about your property taxes.