Flood insurance: What you don’t know may be harmful to your pocketbook

about flood insurance

Ah, the paradox of water. We soak in it to soothe tired muscles, we relax to the sound of it falling on the roof, we frolic in it on the shores of lakes, rivers and oceans. Water nurtures life – without it we can’t survive.

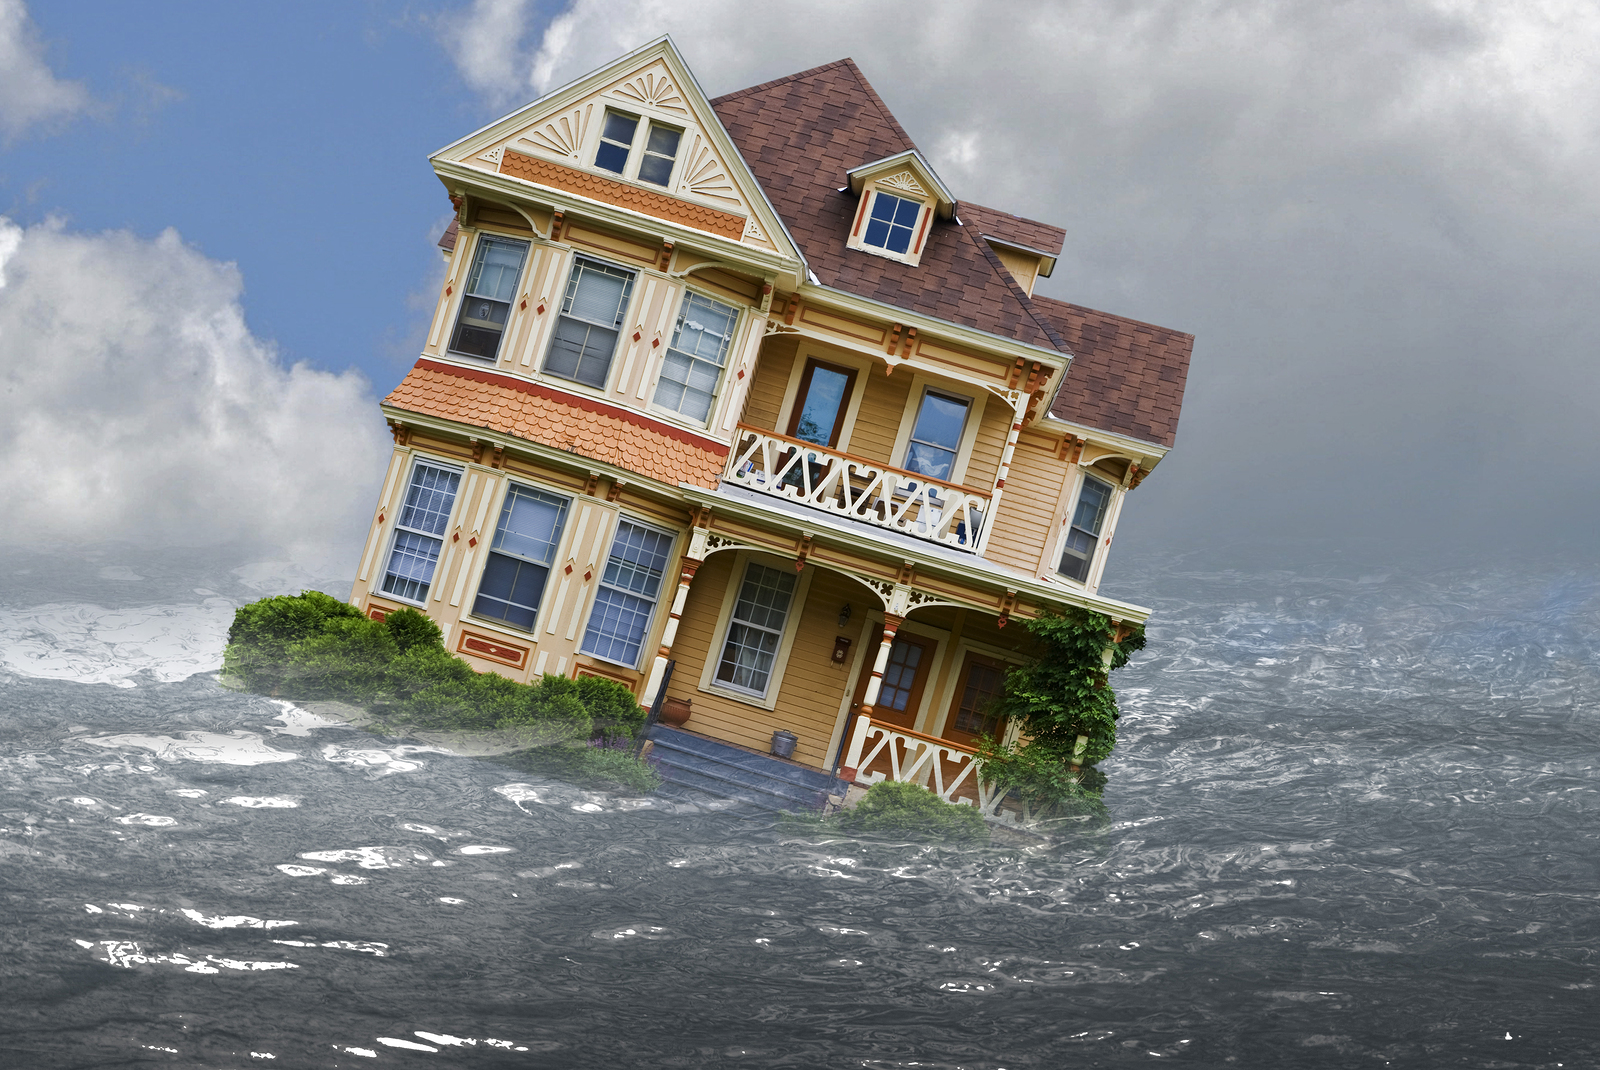
Yet it can also turn deadly. When winter snow storms cease, the threat of flooding increases as the snow begins to melt and the rivers and creeks begin to swell. This is when we witness how powerfully destructive water can be. Flood, in fact, is the number one disaster in the United States, costing nearly $2 billion in insurance claims each year. The average claim is $46,000, according to the National Flood Insurance Program (NFIP). Sadly, only 15 percent of homeowners carry flood insurance on their homes. If you aren’t among them, do you have a spare $46,000 lying around?

Now, not all homeowners need the extra coverage that flood insurance provides. How do you know if you’re among them? Let’s take a look at some common misconceptions that keep homeowners from buying the coverage that may save them from financial catastrophe.

My homeowners insurance policy covers flood damage

Oh, does it now? “Standard homeowners and renters insurance does not cover flood damage,” according to the Insurance Information Institute. You’ll need to purchase a separate policy to be covered for this disaster.

Even if you have flood insurance, by the way, revisit the policy at least once a year to ensure that it provides the right coverage for your current circumstances. NFIP, for instance, covers up to $250,000 for the home’s structure and, for personal possessions, $100,000. It is the latter coverage you want to keep an eye on. If you acquire expensive items that might be damaged or lost in a flood, you may need to increase your personal possessions coverage.

Keeping in mind as well that even just a minor water intrusion into the home can cause thousands of dollars in damage, flood insurance coverage becomes even more important.

Flood insurance is too costly

According to NFIP, you’ll pay an average of $650 a year for the peace of mind you’ll receive from carrying flood insurance. Compare that to the aforementioned average claim ($46,000) and the choice as to whether to purchase the insurance or not is quite clear.

My home isn’t located in a flood plain

When you buy a home it’s smart to look into whether or not it’s located in a flood plain. Be aware, however, that “Many conditions can cause flooding: spring thaws, heavy rains, hurricanes and the rapid accumulation of rain after a wildfire are just some of them,” according to the experts at Allstate Insurance. It can happen anywhere. At any time.

In fact, one in five claims for flood damage come from homeowners who live in areas deemed in moderate to low risk of flood, according to the Federal Emergency Management Agency (FEMA). The danger here is that lenders typically won’t require flood insurance on homes located in these lower-risk areas. It is up to the new homeowner to protect herself.

I can’t afford it now – I’ll wait until it appears I may need it

Would you wait until after your home burns down to try to purchase insurance? Of course not, and, according to FEMA, “There is usually a 30-day waiting period after premium payment before the [flood insurance] policy is effective.”

There are exceptions to the waiting period rule and you can read about them on FEMA’s website.

It’s difficult to think about paying extra for your homeowners insurance when you’re in the midst of the huge cash layout that a home purchase requires, but the consequences of not being prepared for a flood can be devastating. Research the area in which the home is located and weigh the risks. Visit the FEMA website for information from the Flood Map Service Center to help you decide.

Upgrade your bathroom on a shoestring

update your bathroom

Kitchens and bathrooms are the workhorses of the house. Every member of the family spends time in each room, numerous times a day and, over the years, both can become worn and drab. Sure, they could use a remodel, but with the average cost of a bathroom remodel at $9,275, you may want to consider a DIY makeover instead.

Whether you’re putting the home on the market or just want to give it a new feel, and a complete bathroom remodel is beyond your budget, take a look at some of the ideas we’ve put together to help you spruce it up without breaking your budget.

Clean it up

Sure, it’s a basic suggestion, but a clean slate will help you see exactly where you need to start on your bathroom makeover. Clean the bathroom from top (yes, even the light bulbs can use a good dusting) to bottom.

Rid the counters of the detritus that typically collects there – the cosmetics, blow dryer, toothpaste and medicine tubes and bottles. If it’s not decorative, put it in a cupboard.

Take down the shower curtain and liner, remove throw rugs and towels and wash them if you’ll be keeping them.

Paper or paint?

What you do to your walls can be a game changer. Paint or wallpaper will instantly transform the space in a variety of ways, from making a tiny bathroom feel roomier to giving it an entirely different feel. Color, whether in paint or paper form, works wonders.

There are advantages and disadvantages to both wallpaper and paint, so take some time to consider carefully which you’ll use. Wallpaper is harder to work with than paint and it’s much harder to remove when you (or a homebuyer) decide they no longer want it. The advantage of wallpaper, however, is that it can provide texture and patterns that are much harder to achieve with paint.

Of course there are other wall treatments to consider if you’re not on a tight budget. These include shiplap, board and batten and others.

Whichever you choose, the walls are the second task after cleaning.

Shed some new light

New home builders aren’t particularly knowledgeable about proper lighting techniques. The ubiquitous Hollywood lighting strips in bathrooms are a perfect example of this. Women, especially, rely on proper lighting in the bathroom when applying cosmetics and lighting above the mirror is the absolute worse for that purpose, according to lighting experts.

These experts recommend attaching lighting sconces at eye-level on each side of the mirror. So, consider this when purchasing new lighting for the bathroom.

Update accessories

Depending on your budget, new accessories can include items as small (but with a big impact) as new throw rugs to a new mirror and faucets. Consider at least buying a snappy shower curtain and coordinating towels and rugs.

Ditch the plastic switch covers for some of the new ones that come in a wide range of finishes, such as aged bronze and brushed nickel. With a bit larger budget, you can quickly add new life to the bathroom by replacing the drawer pulls and cabinet door knobs to match the finish of the switch plates.

Finally, don’t forget those walls you worked so hard on – consider adorning them with artwork

Most homeowners spend between $5,534 and $13,040 to remodel their bathrooms, according to HomeAdvisor. With a little creativity and far less money, you can give yours a cosmetic makeover in just a weekend.

Think a whole-house inspection is enough?

home inspection

Due diligence: it’s a fancy way of saying that a homebuyer should not depend on the word of the seller (even though, legally, the seller must reveal all known defects in the home) but has an obligation to thoroughly investigate the property. The due diligence period typically runs from the time the purchase contract is signed until a date mutually agreed upon by the buyer and the seller.

Due diligence is something far too many homebuyers take lightly and it’s a pity. Not only will the process ensure that the home is in acceptable condition, but proof that you performed thorough due diligence will be required should you end up in court with the seller.

Any home may be hiding an expensive secret and it’s up to you to get it to spill the beans. Following you’ll find a few of the more common home inspections buyers perform during the due diligence period.

The whole-house inspection

Call this one the mack-daddy of inspections; it’s the one the real estate industry insists must be performed. Carried out by a professional, all of the home’s systems will be checked, from the HVAC to plumbing and electrical. Remember, however, that this is a visual inspection. The inspector cannot tell you what might be hiding behind the walls or in areas of the home’s system that aren’t visible to the naked eye.

The inspector will also make note of potential problems – those that may occur in the near future. Examples of this include faulty grading of the landscaping and possible moisture intrusion.

“Conditions at a home for sale can change radically in only a day or two, so a home inspection is not meant to guarantee what condition a home will be in when the transaction closes,” claims Nick Gromicko and Kenton Shepard of the International Association of Home Inspectors (InterNACHI) “It’s not uncommon for conditions to change between the time of the inspection and the closing date,” they conclude.

The organization offers an excellent resource about what to expect from a home inspection on its website.

Pest inspection

Some creepy crawlies are benign – staying put in their hiding places, causing no problems. Others, however, can wreak enough havoc to bring a home crumbling down around its occupants. These are wood-boring insects, such as powder post beetles, carpenter ants and termites. Then there are the fungal organisms that cause rot in the home’s timbers, which may eventually turn brittle and decay into powder.

Unless you know what to look for, evidence of a pest infestation and even the damage caused by these pests can be difficult to find. The fix, when caught early, is far less expensive than if the problem is left to fester. Most homeowners in the U.S. spend between $237 to $847 for termite control service. An extensive infestation, however, can be substantially more expensive to cure.

Well and septic tests

Purchasing rural property comes with a whole different set of considerations. Typically located far from city services, the drinking water is supplied via a well and sanitation from a cistern or septic system.

Since problems with both are almost impossible to ascertain to the non-professional, an inspection is always a good idea. The typical septic system inspection includes pumping out the system so that a visual inspection of the tank and distribution box can be performed. The inspector will look for signs of decay, including missing or broken parts. Americans typically pay between $280 and $523 to have a septic tank pumped. The price can be as low as $200 or as high as $900, according to homeadvisor.com.

Often, a percolation test (also known as a “perc test”) will be performed. The results will determine if the soil is adequately absorbing water which, in turn, tells the inspector if the lines are functioning properly.

Since the national average cost of well pump repairs is nearly $770, but may run as high as $2,000, if the home of your dreams’ primary water source is well water, it makes sense to have the system thoroughly checked before agreeing to go through with the purchase. Faulty pumps can cause the motor to stall or run continuously and low water pressure.

You’ll also want to have the water quality tested. Contaminants obviously pose a risk and you won’t necessarily see, taste or smell their presence. Your lender may require the tests but if it doesn’t, hire a professional. The U.S. Environmental Protection agency suggests that you have the water tested for nitrates/nitrites, coliform and pH. You may also want to look for copper, arsenic, radon and lead. Get more information from the EPA online, here.

Indoor air testing

Many homeowners routinely check the air in their homes in the winter for radon, an odorless, colorless radioactive gas. It enters the home through cracks and, as mentioned above, well water. Concentrations of the gas are naturally higher in the winter, when homes are buckled up tight against the elements.

Radon is a carcinogen and, in fact, is the second leading cause of lung cancer in the country, according to the National Cancer Institute.

Furthermore, the U.S. Surgeon General urges that all homes be tested. Testing can be performed with DIY test kits or by professionals. Mitigation, on the other hand, requires the help of a professional.

Lead-based paint

Homes built before 1978 were typically painted with products that contained lead. If you have small children, it is imperative that you determine if the home you hope to purchase has lead-based paint.

This is because, according to the United States Department of Housing and Urban Development, the absorption of lead into the body, either by breathing the dust or ingesting paint chips (which small children often do), may lead to damage to the liver, brain and other vital organs.

The EPA requires that homeowners disclose potential lead problems to buyers but not all homeowners are aware of what’s in the paint on their walls. So, if the home was built prior to 1978, be safe and have it tested for lead-based paint. You can learn more about this toxic paint on the EPA’s website.

Of course, these are not the only optional tests you may wish to have performed on the new home. If you suspect structural problems, consult with an engineer. Roof not up to snuff? Call a roofing professional. Due diligence is not only your legal obligation and helps protect your pocketbook, but it is important to your family’s health and safety as well.

The 2017 Baby Nursery

2017 baby nursery

If you hope to begin your family in your newly-purchased home, you’ll no doubt cast an eye toward which room will serve as a nursery. We thought it might be fun to take a look at how other parents are designing and decorating theirs, so we turned to the experts for the 2017 nursery trends and some safety tips.

From pastels to earthy, muted colors

Since the color scheme you choose is the basis of every design element in the nursery, consider your choice of paint color carefully. Last year, Pantone’s announcement of Serenity and Rose Quartz as the year’s colors ushered in a slew of nurseries swathed in peachy pink and lavender-blue tones. While pastels are still popular this year, soft, earthy tones are being introduced — think beige, turquoise, olive and terracotta.

This year, Pantone gives us “Greenery” as 2017’s color of the year. Rather than use it on the walls, however, it’s more suited to providing “a vibrant pop of color to increase the interest of the room,” suggests Belivin’Design. They go on to caution that “if you want your kids to fall asleep at some point, . . .don’t get carried away with it.”

If you want to stick with pastels, consider Dunn Edwards’ Tranquil Eve, a soft lavender or Benjamin Moore’s  Seaside Retreat, a beach-inspired blue.

The crib as a design statement

They’re called “statement cribs,” and you’ll find examples online at projectnursery.com, potterbarnkids.com, wayfair.com and the pricey but gorgeous Pod crib from Ubabub.

The cribs, typically roomy with asymmetric lines, are crafted from modern materials, such as acrylic (easy clean-up!). Many have gorgeous canopies and, although matching furniture in the nursery was declared passé last year, it you want them, you’ll find armoires, chairs and more to match your modern crib.

Nursery safety

Toxic compounds affect infants and newborns far more quickly than older children, according to the Centers for Disease Control and Prevention. Although confined by a crib or your arms now, that little one will soon be crawling and exploring every possible part of the nursery. And, as we all know, what they pick up typically ends up in their mouths.

When choosing paint, consider purchasing low VOC – short for volatile organic compound – paint. “Volatile Organic Compounds (VOC) are emitted by different gases and solids such as paints and lacquers, paint strippers, cleaning supplies, pesticides, building materials and furnishings,” according to the experts at Home Depot. The U.S. Environmental Protection Agency says that some organic pollutant concentrations are two to five times higher inside our homes than outside. A low or zero VOC paint will help maintain healthy indoor air in the nursery.

Carpets are also guilty of emitting toxicants in the home, especially newly laid synthetic types. It’s known as “off-gassing,” and although the largest release occurs within the first 72 hours after the carpet is laid, low levels will continue to off-gas for up to five years, according to best-selling author, Dr. Joseph Mercola. “The ‘new carpet’ aroma is the odor of 4-PC off-gassing, which is an eye and respiratory-tract irritant that may also affect the central nervous system. The adhesive used to affix the carpet to the floor typically contains benzene and toluene, some of the most harmful VOCs,” he cautions.

The solution? Ditch the carpet and install tile, hardwood or laminate flooring and scatter throw rugs to keep the tiny one warm while exploring.

How to determine whether that house you have your eye on will increase in value

determine the future value of a home

Impulse buying. Think it only applies to the grocery store? Sadly, folks who have a tendency to live for today often choose even financial investments impulsively. We see it frequently in the real estate industry—homebuyers that allow their emotions to rule the process instead of looking at a house for what it truly represents – an investment.

Now, we have nothing against spontaneous living; as long as you allow thoughts of the future to intrude a bit when considering purchasing a particular home.

Financial considerations in the home buying process go far beyond whether or not the home is priced appropriately for the neighborhood and the market and whether or not you can negotiate a better deal. While we can’t give you a crystal ball to divine the home’s future value, we urge you to at least consider this aspect before signing a contract to purchase it.

So, what determines the future value of a home?

The factors used to determine a home’s current market value can also be considered when trying to determine whether or not a particular home will hold that value or even provide an increase. These factors include location, land values, market conditions, the economy, condition, size, age and layout of the home and updates performed.

The two predictors to concentrate most on are land values and location. The former is a finite resource so it will never be subjected to the supply side of the supply-demand formula. Sure, demand for land will rise and fall, but it will do so according to how much is available and we can never manufacture more. Unless you live on the Big Island in Hawaii, where mother nature is busy pumping out additional land, what we see is what we get.

The location of a home has an enormous impact on its value. From where it’s located within a town or city to the street it sits on and even the plot of land on which it’s situated, location trumps pretty much everything else.

As long as couples produce children, the American cul-de-sac will be in demand for families, condos situated to take advantage of city views will be worth more than those without and an exceptional school nearby will help a home hold its market value.

How to use this information when home shopping

 Fight those emotional responses when house hunting. Yes, we get that it’s exciting to finally find the kitchen of your dreams in the 100th house you’ve viewed. But, unless you plan on living in the home until you die, you will sell it someday and even the most impressive chef’s kitchen won’t boost the home’s value if it has other factors working against it.

Then, do some investigating. Start with the location and check municipal records to learn of any land use changes or other plans that may have an impact on the future value of the home. Consider the following as red flags and a possible drain on value:


  • The rerouting of traffic through the neighborhood in response to new development (commercial or residential) nearby.


  • Plans for a nearby hospital, shooting range, power plant or waste facility.


  • The neighborhood’s zoning. A multifamily designation may mean that you will one day be living next to an apartment building.


  • Check local regulations if you’re concerned about the possibility of losing your view or even the amount of sunlight your landscaping receives if your neighbor decides to add a second story to his or her home. A view is worth money – lose it and you lose value.

If the home is near a school, check its rankings. Homes near exceptional schools are in high demand and hold their value better than homes near poor-performing schools. Other nearby amenities that boost home values include:


  • Parks – passive use parks (those without playgrounds, ball fields, etc.) tend to raise home values while active use (mainly because of the traffic and noise they attract) do not.


  • “Active” transportation amenities, such as bike lanes, walking and biking paths and trails — homes in what are considered bike-able and walkable neighborhoods are worth far more than homes that lack these features.


  • Nearby Walmart, Target, Starbucks or Whole Foods – these businesses actually have a positive impact on home values. Some however, such as Starbucks, have shown to cause a corresponding rise in property taxes.


Check the HOA documents – if the home is located in a managed community, the Homeowner Association documents will let you know how residents are allowed to use the neighborhood. From landscaping requirements to parking prohibitions, this is important information that my impact the home’s future value, either negatively or positively.

Advice about how to improve a home before putting it on the market is great, but if the home’s location is undesirable due to any number of factors, all the improvements known to man and woman won’t raise its value. The time to ensure you’ll realize a return on your investment is before you invest the money.

Gardening ideas for a condo balcony

balcony gardening

Garden envy – a common malady of the condo dweller who longs for a patch of dirt in which to work his or her botanic magic. The arrival of spring only worsens the symptoms but it doesn’t have to. Whether your condo has a balcony or a patio or even just a front porch, you can garden; it just takes fewer lofty dreams and a bit of creativity.

It’s all about the light

The first consideration when creating your balcony paradise is to ascertain how much sun the area gets. This means watching it over the course of the day. Does the sun shine on the area most of the day, half of the day or not at all? Morning sun or afternoon sun?

Yes, shady spots are challenging for most plants to thrive in, but not all of them. Forests are full of specimens that do quite well in the shade of giant trees. The trick is to do some research or speak with a gardening professional at the local nursery. Remember, not only do you need to find plants that eschew sunlight, but they must also be suited to growing in a container.

Some to consider for your shade garden include the gorgeous foliage-bearing coleus (Coleus spp.), tuberous begonia (Begonia Tuberosa Group), the adorable fuschia (Fuschia spp.) and coral bells (Heuchera Americana).

Gardens provide privacy

Condo living is not especially known for its privacy. Whether it’s an adjoining building that looks directly onto your balcony or patio or your unit is located on the street, folks can (and most likely will) peer in. Rather than tolerate that living-in-a-fishbowl feeling, use your mini-garden to help provide privacy.

Look for tall, dense plants and learn how to strategically space what you grow. Plants with a shorter silhouette can also be used if you elevate them. Hit the flea markets or Craigslist to shop for used end tables, nightstands, shelving units or any other item that can be used to raise the shorter plants. The bonus is that these repurposed items act as decorative hardscape elements.

Vegetables can be decorative

Urban gardeners are well aware that one need not live on a farm or even have a backyard to grow a nice crop of vegetables. Vertical gardening is one of the biggest trends in the gardening world and a boon to the micro-gardener. Get ideas online at Pinterest, Popular Mechanics (an excellent how-to article) and HGTV.

Don’t want to go vertical? Grow bags come in all sizes and the deeper ones will even accommodate a hefty potato crop. Peppers and bush beans take up little space and cucumbers, tomatoes and squash can be grown upright. Then there are the fruit trees bred specifically for container growth. These include dwarf varieties of blueberries, lemons, limes and mandarins.

Harvest to Table offers a handy guide to determine which pot size to choose for specific vegetables and Texas A&M University published on its website a list of easy-to-grow container vegetables.

Don’t forget the accessories

Hardscape doesn’t merely describe walkways and other paved areas, but has grown to encompass just about any garden feature that isn’t organic. Aside from seating for your guests, consider adding a small fountain if you have room, lighting (a lamppost or string of lights), statues and even a small birdbath will all add charm and interest to your mini-garden.

Spring has sprung – how’s your garden growing?

3 things to know about buying new construction

new construction house

When homebuilders stop building, inventories of homes for sale dwindle and we end up in a tight sellers’ market. While there are many reasons for the recent slowdown in new home construction (high material costs, unavailability of labor, etc.), there is good news on the horizon: they are building again.

In fact, new home sales increased more than 6 percent in February, which is “nearly 13 percent higher than February of last year,” according to AP economics writers Christopher S. Rugaber and Josh Boak.

That makes this the perfect time to learn the ins and outs of buying a newly constructed home. Sure, a lot of the process is similar to buying an existing home, but, if you’re considering a new home, it’s critical that you understand some of the differences – critical to both your sanity and your pocketbook.

1.The builder has an agent and a lender . . .do you?

If you’ve ever visited a new home community, you no doubt noticed the fencing that corrals folks to ensure they visit the builder’s office prior to viewing the model homes. The greeter inside this office is typically a licensed real estate agent, employed by the builder or developer. His or her job is to not only let you know all the fabulous features the homes and the community offer, but to peel off those potential buyers who aren’t working with another agent.

While it’s often legal for one agent to represent both the seller (in this case, the builder or developer) and the buyer, and this “dual agency” situation seems like a handy solution for you, be wary. Dual agents are prohibited from representing one party exclusively so you’ll receive only limited representation.

Since the seller is paying for your agent’s services, your best bet is to go into the situation with your own representative. So, when the builder’s agent asks you if you’re working with an agent, let him or her know that you are and you can move on to view those amazing new homes.

Whether or not you should work with the builder’s preferred lender may take some research. Often that lender will be able to save you money on your mortgage but the only way to know for certain is to obtain quotes from other lenders and compare them all.

2. Research is a bit more challenging

The initial steps in the house hunt, after seeing a lender, include deciding where you want to live (at the neighborhood level) and in what type of a home. When the neighborhood is brand new, you’ll be presented with several challenges not present when purchasing an existing home. Keep the following in mind when researching homes and communities

  • Even new homes can have problems. Visit the existing home areas of new communities and do stop and chat with any residents you see. Ask about their experience with their homes and with the neighborhood overall.
  • Ask the builder’s agent about the Homeowners Association (HOA) and how much the monthly fee will be. Ask to the see the HOA documents, such as the CC&Rs – the covenants conditions and restrictions. Run them by your attorney if there is anything you don’t understand.
  • Determine if Internet and TV service will be available in the community as of your expected move-in date.
  • The Better Business Bureau is a valuable resource. Use it to research the developer/builder.
  • Visit the city planning office to determine what they have planned for the area surrounding the community.
  • If noise bothers you, check the neighborhood’s proximity to busy roads, the airport flight pattern and the number of young people residing there.
  • Although it is great to be one of the “founding” fathers or mothers of a new neighborhood, keep in mind that if you move in before the neighborhood is complete you’ll be forced to live with the dust and noise of construction work for a while.

3. New home upgrades can be confusing

As you tour the model homes, unless you purchase identical upgrades, your home will not look anything like the model. In fact, it will be a bare shell, with the least expensive flooring, appliances and fixtures. Find out exactly what comes with the basic home price. With that in mind, you can add upgrades and keep within your budget.

Typically upgrades performed by the builder during the construction process are more expensive than if you hire someone to do them later on. The advantage of having them done during construction, though, is that you can roll the costs into the loan.

Let’s take a look at three of the most popular builder upgrades.

  • The lot — The one upgrade that you can be assured will hold its value is land. Unless you live in Hawaii, no more land is being created. A larger lot, or a better-located lot (if you can afford it), is worth the money it costs.
  • Structural upgrades — Creating a three-car instead of a two-car garage or adding an extra bathroom are popular upgrades because of the expense homeowners would incur if they saved these upgrades for after they close escrow.
  • Plumbing and electrical — Anything that will help save money while you live in the home is worth considering. For instance, a super-efficient HVAC system and tankless water heater are worth considering purchasing as an upgrade.


Think about your wants and needs and whether any would be costlier to add once the home is built. Any time a wall needs to be opened you can expect a huge mess that costs lots of money.

Lock down your furniture for kids’ safety

anchor furniture to wall

Even brand-new moms know to put those plastic things in electrical outlets and to child-proof cupboards that contain hazardous materials. What is less well known, however, is that the furniture in your home creates an enormous hazard to toddlers who love nothing more than to throw open dresser drawers to facilitate their scrambling and climbing endeavors.

In January, NBC News posted a horrifying video of two Utah toddlers doing just that. Thankfully, the outcome for these munchkins wasn’t disastrous, but it has been for more than 40 children in the past 27 years, according to foxnews.com. Six of those children were killed when furniture toppled over on them, trapping them underneath.

In fact, the federal government claims that “Every 24 minutes, tipped furniture or a falling TV sends an injured child to the emergency room.”

In June of last year, Swedish retailer Ikea recalled 29 million chests and dressers which, if not anchored to a wall, pose “a tip-over and entrapment hazard that can result in death or injuries to children.”

Preventing furniture tip-overs is easy and inexpensive.

Secure the TVs

A child in pursuit of his or her favorite cartoon program will stop at nothing to get that TV turned on. This may include using the drawers of the TV stand as a ladder. The experts at anchorit.gov suggest using sturdy furniture to hold the CRT TV or, even better, something that sits low to the floor so the child won’t need to climb to reach the power button. Flat-screen TVs should be mounted to the wall securely.

If you must keep the TV up high, anchor it to the wall to prevent it from tipping and falling.

Furniture anchoring

All bookcases, dressers, appliances and other items a toddler may climb should be securely anchored into a wall stud. You can purchase furniture anchors and restraints at large hardware retailers, baby supply stores (such as Babies”R”Us) and at big-box department stores. If you are anchoring Ikea furniture, the retailer offers anchor kits free of charge.

Safety experts suggest that you avoid restraints that utilize plastic cable ties as these can degrade over time and aren’t quite as strong as one might think. Use angle braces, such as those used for earthquake safety.

Don’t skimp on the number of braces used, either. Use at least two for each appliance or piece of furniture and install them into a thick, solid piece of wood near the top of the item and then into a wall stud.  Ikea offers a “wall anchoring guide” on the company’s website.

Follow up on your safety precautions by checking the restraints on a monthly basis to ensure they remain tight.

Additional considerations

Busy Moms and Dads know how easy it is to scoop up a toy and stick it on top of the TV or other tall piece of furniture until it can be put in its proper place later on. Frighteningly, it takes only seconds for a toddler to notice it, become curious and start climbing to reach it. Avoid temptations – put away items that may cause curiosity or, if they are toddler-appropriate, place them at kid-level.

Hide electrical cords or place them out of the reach of your children.

Kids love to explore and, with just a few dollars and a half hour of your time, they can do so safely in the home.

5 tips for choosing a closing date

choose a closing date

One of the decisions you’ll need to make when you make an offer to purchase a home is the closing date. Yes, it goes into the contract and all efforts, from the time the contract is accepted by the seller until you’re handed the keys, are aimed at meeting this date.

If you are the seller, by the way, you should know that the closing date, like many of the contract terms, is negotiable, as long as the buyer’s lender can fund the loan by the chosen date. We have often seen protracted negotiations over closing dates since both the buyer and the seller have a vested interest in this contract clause.

That said, there are several things to consider when choosing a closing date aside from when your lease terminates (if you are currently renting) and the estimated date on which the lender will be ready to fund the loan.

1.Since prepaid interest, which is paid at closing, is prorated from the date you close to the end of the month, you will pay less if you close at the end of the month, a good choice for the cash-strapped homebuyer.

For instance, suppose your loan amount is $300,000 at 6 percent interest and the sale closed on January 10. You will be required to pay for 22 days of interest, or $1,085.04. If you close on           the 25th, however, you will only pay six days of interest, or $295.92.

Keep in mind, however, that there are many cash-poor homebuyers, or those that are hoping to hang on to their cash to use to fix up the new home, so there is typically a backlog of closings         toward the end of each month.

2.If you’re worried about cash flow, close early in the month. Yes, you’ll pay more in pre-paid interest, as the above example shows, but because interest in paid in arrears, you won’t have a house payment for slightly less than two months. Suppose you close on January 5. The prepaid interest covers you until January 31 and, since interest is charged in arrears, you won’t have a house payment for February until March 1, giving your cash flow some breathing room.

3.Avoid closing during the winter holidays, especially near Christmas and the week before New Year’s Day. Most of the real estate industry closes up shop during this week so the chances of closing on time are diminished. Plus, there’s enough stress around the winter holidays without adding closing on a loan and moving into a new house to the mix.

4.If you want to be able to move in over the weekend, close by at least Wednesday. This gives the title company time to get the deed on record and you’ll have keys in hand in time to move in on Friday or Saturday.

5.If you are also selling a home, consider your existing loan. The interest rate may be higher than that of the new loan so it may be better to choose your closing date based on that fact – close as soon as possible.

By the way, if you’ll be using an FHA-backed loan, you will be expected to pay 30 days of interest regardless of when in the month you close. In this case it may be better to close at the end of the month since you are paying for it anyway.

Tip: The closing date and the occupancy date are not necessarily the same. The date on which you close is the date on which the ownership of the home is transferred to you yet occupancy typically doesn’t take place until after the sale goes on record at the country recorder’s office. This date, like most in the contract, is negotiable. Some sellers allow the buyer to move in prior to closing, but there are insurance issues to consider with this scenario. Then there are the sellers who may need more time to move out and need to “rent back” the home. Ensure you consider all your options when choosing the occupancy date.


Make your neighbors disappear with privacy landscaping

privacy screening for your yard

When looking at homes for sale, how much is privacy worth to you? If you place a premium on not feeling like you live in a fishbowl, but can only afford to purchase a home in developments where the builder obviously tried to cram as many homes onto the parcel as possible, we may just have a solution for you: landscaping. Or, to be more precise, creative landscaping that assures privacy.

How much privacy do you want?

Before you can come up with a landscaping plan you’ll need to determine just how much solitude you want and need. The plan will be significantly more complicated and expensive if all four sides of the home need to be screened than if you only require something to block out the nosy neighbors behind the home.

Do you want the home completely shielded from view or is a lighter touch sufficient? Dense privet hedges will screen out most views while a combination of tall perennials and trees, or widely spaced trees will ensure privacy but with a softer silhouette.

Make the plan

Take measurements of the space you need to fill. Knowing the size of the space will help you choose the appropriate plants. Measure not only the length of the area but approximate height of your barrier.

Choose the right plants

American and Green Giant arborvitae (40 to 60 feet tall in maturity) are popular and will do the trick for those who need something tall, according to the National Arbor Day Foundation.

If something more shrub-like will suffice, consider two other arborvitae – Emerald and Nigra. The former grows to 15 feet in height while the latter may reach 30 feet tall. Both can be pruned to the height you desire.

Ensure that the tree, shrub or hedge that you purchase is evergreen or you’ll lose your privacy in the winter. If you prefer deciduous plants, the experts at Colorado State University suggest you choose those with lots of stems and branches to help provide a screen even after the plant loses its foliage. Rose of Sharon (Hibiscus syriacus) is one suggestion.

The eventual height and width of each plant is important, but so is its hardiness zone. Assure that what you choose is adapted to our area. Native plants are the ideal choice.

Landscaping narrow areas

Few homeowners feel comfortable being greeted by their neighbor’s face as they make their morning coffee. If the area between your house and the neighbor’s is narrow, fill it with quick-growing, columnar trees. Although Italian cypress (Cupressus sempervirens) remains slender, it will grow quickly (up to 3 feet per year) to be quite tall. Plant several, 5 to 6 feet apart, for a dense screen, or consider native vines with lattice, painted an attractive color, on which to climb.

Privacy for front and backyards

Typically, it’s the front and backyards that require blocking from prying eyes. And, since these spaces are larger than side yards, landscaping can be pricey. Consider using a mix of trees and shrubs with a few perennials thrown in for interest.

Blocking the bird’s eye view

Providing the privacy you crave is a bit trickier when the neighbor’s home looks down on yours. Consider planting trees with wide canopies, such as American hornbeam (Carpinus caroliniana) American chestnut (Castanea dentate), or Modesto ash (Fraxinus velutina). For year-round privacy, use latticework or an arbor and soften the lines with a vine.

Keeping it legal

If the home you’re considering buying, or the one in which you’re currently living is governed by a Homeowners Association, you’ll need to ensure that the privacy landscaping you want abides by the HOA rules. You’ll typically find landscaping rules in the CC&R section of the HOA documents.