3 easy ways to live a greener life

Green – a word that can indicate envy or inexperience, it can conjure up a frog named Kermit, or immature fruit.

It’s also a descriptor of a lifestyle that is concerned with environmentalism.

While many Americans take this concern to the max, others adopt pieces of a green lifestyle. This way, they can do their part to help the environment while saving money in the process.

A Home Improvement Research Institute (HIRI) study found that more than 40% of us will purchase green products for the home. If you’re among this group, read on to learn three easy ways to make your life at home a bit greener.

1. Go green when you clean

You’ll find lots of cleaning products at the supermarket, labeled “eco-friendly” or “green.” Do they work as well as traditional cleaners?

“Indeed they do, according to according to research analyst Samara Geller with the Environmental Working Group (EWG). “They have been demonstrated to be just as effective at tackling various cleaning chores as traditional cleaning products,” she claims.

But not all so-called eco-friendly products are created equal and even the experts at EWG.org admit that. In fact, they recommend that when shopping for cleaners to use in the home, ensure that they are:

  • Certified by Green Seal or Ecologo
  • Fragrance-free
  • Free of quaternary ammonium compounds or triclosan

Go online to the Environmental Working Group’s website to find out which cleaners they recommend.

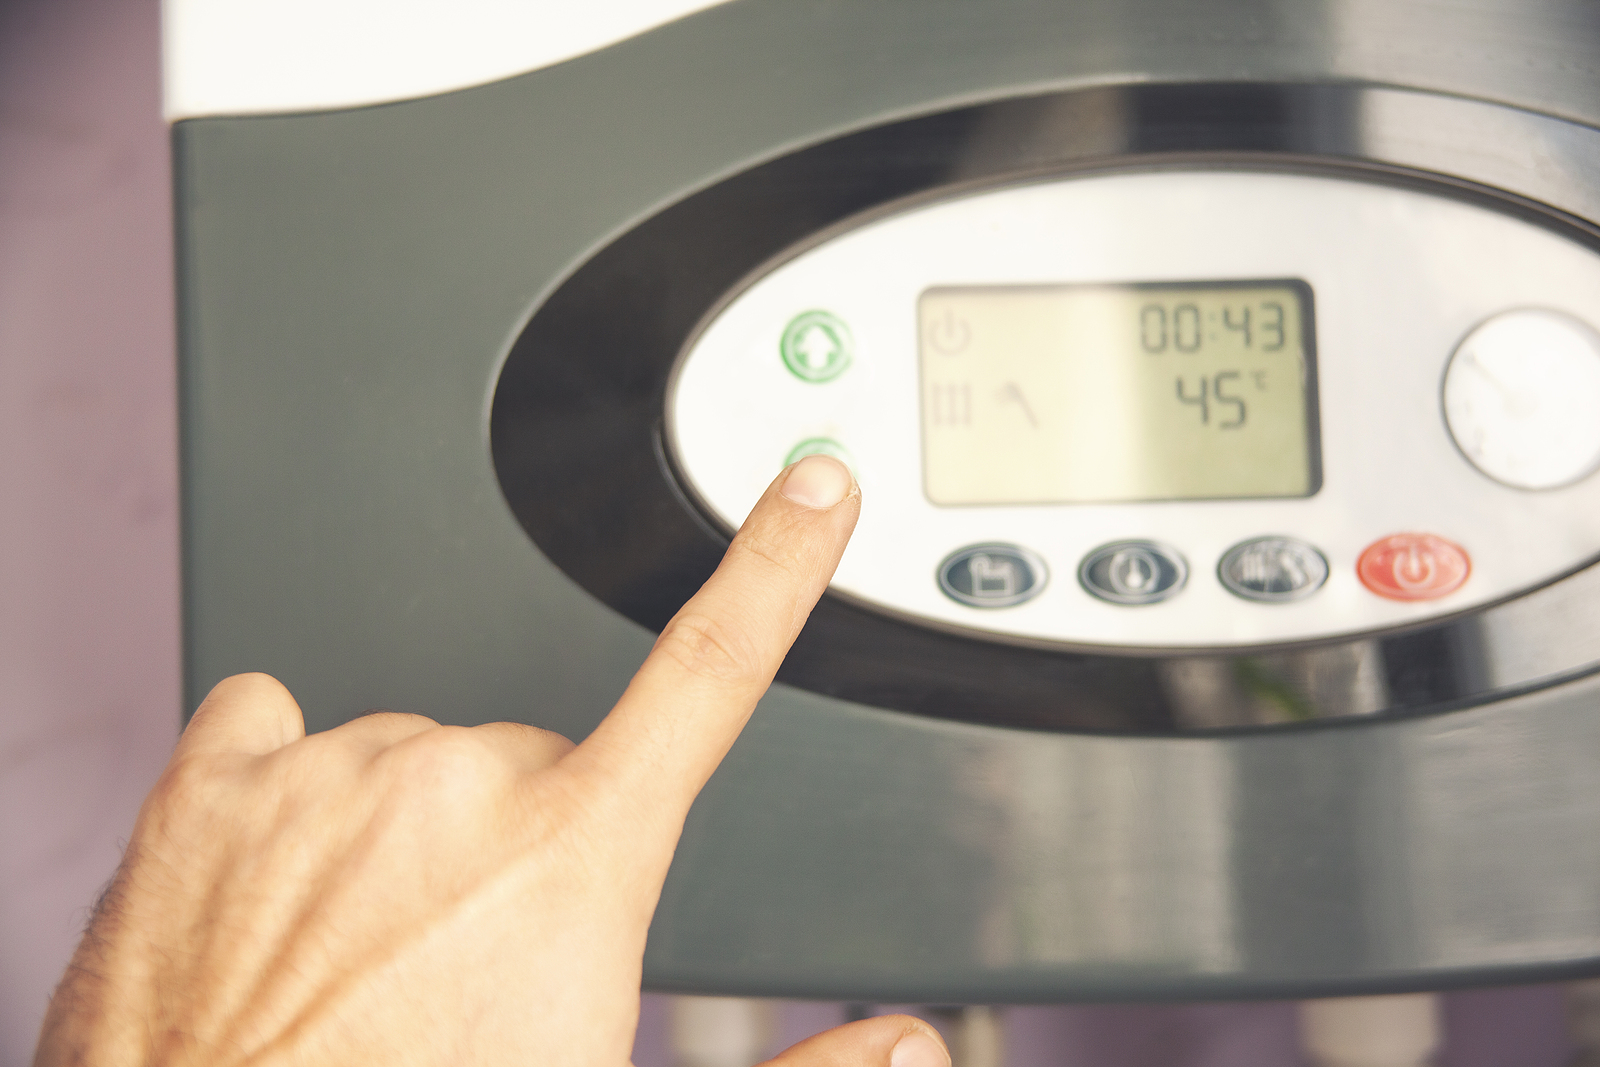
2. Save the environment by installing a new thermostat

If you haven’t read up on programmable thermostats, what are you waiting for? Basically, you program in the times you want the home’s temperature to warm or cool and to regulate what it should do when nobody is at home.

Look for a “smart thermostat,” which will “learn” your heating and cooling habits and you can control it from an app.

The folks at the U.S. Department of Energy find that you could save up to 10% on cooling and heating your home just by dialing back the thermostat 7 degrees while you’re at work.

3. Save  with this simple tip

What’s simpler than changing a light bulb? If you ensure that the new bulbs are ENERGY STAR® certified you’ll save up to 90% in energy consumption, according to the owner of the ENERGY STAR registered trademark, the EPA.

Take these three steps to a greener home to help protect your family, your pocketbook and the environment.

You may not notice them, but your home has eyesores

You can clean your home like a professional. Organize and decorate ‘til the cows come home. Nine times out of 10, however, what your guests will notice first are those little eyesores that you’ve grown so accustomed to that you no longer notice them.

It’s the snake’s nest of cables and cords near the TV and/or the computer, the art work hung too high and the car keys and mail haphazardly thrown on a table or counter. The neater and cleaner a home is, the more a guest’s eyes will be drawn to the eyesores; they’re out of place and catch our eyes.

We rounded up some of the more common household eyesores and the solutions for them. Easy DIY projects, you can get started on them this weekend.

1. Cords and cables galore

They’re found in the kitchen, living room, bedroom, office and even in the exercise room. Wherever there are electronics you’ll find cords, chargers and cables, typically in a tangled mess.

Even one cord, say from the cable outlet to the TV mounted high on the wall, can be an eyesore.

Thankfully, there are some pretty nifty inventions to help you hide the mess.

Check out the cable management boxes at Amazon.com. We like the D-Line Cable Management Box for its understated branding, making it a bit more stylish than the others.

Other ideas include:

  • Clipping the mess to the back of furniture. Amazon carries non-damaging plastic clips for this purpose.
  • Hide that cord from the wall-mounted TV with a cord concealer kit.
  • Check out the Cable Slinky, a rubber, spiral cord wrap.
  • For cords and cables that snake through the home, consider baseboard cord channels. These self-adhesive channels are attached at the bottom of baseboards for a seamless solution to the cord clutter problem.
  • Finally, check out this ingenious solution (fake books!) from an Etsy seller.

2.Heating/cooling ugliness

Used only a few months out of the year, the window-installed AC unit can become an eyesore. We found several projects that will help you conceal it and its cousin the radiator, during the periods they aren’t in use.

  • An adorable DIY window AC unit enclosure that cost the creator only $30 in supplies. Find it online at vintagemeetsglam.com.
  • Wall-mounted radiators? We love this clever DIY solution we found at thespruce.com.
  • Camouflage air vent returns with covers. You can buy them online at beaux-artsclassicproducts.com  or fancyvents.com.
  • If you’re handy with tools, you may want to try this DIY hide-the-AC-unit shoe rack project at engineeryourspace.com.
  • Love Ikea hacks as much as we do? Check out this amazing, trendy project to hide the AC unit at popsugar.com.

3. Dress up the box spring mattress

Sure, you can buy a dust ruffle to hide the box spring mattress in the guest bedroom, but there are more on-trend solutions you can try.

DIY the project with stunning fabric and a staple gun. Get the how-to at rainonatinroof.com or thisoldhouse.com.

Earlier we touched on one eyesore that drives designers nuts and is an eyesore to visitors: pictures hung too high. So, just how high on the wall should you hang them? Find out from bobvila.com.


Need a new water heater? Consider a tankless version

The average water heater’s life span is 10 to 15 years, according to energysaver.gov. This is a general rule because not all water heaters fit that time frame.

Because many homeowners don’t understand that these appliances require annual maintenance, some water heaters poop out much sooner.

If you’re shopping for a traditional, tank-style water heater, do yourself a favor and compare them to tankless units. Read on to learn about the advantages and disadvantages.

The benefits of tankless water heaters

A standard water heater holds water that is constantly being heated. “That means you’re paying to have hot water whether you need it or not,” according to the researchers at consumerreports.org.

Tankless water heaters, often referred to as “on-demand” units, offer heated water only when you need it. They do this by flash-heating the “… water as it passes through the unit, using a heat exchanger to rapidly bring it up to temperature,” explain the folks at Consumer Reports.

This benefit alone saves homeowners from $70 to $100 a year on energy bills, depending on how much hot water is used.

Tankless water heaters last longer than the fuel-powered variety. Most will last more than 20 years while, as mentioned earlier, heaters with a tank have a life expectancy of 10 to 15 years.

Additionally, tankless water heaters don’t contain the sediment and rust of their tank counterparts so they provide cleaner water.

Finally, with a tankless water heater, you’ll receive hot water on demand. No longer will you have to waste water waiting for the cold to turn to hot.

And, the downside

Tankless water heaters cost more than their larger cousins. “The average homeowner pays $2,811​ for an installed 150,000 BTU tankless whole-house gas water heater,” according to the researchers at fixr.com.

Installation charges vary, however, depending on size, whether it’s electric, solar or gas, whether you need additional gas lines added and other items. You’ll find many of these listed at homeguide.com.

Remember, though, that tankless units have longer life spans than traditional water heaters and they cost less in both energy usage and operating costs.

Learn more about tankless water heater advantages at energystar.gov and find out if rebates are offered by entering your ZIP Code here.

2 insanely easy home maintenance tasks to tackle in June

June brings with it a whirlwind of events and celebrations, such as weddings, Juneteenth (June 19), Father’s Day (June 20) and the first day of summer (June 20).

Before those distractions arise, though, you’ll have time to get things done around the house before the weather really heats up and gives you yet another excuse to hibernate inside, where it’s cooler.

We’ve gathered up two tasks that need to get done before the heat of summer arrives and, because they’re so insanely easy, you can knock them out well before then.

Dust off the grill

The last thing you want to happen is to invite company for one of your famous barbecues only to discover that the grill has problems.

Avoid that headache by dragging the grill out and inspecting the jets for clogs and for leaks in the gas cylinder valve where the hose attaches to the grill. Learn what to look for by navigating to youtube.com and entering “Grilling Safety Tips from NFPA” in the search box.

Charcoal grills get pretty grimy and if you haven’t cleaned yours yet, this is the perfect time to do so. Danny Lipford, the home maintenance genius at todayshomeowner.com, suggests trying the following cleaning techniques:

  • Use liquid grill cleaner (according to label instructions) such as these at homedepot.com or these at amazon.com.
  • Use ammonia. Don your cleaning gloves, remove the grates from the grill and wrap them in newspaper. Next, place the wrapped grates in a plastic bag into which you’ll pour household ammonia until the newspaper is saturated.

Secure the bag with a twist tie and allow it to sit overnight. Spray the grates clean of the grime and ammonia with water from the hose and then wash them well in soapy water.

Clean the grates with vinegar. Although we haven’t had much success with this method, many have, so it’s worth a try if you’re seeking a chemical-free method. Lipford recommends spraying the grates with vinegar and then allowing them to sit for a few minutes. Then, use “… crumpled up aluminum foil” to rub the grime away.

Get the AC unit ready for primetime

Even if all it needs is a filter change, pay some attention to the air conditioning system.

If you’re a DIY kind of guy or gal, check the unit’s evaporator and condenser coils first. These tend to attract dirt and when they’re dirty, airflow is reduced and the dirt “…insulates the coil, reducing its ability to absorb heat,” according to the pros at the U.S. Department of Energy (DOE).

Lipford recommends cleaning the air conditioner’s condensation drain line where “Algae, mold, and mildew can build up, … causing it to clog and water to back up inside the air handler unit.”

It’s an easy job, involving a cup of bleach poured into “… the access opening in the drain pipe (located near the AC unit). Doing this task annually should keep it clear of the nasties.

Finally, clean the area around outdoor condenser units of leaves and other debris. The DOE suggests trimming nearby foliage to at least 2 feet away to allow for good airflow.

Bed bug basics and how to get them out of your home

You may think we have enough to worry about this summer with a world that’s gone just a bit nuts. It is still spinning, however, and whether we like it or not summer is on our doorstep, along with the various pests it brings with it. This includes bed bugs, according to the folks at DC Scientific Pest Control.

“Peak season for bed bugs is from June through October,” they say and look for them to be particularly active, feeding and breeding during this period.

The bed bug, in a nutshell

The most important thing to know about bed bugs is that they’re parasites and they feed on blood. They’re somewhat species-specific, too. The one that loves our blood is Cimex lectularius, found world-wide.

Bed bugs are similar in appearance to ticks. They are reddish-brown in color and are “… about the size and shape of an apple seed,” according to the experts at Terminix. They go on to say that the bed bug may be flat or bloated, “… depending on whether they’ve fed recently.”

The female bed bug continuously lays eggs (if she is feeding regularly), several eggs every day. Thankfully, she’ll only live a couple of months (typical life span is six to 10 months), but then her offspring take off where she left off.

They are primarily nocturnal and require three conditions under which to feed:

  • Darkness
  • Warm temperatures
  • Carbon dioxide

What does a bite look like?

“Unfortunately, you can’t identify the bug by the appearance of the bite,” say the folks at Terminix. “Bed bug bites can resemble bites from chiggers, fleas and other insects. They can also be confused with skin conditions, such as hives, eczema or even fungal infections.”

If you wake up with a bug bite (or several), especially on areas of the body that are exposed while sleeping (face, arms, shoulders), check your sheets and pillow cases for blood spots, feces and cast-off bed bug skins. Bed bug feces, by the way, are tiny (about the size of a flea egg) and black or rust-colored.

How to find bed bugs in the home

The most logical place to start your hunt for bed bugs is near the bed. Check “… near the piping, seams and tags of the mattress and box spring, and in cracks on the bed frame and headboard,” suggests the experts at the United States Environmental Protection Agency (EPA).

From there, inspect other areas of the home, including:

  • Between sofa cushions
  • In the seams of upholstered furniture
  • Drapery folds
  • Where the wall meets the ceiling
  • Electrical outlets
  • Drawer joints
  • Under wall hangings
  • Clothing
  • Baseboards
  • Carpet

“Since bed bugs are only about the width of a credit card, they can squeeze into really small hiding spots,” according to the EPA. “If a crack will hold a credit card, it could hide a bed bug.”

How to rid the home of bed bugs

The folks at the EPA caution that it is important to keep the infestation from spreading further. Do this by removing infested items and sealing them in plastic. If the item can’t be treated, it must remain in the plastic for up to one year to ensure all bed bugs, and their offspring, are dead.

When purchasing a pesticide to treat the infestation, ensure that it is not only EPA-registered, but labeled for the treatment of bed bugs.

Find control and treatment tips online at EPA.gov.

We recommend hiring a professional pest control company.

Bed bugs are brilliant hitchhikers, so regardless of how impeccably clean your home is, if you travel, use public transportation, frequent laundromats or buy used furniture, you risk an infestation.

Inspect your deck to keep family and friends safe this summer

It’s about that time of year when homeowners’ attention turns to summer and in which home maintenance tasks are the most pressing.

Typically, the list includes replacing HVAC filters, cleaning out the gutters, cleaning up debris around the property and more.

It’s not enough, however, to give your deck a good sweeping and maybe a fresh coat of varnish. If you’ll be entertaining on it this spring and summer you should also do a safety check.

Why?

A wood deck typically lasts between 10 and 15 years, claims the U.S. Consumer Product and Safety Commission. They also say that about half of the 40 million decks attached to U.S. homes are older than their life expectancy.

Sadly, ignoring repair or replacement of decks results in nearly 225,000 injuries and more than 30,000 of these were the result of a collapse or other structural failure.

Let’s walk through the type of deck inspection that the experts recommend.

Inspect the condition of the wood

Weather does a number on wood, causing decay and splitting. Walk around and under the deck, paying close attention to the wood, especially those spots attached to the house.

This is where the ledger board is located. “The ledger provides much of a deck’s strength; it supports the joists at one end, and it provides stiffness to the framing,” according to the folks at Decks.com.

It’s the ledger board that is among the most common sources of deck collapse, according to the National Deck and Railing Association.

They also recommend checking “the support posts and joists under the deck (if you can reach them), deck boards, railings and stairs.”

Not all damage is visible, however, so take a screwdriver with you on your inspection tour. Poke the wood in various areas and if it feels spongy, it may be either decayed or have a pest infestation.

Then, insert the screwdriver into any cracks you come across. Natalie Rodriguez of This Old House magazine suggests that if you can push the screwdriver more than ¼-inch into a crack, or if the wood splinters, there is decay or rot.

Check the connectors

Next, tour the deck with a hammer in hand. Use it to lightly tap on bolts. A hollow sound indicates that the connector may need to be tightened. While you’re tapping, look for rust or corrosion.

Experts with the International Association of Certified Home Inspectors warn that corroding fasteners cause decay and deterioration of surrounding wood.

Inspect the banisters, balusters, railings and stairs

Many homeowners confuse the difference between the banisters and the balusters. The former is the handrail on a stairway while the latter are the vertical structures that support the banister.

Shake the banisters to ensure they don’t wiggle then visually inspect the balusters to be certain there is no decay and that they are securely attached.

Finally, measure the railing. It should be at least 3-feet high and the balusters should be no more than 4 inches apart.

Other risks to the deck

Is the home’s irrigation system hitting the deck? This is a major source of wood decay, so redirect the sprinkler heads to ensure they aren’t wetting the deck. Do the same with the home’s downspouts – redirect them so that no moisture reaches the deck.

Wet landscape plants in contact with the wood deck promote mildew, so keep it cut back during the growing season.

Wrap up the safety inspection by applying a fresh coat of weatherproofing.

Now you can relax into those spring and summer soirees, knowing that everyone who uses the deck is safe.

How to grow better roses this summer

Roses aren’t as difficult to grow as many beginning gardeners assume. The key to growing better roses in the summer is to choose varieties that are proven to do well in our climate.

Keep in mind as well that some roses are more tolerant of cold while others can handle the heat better. There are even a few shade-tolerant varieties (floribundas in pastel colors is an example).

The most challenging time of year for roses is during the heat of summer. Knowing how to care for them during this period will keep them gorgeous and healthy all year long.

Keep the soil insulated

Mulch is like a wonder drug in the landscape. Spread a 3-inch layer of it around the rose (keep it from touching the plant to avoid rot) and you’ll not only insulate the roots from heat, but conserve soil moisture as well.

“The mulch will keep the roots 10 to 15 degrees cooler then the air temperature,” claims rosarian Leonard Trubisky.

How much water to give roses in summer

The biggest favor you can do for your roses is to water them deeply and keep the water off the foliage to avoid mildew.

To determine how much water to provide, stick a length of rebar into the soil. If you hit dry soil (you’ll know because it will become more difficult to push the rod into the soil), pull it out and measure how far it was inserted before it stopped. If it’s not two feet, keep watering and measuring until you hit that depth.

Then, wait until the top two inches of soil is dry to the touch before watering again. It is critical that you neither over- or under-water the roses during the heat of summer.

Get rid of faded blooms

Certain roses don’t require deadheading (the removal of dead or faded blooms) to continue blooming. Known as self-cleaning roses, this group includes the popular The Knock Out® family of roses.

If you need to deadhead, do it consistently throughout the summer. Cut the stem with a faded flower back to a cluster of five leaves, making the cut so that the cluster remains on the plant. Choose a cluster that is facing the direction you want the stem to grow.

Fertilizing roses in summer

Heat and fertilizer don’t mix and you may end up with a burnt rose bush if you fertilize in the middle of a hot day.

Since many rosarians suggest that July 31 should be the final fertilization for the year, many gardeners run into trouble. It’s hot in July!

If this is the case for you, apply fertilizer to your roses early in the evening or morning, before the weather heats up.

Use half the amount you normally do. If you’re new to roses, a 10-10-10 or 5-10-5 general purpose fertilizer is fine. Never apply fertilizer to dry soil and thoroughly water the soil around the roses after fertilization.

This is basic summer rose-growing advice and if you need more information, turn to the experts of the American Rose Society.

Spruce up your patio this weekend

Whether you beckon your summer guests outdoors for alfresco cocktails or an entire meal, if your patio isn’t up to snuff, they’ll notice.

This is the ideal time to give the spot a refresh or transform it into something worthy of starring on a magazine cover. And, the good news is that doing so only takes a day or two and if you shop carefully, the project won’t break the bank.

Get rid of everything

No, we aren’t talking about dragging it all out the curb for the trash guys to pick up.

Move everything off the patio so you can start the process with a clean slate. And, “clean,” by the way, is the operative word. Get rid of cobwebs, leaves and other trash that blew in over the winter and hose down or power-wash the area.

Then, take a look at the items you removed and determine what you’ll return to the patio and what goes away.

Under foot

Designing your patio décor is a lot like determining how you’ll decorate the interior of the home. Some of the same elements should be considered:

  • Lighting
  • Color
  • Texture
  • Accessories

“Ground your space and give it an instant dose of personality with an outdoor rug designed to withstand the elements,” suggests the experts at Wayfair.com. Geometric prints, bold colors provide “maximum impact against outdoor greenery,” they conclude.

Patterns and colors shouldn’t be your only guide, however. Try to tie all of your décor elements together. For instance, a round rug looks best under round tables. If you have other types of seating, choose a rectangular rug.

“Around an outdoor dining table, you should be able to pull out all of the chairs and have the chair legs remain on the rug,” according to Wayfair.com’s rug-buying guide. A rule of thumb is for the rug to be a minimum of 2-feet wider than the table, on all sides.

Overhead

Al fresco entertaining is even more interesting in the evening. Make your patio glow with attractive lighting, such as lanterns, candles, torches or, our favorites, string lights.

If you go with the latter, the pros suggest you take into account the total space of your patio before settling on a particular string of lights.

“Larger bulbs have a bigger presence and higher wattage,” according to the pros at yardenvy.com, so are better suited to a large patio. The smaller light strings help create a cozy vibe on a smaller patio.

What better way to get ready for summer than with some budget-friendly do-it-yourself projects that will take just a weekend (or less) to achieve? Your patio will be summer-ready, and as a bonus, you may just fall in love with it all over again.

Add life to the space

Greenery and flowers add the final touch to your patio makeover. The pros at lowes.com offer five ways to decorate the patio with container-grown plants.

Our favorite is the grouping method. “Group containers — tall, medium and small ones — to make a stunning deck focal point.” With the taller containers, use the “thriller, filler, spiller” theme.

The thriller— plants with height—go in the back of the container. Fillers go in the middle, while spillers, or trailing plants, spill over the front of the container. Get tips and ideas at provenwinners.com.

A few accessories, such as a fountain, lanterns or candles on the table and perhaps some statues and you’re all set.

Find additional inspiration online at:

AC on the blink? How to hire a HVAC company

How’s your HVAC system? Specifically, the cooling aspect of it?

Checking your air conditioning system now is a good idea; you’ll have a chance to remedy any problems before the weather starts heating up this summer. Even if all that’s needed is a tune up, the time for action is now.

Why?

“The cost to replace an HVAC system averages $7,000, with a typical range of $5,000 to $10,000,” say the pros at homeadvisor.com.

And, as you can imagine, the most expensive time of year for hiring HVAC technicians is when they’re busiest: the summer.

Be prepared

Check your system for labels that list the model number. Jot that number down for the contractors that you interview.

Next, learn about state requirements for HVAC contractors, including licensing and insurance.

Finally, run the system for about an hour (if it’s in working condition) and check each room of the home, making note of rooms that don’t appear to be cooling as well as others.

Find contractors to interview

Referrals are always the best way to find a good contractor. Ask neighbors, people you work with, friends and family who they recommend.

You might also find referrals if you’re a member of your neighborhood at nextdoor.com. Create a post asking specifically for referrals to good AC contractors.

Finally, don’t waste time interviewing companies with bad reviews. Check each one on your list by reading the reviews at Yelp and, on Google, search for “HVAC companies” or “air conditioning technicians” in your town and those reviewed by Google appear in three boxes at the top of the search results page.

Finally, head on over to the Better Business Bureau’s website to see if there are complaints against any of the companies on your list.

Make appointments with A/C technicians

When making an appointment with AC company representatives to visit your home, ask them to bring with them the following:

  • List of references
  • Copy of their state license
  • Proof of bonding and insurance
  • Proof of certification to handle refrigerants

During the home visit

The experts at energystar.gov suggest that “… the contractor should spend significant time inspecting your current system.”

This includes checking the duct system for leaks and inspecting your current system’s “… airflow to make sure it meets manufacturers specifications.”

Finally, request that the itemized estimate be in writing and that it should include not only the cost of the work to be performed, but model number of the equipment they will be installing (if applicable).

Request as well that the estimate include a schedule for the project and any warranty information for equipment to be installed.

Making the final decision

Before deciding on a company, call the supplied references for each one. Ask each customer the following questions, in addition to any that you may have after the interview:

  • Was the job completed on time?
  • Did the project go over budget?
  • Was the completion of the project to your satisfaction?
  • Were there any significant problems?

When you finally choose a HVAC contractor, go over the proposal or contract thoroughly, ensuring all of your requests are included.

Summer is almost upon us, so ensure that your home will offer shelter from the heat by fixing air conditioning problems now.

House feeling a bit cramped?

When the house is full of friends and family visiting over the summer, any home can feel a little smaller than usual.

But, if your home is small to begin with, that cramped feeling persists even when company leaves. If you aren’t planning on buying a larger home in the near future, there is a way to get more room in the one you have.

The basement. Think about all that “unused” space and consider finishing it to get maximum value.

If you are planning on selling, although you won’t recoup 100% of the money spent, the ROI is better than many other remodeling projects.

Cost vs. Value

The folks that compile Remodeling Magazine’s Cost vs. Value report assign a 70% ROI to a basement finishing project.

This is based on several specifics, including:

  • Transforming the basement into a “… 20-by-30-foot entertaining area with wet bar and a 5-by-8-foot full bathroom …”
  • An enclosure for the mechanical area
  • Insulated exterior walls
  • “… five six-panel factory-painted hardboard doors with passage locksets”

Plus, a few other common-sense items (wiring to code is one).

The truth is, you can transform that space into an additional bedroom with bathroom which will add value to the home as well.

If you are going to be selling in the near future, plan on a roughly 70% return of your money invested in the basement project. Consider that as lumber prices continue to increase, however, the ROI will decrease. 

See the entire breakdown at remodelinghw.net.

 Planning Is Everything

When you move the kids from one bedroom to another, you can usually make the switch with very little planning. You can even rearrange the furniture or add new windows to the living spaces with little hassle.

But, when it comes to finishing a basement, you need to think it through thoroughly before you begin.

Consider what you can do on your own before hiring pros

Many of the jobs included in finishing a basement are best left to experts. Electrical wiring comes to mind. Oh, and plumbing as well.

But others may be within your talent set. Some of these include:

  • Flooring
  • Installing insulation
  • Painting
  • Hanging drywall

If you decide to take on any of these projects as DIY, ensure you have the proper permits before starting.

Home Systems – Although your basement may be a storage dumping ground, there are usually some seriously important functions that the area already performs.

Many of the pipes and drainage systems, along with the electrical components of your home, line the walls and ceilings of your basement. You will need to ensure you maintain access while still having a finished appeal when revamping this area.

You may want to bring the finished living area in to accommodate access without jeopardizing the look of this space.

Living Spaces – Most basements don’t have a lot of light. That’s great for cinema rooms, but it does make it difficult for living areas.

Most architects suggest centering living areas around the small pockets of existing light and working from those points outward.

Windows – When you finish your basement, you may find that your insurance company requires an additional exit. Typically, this can be solved with large egress windows that can serve as an emergency exit, as well as an additional source of light to your new, usable space.